
Easy Steps on How To Create a New Apple ID Account On iPhone 14
Easy Steps on How To Create a New Apple ID Account On Apple iPhone 14
Your Apple ID is your gateway to a world of apps and services, making it an essential part of your Apple experience. Whether you’re a new Apple user or simply looking to start fresh, creating a new Apple ID can open the doors to endless possibilities.
This guide will walk you through creating a new account for Apple devices in an easy-to-understand manner. From setting up your email address to securing your account, this article covered you every step of the way. Embark on this journey and learn how to create a new Apple ID account effortlessly.
Part 1: Why Create a New Apple ID?
You might need to create a new Apple ID to enhance your Apple experience. Let’s dive into why it’s a good idea:
A. Reasons for Creating a New Apple ID Account
Here’s a breakdown of the reasons why you should create a new Apple ID for your Apple iPhone 14:
- Your Apple ID is like your digital identity. Creating a new one lets you choose a unique email address that suits you, adding a personal touch to your Apple journey.
- Maybe you’ve been using an email for your Apple ID that you don’t want to use anymore. Creating a new one helps keep your personal and Apple-related emails separate.
- **Switching Devices.**When you switch to a new Apple device, like getting a new iPhone or iPad, creating a unique Apple ID ensures a fresh start tailored to your new gadget.
- **Separation of Accounts.**Sometimes, you may want to keep your work-related apps and data separate from your ones. Creating a new Apple ID helps you achieve this separation.
- If you’re using Apple services for different purposes, such as work and personal use, having separate Apple IDs can help keep everything organized and distinct.
B. Scenarios Where a New ID Is Needed
Below are the common scenarios where a new Apple ID might be needed:
- **New Apple Device.**When you purchase a new Apple device, like an iPhone or iPad, you’ll need a new Apple ID to set it up and make it truly yours.
- **Shared Device.**If multiple people use the same device, creating a new Apple ID for each user ensures that everyone has their own personalized experience.
- **Change of Email.**If your current email address associated with your Apple ID is changed or you prefer a new one, creating a unique Apple ID with the updated email is the solution.
- **Work and Personal.**To keep your work-related apps and data separate from your personal ones, having separate Apple IDs for each purpose is practical and organized.
- **Starting Fresh.**Sometimes, you might want a fresh start with your Apple experience, and creating a new Apple ID provides a clean slate.
Creating a new Apple ID isn’t just about getting a new email; it’s about tailoring your Apple experience to your needs, whether for personalization, privacy, or organization. Now that you know why it’s essential, let’s explore how to create it in the next section.
Part 2: Step-by-Step Guide: How To Create a New Apple ID Account
Creating a new Apple ID for free is a straightforward process. Let’s break it down into simple steps:
A. Registering a New Apple ID
These are the steps for registering a new Apple ID:
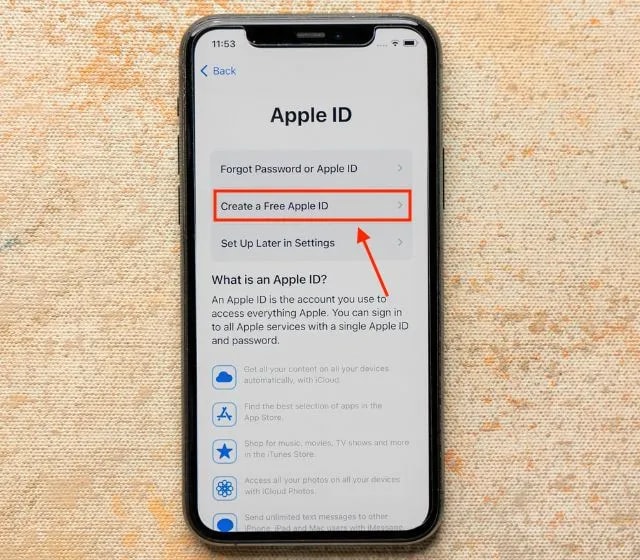
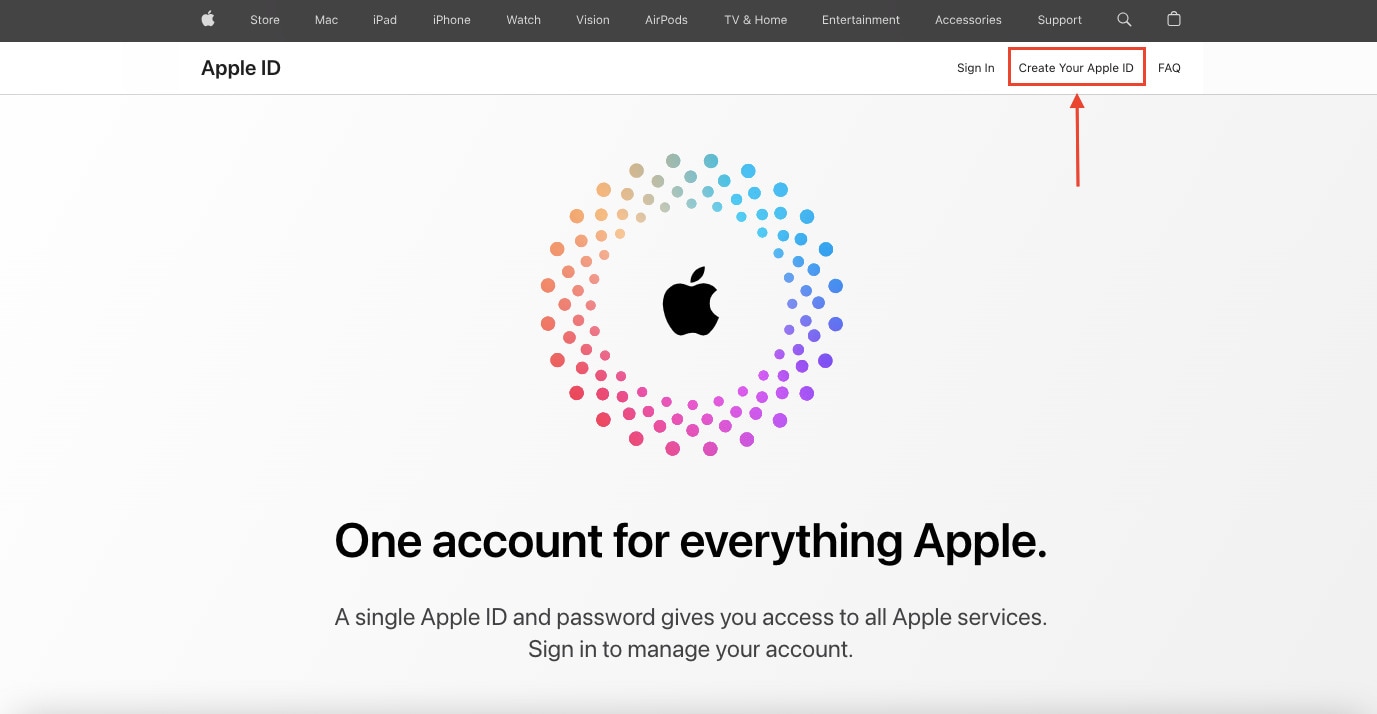
- Step 1: Open your web browser and visit the Apple ID account management page. Click the Create Your Apple ID button to begin.
- Step 2: On the registration page, you’ll be asked to provide your First name and Last name. Make sure to use the name associated with your new Apple ID. Next, you’ll need to enter your preferred email address. This one will be your new Apple ID.
Tip: Choose an email that’s easy to remember and access.
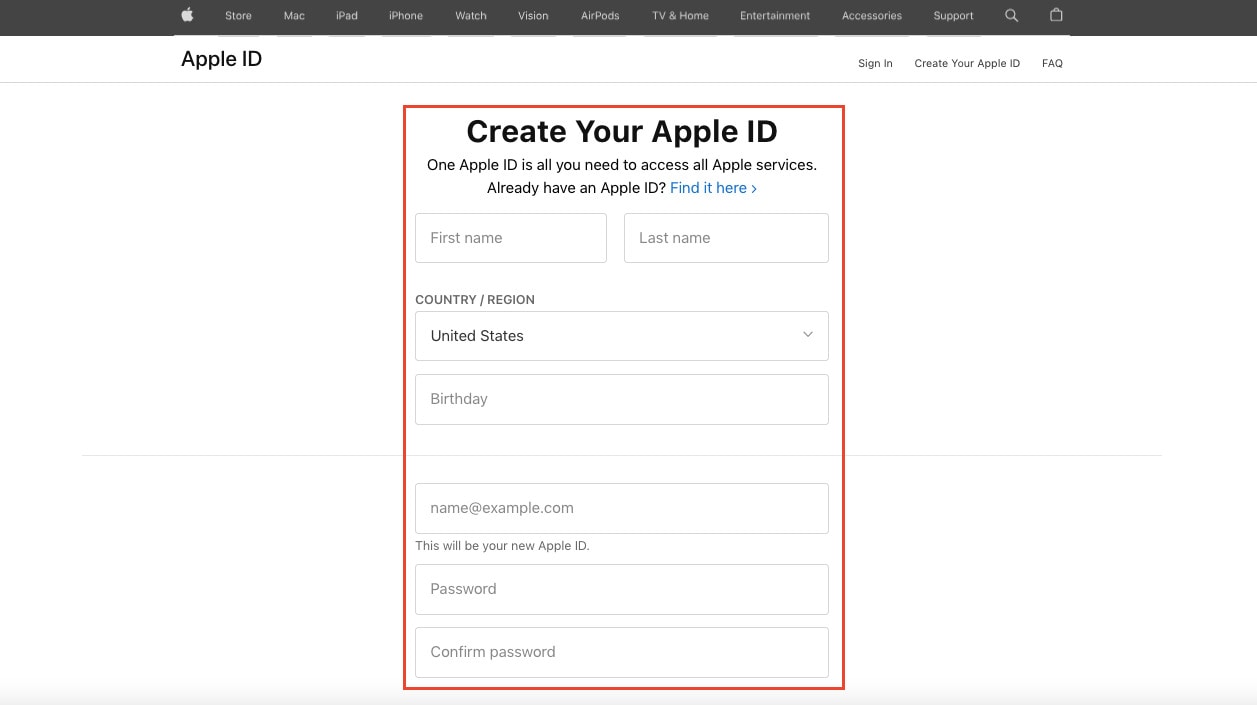
- Step 3: Create a strong password that combines letters, numbers, and symbols. This password is essential for the security of your account, so make it unique and hard to guess. Confirm your password by entering it again in the designated field.
B. Verifying Your Identity
The next step is verifying your identity. Check out the steps below:
- Step 4: Apple takes your security seriously. You may be asked to provide a phone number to verify your identity. This number can be used for account recovery or two-factor authentication. The phone number you provided will receive a verification code. Enter this code in the space provided to confirm your identity.
Note: It’s crucial to ensure that your phone number is accurate and accessible. This number will help you recover your account in case you forget your password or encounter any issues. Apple may use this phone number for two-factor authentication, adding an extra layer of security to your account.
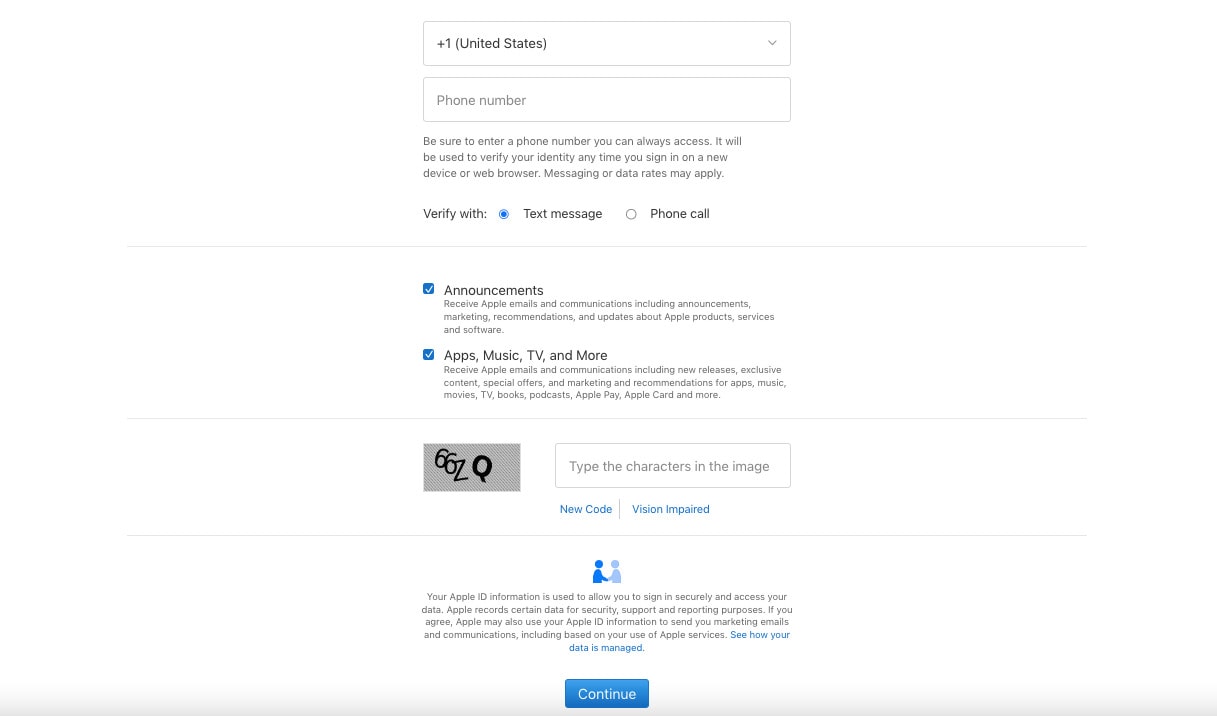
- Step 5: Apple may sometimes ask you to complete a CAPTCHA or verify your identity to prevent automated account creation.
C. Setting Up Security Questions
The next process will be setting up security questions for your account:
- Step 6: Apple asks you to choose and answer security questions. These questions provide an additional layer of protection for your account. Select questions that you can easily remember and that others can’t guess.
D. Finalizing the Process
To finalize the creation process, refer to the steps given below:
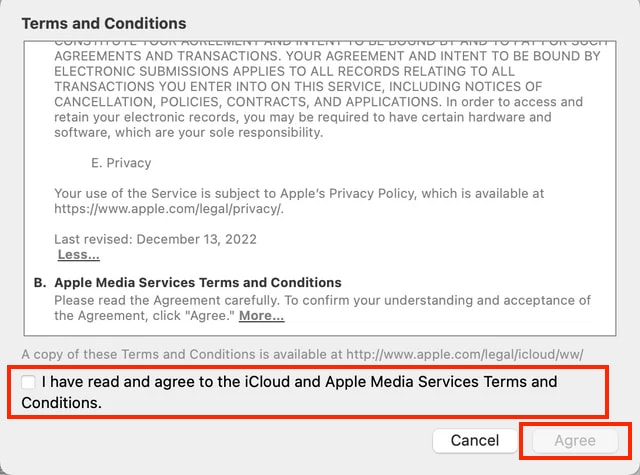
- Step 7: Read through Apple’s Terms and Conditions and Privacy Policy. Once you’ve understood them, tick the box to confirm that you’ve read and agree to the iCloud and Apple Media Services Terms and Conditions. Then click Agree to proceed. Remember that it’s essential to be familiar with Apple’s policies to ensure a secure and smooth experience.
- Step 8: After completing these steps, Apple will send a confirmation email to the address you provided. Go to your email and open the verification link to confirm your new Apple ID.
Congratulations! You’ve successfully created a new Apple ID. With this account, you can now access Apple’s services, including the App Store, iCloud, and more. Remember to keep your login credentials secure and use them to personalize your Apple experience fully.
Part 3: Effortlessly Remove Your Apple ID Using Wondershare Dr.Fone - Screen Unlock (iOS)
You can embark on an enhanced Apple experience after successfully creating your new Apple ID. Removing the previous one is essential when you create it, especially if you’ve acquired a second-hand device or no longer want the previous user’s associated credentials.
This step ensures that your new Apple ID takes center stage, granting you full control over your device and its associated services. But if you encounter difficulties when removing the previous Apple ID from your device, Dr.Fone - Screen Unlock (iOS) is a reliable and user-friendly solution.

Key Features of Dr.Fone - Screen Unlock (iOS)
This versatile tool offers the following key features in the context of Apple ID issues:
- **User-Friendly Interface.**Fone - Screen Unlock (iOS) is designed to be straightforward, making it accessible to users of all levels of technical expertise.
- It is usable with a wide range of iOS devices, ensuring you can remove the previous Apple ID from your device, regardless of the model.
- **Multiple Unlock Modes.**Fone offers various unlock modes to cater to different scenarios, including removing the previous Apple ID. This flexibility ensures that you have the right solution for your specific situation.
- **Data Security.**Fone - Screen Unlock (iOS) prioritizes data security, ensuring that your personal information and content remain intact during the Apple ID removal process.
Step-by-Step Guide on Using Dr.Fone Screen Unlock (iOS)
Check out the steps on how to remove an Apple ID account using Dr.Fone below:
- Step 1: Launch Wondershare Dr.Fone on your PC to use the Screen Unlock function and then navigate to Toolbox. Click the Screen Unlock section, then choose iOS.

- Step 2: If you want to proceed with deleting your Apple ID, you’ll need to go to the next window and select the Remove AppleID option from the menu.
- Step 3: When you hook up your iOS device to a computer, the next screen will report on its connectivity. Select the Unlock Now button to proceed.

- Step 4: Before the Apple ID can be unlocked, the next step is for the platform to ask a series of questions. Verify that a screen lock is active on your iOS device. However, please lock your iOS device before proceeding with the Yes option.

- Step 5: Check if Two-Factor Authentication is set up on all your iOS devices. If not, switch it on before confirming your decision to unlock your Apple ID.

- Step 6: After you have confirmed these settings, you will be taken to a screen with on-screen instructions for entering Recovery Mode on your iDevice. If the steps for your specific iOS device don’t work, try tapping Try DFU Mode in the app’s bottom left corner. To continue with the unlocking process, this will launch the DFU Mode instructions.

- Step 7: Once Recovery Mode has been activated, the Apple iPhone 14 device’s information will be shown on the subsequent screen. Once the Device Model has been identified, all that remains is to choose the appropriate System Version and click Start. However, if there are disagreements in recognition, pick the details by hand and move forward.

- Step 8: The appropriate iOS firmware begins downloading, showing its status on the following screen. Click the Copy button to copy the direct URL to download iOS firmware for systems with sluggish firmware download speeds.
- Step 9: The platform checks the downloaded firmware and displays its details on the following screen. To proceed with unlocking your Apple ID, click the Unlock Now button. To proceed, you will be prompted to input a code into a confirmation window. Enter the code and then click the Unlock button.

- Step 10: The following screen shows the unlocking status of your Apple ID. Don’t let the Apple iPhone 14 device lose its connection under any circumstances. The screen prompts the process of completing the Apple ID once the ID has been unlocked. If the Apple ID has been unlocked, click Done to proceed. If that fails, click the Try Again button and give it another shot.

Conclusion
This guide has simplified the process of creating a new Apple ID, ensuring you can effortlessly personalize, secure, and organize your digital experience. Creating a new Apple ID is easy, and it allows you to tailor your Apple journey to your preferences. Remember, it’s all about you, your privacy, and your convenience.
Should you encounter any challenges while managing your Apple ID, such as removing a previous one, consider Dr.Fone - iOS Screen Unlock tool. This user-friendly resource stands ready to assist, ensuring a seamless and secure Apple experience. Explore the possibilities and make the most of your Apple adventure!
Unlocking Apple iPhone 14 Lock Screen: 3 Foolproof Methods that Actually Work

The competition in the market between Android and iOS has been increased ever since the features are increasing. People get attracted by anything that is new and unique. The competitive brands are taking things seriously and are coming up with the eye-catching mobile body and mesmerizing features.
Someone who is new in the Apple world must not be aware of the security activation lock and many other different features. No one can use your Apple device without the activation lock. The fact that user can remove all the data from iPhone whenever they want and can even restore it instantly gets user attention.
Looking more into the Apple iPhone 14 world, people might be confused between the lock screen and activation lock. Also, they might be facing the problem of how to bypass the lock screen of iPhone Apple iPhone 14 . Let us answer your questions and provide you some knowledge.
Part 1. Can Someone Bypass the Apple iPhone 14 Activation Lock?
Protecting user’s information is among the core objectives of Apple. For this purpose, an activation lock has been developed for iPhone, iPad, iPod, and Apple Watch users. The lock prevents any other person from using your apple device in case it’s lost or stolen.
The phones that are iOS 7 or above versions do not need to manually enable the lock because it is auto-enabled once the phone is switched on. The strong security concerns behind this lock do not allow your device’s misuse from someone who is using it for the wrong purpose.
Apple’s activation server saves your Apple ID, and in case the phone is turned off, or any erasing activity is observed, then the Apple iPhone 14 device will ask to unlock the iCloud activation. Suppose you have purchased a phone from someone, and it asks for an activation lock. That is because the Apple iPhone 14 device is still linked with the old owner and hence, will not allow you to access the phone.
For this, if the Apple iPhone 14 device is asking for an activation lock, the user cannot bypass the Apple iPhone 14 activation lock. The only way to get rid of that is to break the link between the Apple device and the prior owner, but that requires Apple ID.
Part 2. Bypass iPhone Lock Screen Apple iPhone 14 without Passcode [No iTunes]
The major difference between the lock screen and activation lock is that the lock screen can be bypassed without the password but, the user can never bypass the activation lock as it marks the security boundary of Apple.
You might be wondering how to escape the lock screen without a password because it is possible that you might forget the password, and now you can’t open your phone. Let’s look at how you can do this;
The commonly faced problem of many iOS users was that they forget the password but later, an amazing solution to this problem as Dr.Fone – Screen Unlock application was known and used by almost all iOS users. Some of its features are;
- The application is easy to use. It does not need any technical skill to use it, and everyone can handle the application.
- It can unlock a disabled iPhone even if the user doesn’t have the passcode.
- It fully supports iPhone 8, iPhone X, and all the latest models of iPhone.
- You don’t have to worry if you got a second-hand phone because Dr.Fone can unlock it.
Let us now show you how to use the application and enjoy life with iPhone;
Step 1: Download Dr.Fone
The user is requested to download Dr.Fone – Screen Unlock on Windows or Mac system from its official website. Once it’s downloaded, you should install it and then, it will be ready to use. Launch it whenever you want to bypass the Apple iPhone 14 lock screen.
As you will launch the application, the home page will appear from that, and you have to select ‘Screen Unlock’ that is on the left.
Step 2: Make a Connection
The user is now supposed to make the connection between iPhone and the system and let the application automatically detect it. When you are ready to initiate the action, just click on the button ‘Unlock iOS Screen.’

Step 3: Activate DFU Mode
Once the system has detected the phone, the user is advised to activate the DFU mode by turning off the phone and connecting it to the computer.

Step 4: Information for Confirmation
The next window will ask for some basic information regarding the iOS device and version.
Step 5: Firmware Update
Click on the ‘Download’ button at the bottom to get the firmware update for your phone. This might take some time as the firmware update for your phone is being downloaded. As that’s done, click on the ‘Unlock Now’ button on the screen.
Step 3: Select the Path
Select the saving path where you want to save your screenshots. For this, click on the “Settings” and go to “Screenshots and recording settings.”
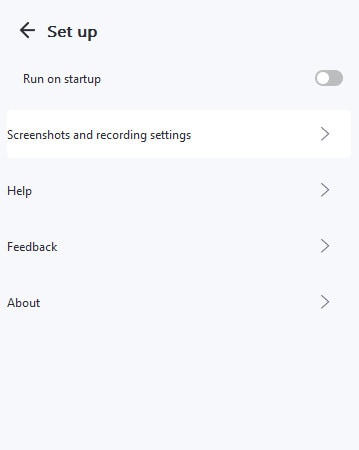
You will see the option “Save to.” Guide the path, and all taken screenshots will be stored at the selected location.

Provide the system with an on-screen confirmation code to continue the process. When that is done, the interface will notify you. By clicking on the ‘Try Again’ button, you can repeat the process.

Part 3. Erase iPhone from iCloud [Apple ID & Password]
People keep on switching between Android and iOS. Not everyone sticks to one thing, and so do passionate mobile users do. But suppose someone is changing their phone and they want to delete the Apple iPhone 14 from iCloud, both the Apple ID and its password; what should be done in such a scenario?
The user can easily bypass the lock screen on their iPhone from iCloud only if their Find My iPhone feature is turned on. Let us take you through the steps that will help you to do the task;
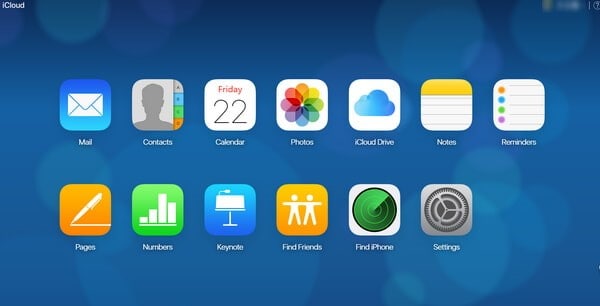
User is firstly supposed to log in to iCloud.com on their computer or any other device in use by using the Apple ID and password.

In case the user has enabled the two-factor authentication on iPhone, then they should hit 'Trust' and enter the six-digit verification code sent to their iPhones on the iCloud web.
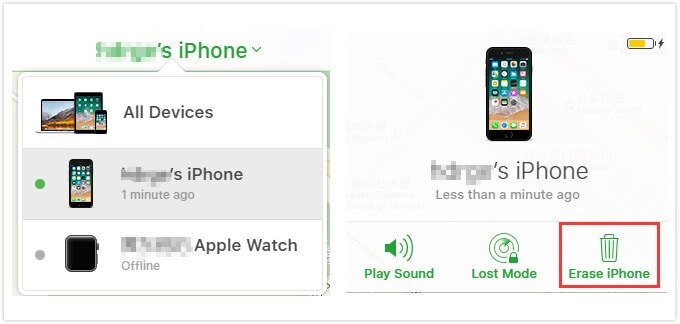
Once that is done, and you have logged in to iCloud, select the option of ‘Find iPhone.’
Now, the user should select and click on ‘All Devices, located at the top of the browser.
The system will now ask for your Apple ID and password; provide that.
After you have done that, a list of all the Apple iPhone 14 devices will appear. You are now supposed to select your device and click on the option of ‘Erase iPhone.’
Doing this will wipe all the data, settings and, also the password.
Part 4. Restore Apple iPhone 14 Apple iPhone 14 to Factory Reset by iTunes
Most iPhone users have synced the Apple device to iTunes. This helps them to recover the data in case it is lost. If the user has created an appropriate backup across iTunes, they can easily carry out the process of bypassing the lock screen. In other words, iPhone users have everything saved without the fear of being lost.
iPhone users can even restore their phones to factory settings without losing anything and by just using iTunes. Let us show you how it is done;
Users should start the process by turning their phone off and connecting it to the computer.
Now, the user should press and hold the ‘Home’ button and ‘Power’ button together. Release them when you see ‘Connect to iTunes’ on the screen.
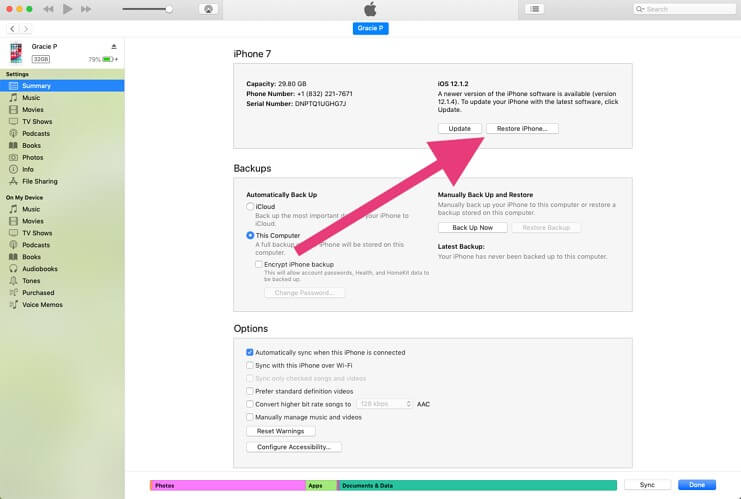
Once that is done, the user is now requested that from the menu on the left side of the screen, select ‘Summary.’
A new window will appear, the Summary window. From this, the user is supposed to select the option of ‘Restore iPhone.’
Selecting the restore option, a confirmation window will appear on the screen, asking the user to confirm the decision of the restore process.
As soon as iTunes has finished the restoring process, the phone is ready and reset.

Users can now retrieve all the data that has been backed up on iTunes.
Conclusion
The article has covered a sufficient portion of knowledge for the user regarding how they can bypass iPhone lock screen Apple iPhone 14 . The difference between the common confusion of lock screen and activation screen and also a few tips and tricks have been discussed.
How To Unlock Apple iPhone 14 Without Swiping Up? 6 Ways
Part 1: What’s Swipe Up To Unlock on iPhone?
The Swipe Up Unlock function has been a fundamental aspect of iPhone functionality for a long time. It enables swift access to your phone by swiping upward from the screen’s bottom. This gesture grants entry to all your applications and data on your Apple iPhone 14. It was initially introduced to replace the physical Home button. However, it significantly simplified the user experience with iPhones.
It streamlined various tasks without the need for excessive button pressing. Moreover, its simplicity and speed became vital in how individuals utilized their iPhones. Yet, as preferences evolve, not everyone finds the exclusive Swipe Up Unlock feature appealing. Hence, exploring alternative methods to unlock your Apple iPhone 14 is advisable.
Part 2: Why Do You Need To Swipe Up to Unlock on iPhone?
Swipe up to unlock the iPhone holds significant importance in its user interface and accessibility. This intuitive gesture serves as the primary means of gaining access to the Apple iPhone 14 device. Here are several reasons why the Swipe Up to Unlock iPhone feature has been a cornerstone:
1. Simplicity and Ease of Use
The swipe gesture replaced the physical Home button, simplifying the unlocking process. Users could effortlessly swipe up from the bottom of the screen. It eliminates the need for pressing multiple buttons to access their devices.
2. Streamlined Navigation
Beyond unlocking the iPhone, the swipe gesture also allowed for quick navigation to the home screen. This streamlined access enabled users to jump straight into their apps, messages, or other functions.
3. Visual Aesthetics and User Experience
Apple’s design philosophy often revolves around clean, intuitive interfaces. The swipe up to unlock gesture aligns smoothly with this philosophy. It contributes to a visually appealing and user-friendly experience.
4. Security and Privacy
The gesture served as a security measure, preventing accidental or unauthorized access to the iPhone. Moreover, users can confidently rely on this unlocking method to safeguard their personal data.
Part 3: 6 Common Ways To Unlock iPhone Without Swiping Up
For an extended period, the primary method to unlock an iPhone involved swiping up. Nonetheless, if you wish to explore alternative methods, it’s entirely feasible. Various methods have emerged over time to open the Apple iPhone 14 without swiping up.
Method 1: Unlock iPhone without Swiping Up with Enable Back Tap
With the debut of iOS 14, Apple unveiled an innovative feature called Back Tap. It provides users with a method to engage with their iPhones by tapping the Apple iPhone 14 device’s rear surface. This innovative functionality can be configured to perform various actions. It includes unlocking the phone without a swiping-up gesture. Follow these steps to set up and use the Back Tap feature for unlocking your Apple iPhone 14:
Step 1. To start, access the “Settings” on your iOS device. Once there, scroll down until you locate the “Accessibility” option and tap on it. On the following screen, select “Touch” to access Touch settings under the “Physical and Motor” section.

Step 2. On the following screen, scroll down to the bottom and press “Back Tap.” Now, either choose “Double Tap” or “Triple Tap” and select “Lock Screen” from the options under the “System” section.

Method 2: Unlock iPhone Without Swiping Up Using iPhone Screen Unlocker: Dr.Fone - Screen Unlock
If you’ve forgotten the passcode for your Apple iPhone 14 and are unable to access it anymore, there is no need to panic. We have the perfect tool for you that can unlock any lock on your screen in a few moments. The tool we are talking about is Wondershare Dr.Fone - Screen Unlock (iOS) , an industry leader in smartphones. Dr.Fone, a pioneering tool for iOS lock screen removal, assists in unlocking various iPhone/iPad/iPod touch lock screens.
Dr.Fone - Screen Unlock (iOS)
Unlock iPhone Without Swiping Up!
- Simple, click-through, process.
- Unlock screen passwords from all iPhones and iPads.
- No tech knowledge is required, everybody can handle it.
- Supports iPhone 15 /iPhone 14 /iPhone 13, iPhone 12, … and the latest iOS version fully!

4,395,218 people have downloaded it
It can handle 4-digit / 6-digit passcodes, custom numeric codes, alphanumeric passcodes, Face ID, Touch ID, Screen Time Passcodes, and more within minutes. Wondershare Dr.Fone also offers a swift and simple iCloud activation lock removal feature within its iPhone unlocking capabilities.
Key Features of Wondershare Dr.Fone
- Capable of bypassing Mobile Device Management (MDM) and Screen Time restrictions without causing any data loss.
- Compatible with iOS 17/iPadOS 17 and iPhone 15, ensuring its functionality with the latest Apple OS.
- Offers a simple 3-step procedure, making it accessible even for users without technical expertise.
Steps To Unlock iPhone Without Swiping Up Using Wondershare Dr.Fone
Here is how to open your Apple iPhone 14 without swiping up with the help of Wondershare Dr.Fone:
Step 1: Navigate to Unlock iOS Screen
Download and install Wondershare Dr.Fone on your computer. Go to “Toolbox,” tap “Screen Unlock,” and finally choose “iOS” to access the screen unlock tools. Once the window appears, choose the “Unlock iOS Screen” button to proceed with unlocking your iOS device’s screen. In the following screen, click “Start” to begin the process of unlocking your iOS device.
Step 2: Initiate the iDevice into Recovery Mode
After this step, enter Recovery Mode on your iDevice by following the specific on-screen instructions. Once your iDevice is in Recovery Mode, the system automatically identifies and displays the “Device Model.” You can make adjustments to the model if necessary and choose the “System Version” as per your needs. When finished, click on “Start” to initiate the unlocking process for your device’s screen.
Step 3: Successfully Unlock Your Locked iPhone
The screen will showcase the download progress of the iOS firmware on the platform. Once the iOS firmware download is completed, it undergoes verification. Proceed by selecting the “Unlock Now” button to initiate the unlocking process. A prompt window will appear, requesting confirmation for the process. Enter the necessary code and tap on “Unlock” to proceed. Upon successful unlocking of the iDevice, click “Done” to complete the process.
Method 3: Unlock the Apple iPhone 14 Without Swiping Up via Touch ID/Face ID
Apple’s advanced biometric authentication systems, Touch ID and Face ID, are also reliable options. These offer smooth and secure methods to unlock the Apple iPhone 14 11 without swiping up. The following are the models that support Touch ID and Face ID:
Models with Touch ID
- iPhone SE (2022)
- iPhone SE (2020)
- iPhone SE (2016)
- iPhone 8 Plus
- iPhone 8
- iPhone 7 Plus
- iPhone 7
- iPhone 6s Plus
- iPhone 6s
- iPhone 6 Plus
- iPhone 6
- iPhone 5s
Models with Face ID
- iPhone 15 Pro Max
- iPhone 15 Pro
- iPhone 15 Plus
- iPhone 15
- iPhone 14 Pro Max
- iPhone 14 Pro
- iPhone 14 Plus
- iPhone 14
- iPhone 13 Pro Max
- iPhone 13 Pro
- iPhone 13 mini
- iPhone 13
- iPhone 12 Pro Max
- iPhone 12 Pro
- iPhone 12 mini
- iPhone 12
- iPhone 11 Pro Max
- iPhone 11 Pro
- iPhone 11
- iPhone XS Max
- iPhone XS
- iPhone XR
- iPhone X
Method 4: Unlock Your Apple iPhone 14 Without Swiping Up via AutoUnlockX
AutoUnlockX is a tweak designed for jailbroken iPhones. It enhances the Apple iPhone 14 device’s unlocking experience by automatically bypassing the lock screen. That is when certain conditions are met. Jailbreaking involves bypassing the software restrictions imposed by Apple. Here are the steps to iPhone 11 unlock screen without swiping:
Step 1. Begin by adding an external repository like Sileo or Cydia, which will serve as an emulator. Remember, it won’t be automatically added to your applications; you’ll need to do this manually. So, download the repository from the SparkDev website (it’s not available on the App Store). Head to the “Tweaks” tab, find “AutoUnlockX,” and download it to your device.
Step 2. Following this, go to “Sources” in your Apple iPhone 14’s Settings, select “Edit,” and manually add the external repo to Cydia or Sileo. Open Sileo or Cydia and navigate to the “Search” page. In the search bar, type “AutoUnlockX.” Once the tweak appears, select it, and then tap “Get (Sileo)” or “Install (Cydia).”
Step 3. Confirm the selected repo by tapping the “Confirm” option and allow the tweak to install. Once installed, tap “Restart SpringBoard” to complete the download. After your Apple iPhone 14 resprings, proceed to enable AutoUnlockX.
Step 4. Open Settings, tap on “App,” and then select “AutoUnlockX.” Toggle on “Enable Auto Unlock.” Customize other settings as desired by tapping on them to turn them on or off.
Step 5. When finished, tap the “Respring” option at the bottom to apply your changes. At last, unlock your Apple iPhone 14 using your Face ID effortlessly.
Method 5: Unlock iPhone Without Swiping Up via Voice Control
Utilizing Voice Control to unlock your Apple iPhone 14 offers a hands-free approach to accessing your device. It is especially helpful for individuals with accessibility needs. There are situations where manual interaction might be challenging. Here’s a guide on how to set up and use “Voice Control” to unlock your Apple iPhone 14:
Step 1. Open the Settings app on your Apple iPhone 14 and scroll down to tap “Accessibility.” On the following screen, press “Voice Control” to proceed further.

Step 2. To set up voice control, you need to ensure that the “Voice Control” option is toggled on. After activating Voice Control, use a voice command to unlock your device.

Method 6: Unlock iPhone Without Swiping Up with Switch Control
Utilizing Switch Control is an excellent accessibility feature on iOS devices. It allows users to interact with their iPhones using adaptive switches or the Apple iPhone 14 device’s screen itself. Moreover, it can provide an alternative way to navigate the Apple iPhone 14 and access the Home screen. You no longer have to rely solely on the conventional swipe gesture. Here is how you can set up switch control to iPhone swipe to unlock:
Step 1. Access your Apple iPhone 14’s Settings, then tap on “Accessibility.” Now find and select “Switch Control,” and within it, navigate to “Switches.” Now, tap “Add New Switch” and choose “Camera.”

Step 2. Set Left Head Movement and Right Head Movement separately to “Home.” This action will lock the screen when tilting your head left or right. Now go back to “Recipes” in Switch Control, select “Edit,” and delete all existing recipes.

Step 3. Set “Scanning Style” to “Single Switch Step Scanning” and adjust “Dwell Time” to the shortest duration. Then, turn off the remaining settings under Switch Control.

Step 4. Save your switch, return to Accessibility Settings, and locate “Accessibility Shortcut.” Now, set triple-clicking the side button to activate “Switch Control.” On the home screen, triple-click the Side button, as previously set, to activate the switch on your Apple iPhone 14. Now, lock the Apple iPhone 14 screen and then wake the Apple iPhone 14 device without looking at it.

Conclusion
To conclude, we have explored different ways to unlock iPhones without swiping up beyond just using the usual swipe-up method. We’ve talked about using your fingerprint or face to unlock, using voice commands or special controls. The swipe-up gesture on iPhones is great, but these other methods give you more options.
While these methods are helpful, there’s a software called Wondershare Dr.Fone that’s particularly useful for iPhone issues. It does things like recovering data, fixing problems with your phone, and unlocking it when you can’t get in. Dr.Fone has a feature called “Screen Unlock” that was specifically made to help with different ways of unlocking iPhones.
Also read:
- [New] 2024 Approved IPhone Methods for JPEG/PNG to PDF File Migration
- [New] Reaping the Benefits of HDR for Professional Videoists
- [New] SnapTube Downloader Snag Twitter Videos on iPhone
- [New] The Art of Revisiting Historical Facebook Posts (Mobile/Laptop)
- [New] Zoom Meetings Unveiled Maximizing Video Clarity
- All You Need To Know About Mega Greninja For Apple iPhone 11 | Dr.fone
- Baffled by Missing AirPods on Find My App? Try These 11 Tips
- How Do You Remove Restricted Mode on iPhone 8 Plus
- How Do You Unlock your iPhone 8? Learn All 4 Methods
- How To Change Country on App Store for iPhone XS With 7 Methods
- How To Unlock A Found Apple iPhone 15 Plus?
- In 2024, 4 Ways to Unlock iPhone 6s Plus to Use USB Accessories Without Passcode
- In 2024, Complete Guide For iPhone 12 Pro Lock Screen
- In 2024, How To Remove Flashlight From iPhone SE (2022) Lock Screen
- In 2024, How to Unlock Your iPhone 15 Pro Passcode 4 Easy Methods (With or Without iTunes)
- In 2024, Unlock Apple iPhone 15 Plus Without Passcode Easily
- Optimal Screen Recorder Selection for YouTube Professionals for 2024
- Remove the Lock Screen Fingerprint Of Your Realme GT 5 Pro
- Windows 11の初期設定を行う前に重要なデータ保存ガイド
- Title: Easy Steps on How To Create a New Apple ID Account On iPhone 14
- Author: Sophia
- Created at : 2024-10-29 06:19:28
- Updated at : 2024-11-01 00:55:38
- Link: https://ios-unlock.techidaily.com/easy-steps-on-how-to-create-a-new-apple-id-account-on-iphone-14-by-drfone-ios/
- License: This work is licensed under CC BY-NC-SA 4.0.