
How to Remove and Reset Face ID on Apple iPhone 13
How to Remove and Reset Face ID on Apple iPhone 13

Did you go wrong when you set the Face ID the first time? Or are you tired to put off the mask to use Face ID to unlock your Apple iPhone 13? And now, you want to disable the Face ID. Whatever your reasons are, read this article to learn how to remove Face ID on your Apple iPhone 13 X, iPhone XS, iPhone XR or iPhone 11, iPhone 12, iPhone 13, iPhone 14, anmd iPhone 15.
Part I: What is Face ID?
If the new Apple iPhone 13 is your first-ever iPhone, or if you have neither upgraded your Apple iPhone 13 from the 6/7/8 series nor have kept abreast with the happenings in the Apple world, you might wonder what this newfangled thing called Face ID is.
Face ID is an authentication system that came with iPhone X for the first time, and then the Apple iPhone 13 13, the Apple iPhone 13 14, and now the Apple iPhone 13 15. Like Touch ID that uses your fingerprints, Face ID uses your face metrics to authenticate you for everything, the way Touch ID does.
Face ID is not a new and advanced version of Touch ID, but a completely different authentication system that utilizes a different component what Apple calls a TrueDepth camera to scan your face metrics. Face ID is not available on phones with Touch ID (iPhone SE 2022 today) and Touch ID is not available on iPhones that come with Face ID as their authentication mechanism.
Part II: What Can You Do with Face ID?
Most of us know that we can unlock iPhone with our face via Face ID instead of a thumbprint or passcode. But actually, Face ID does more than just that. Let us learn more cool things you can do with Face ID, which helps you to make a decision if you still want to disable it. Here‘s what you can do on your Apple iPhone 13 13/12/11 with Face ID:
II.I Unlock Your Apple iPhone 13
As an authentication mechanism, Face ID enables you to unlock your Apple iPhone 13 13 /iPhone 12/iPhone 11 with a look. How to do that? Here are the steps:
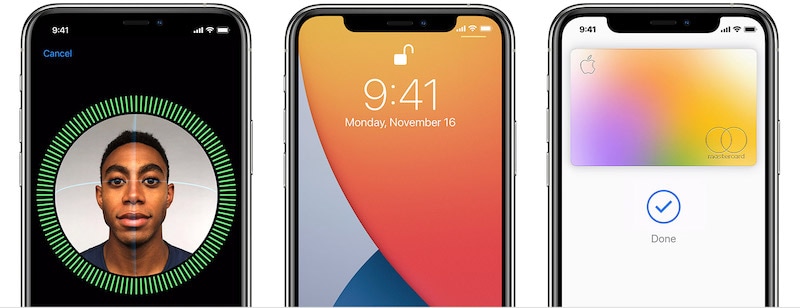
Step 1: Pick your Apple iPhone 13 up in your hands or tap the screen to wake it up.
Step 2: Look at the iPhone.

When the lock symbol changes to the unlocked position, you can swipe up to unlock your Apple iPhone 13 using Face ID and get to the Home Screen.
Note that Face ID will not work in landscape mode on an iPhone.
II.II Making Purchases Using Face ID on Your Apple iPhone 13
Face ID allows you to authenticate yourself to make purchases in the App Store, Book Store, and iTunes Store and use Apple Pay wherever supported.
How to use Face ID on Apple iPhone 13 to make purchases in App Store, Book Store, and iTunes Store
Step 1: Check if Face ID is enabled for purchases in these stores by going to Settings > Face ID and Passcode and ensuring that iTunes and App Store are toggled On.

Step 2: On any of these stores, when you tap on the option to buy some content, a payment confirmation popup will be displayed along with instructions to authenticate yourself using Face ID.
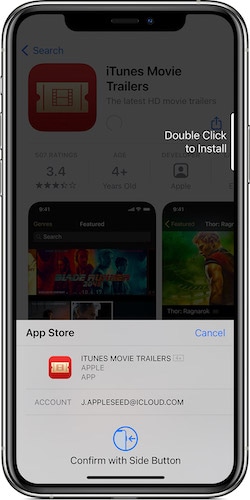
The instructions are simple: press the side button twice to authenticate yourself using your Face ID and make the purchase.
When done, a satisfying ting and a checkmark will confirm the action.
How to use Face ID on Apple iPhone 13 to pay with Apple Pay
Step 1: If Apple Pay is supported by banking institutions in your country, you can set it up by adding a supported bank‘s credit card, debit card, or prepaid card to the Wallet app on your Apple iPhone 13 13/12/11.
Step 2: When a card is added and ready to use, check that Apple Pay is enabled under Settings > Face ID and Passcode.
Step 3: For App Store/ Book Store/ iTunes Store purchases, it works as always, you double-press the Side Button to authenticate and use your default card.
Step 4: Look at your Apple iPhone 13 to authenticate yourself using your Face ID and make the purchase.
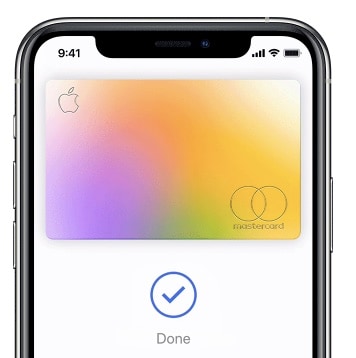
Step 5: When paying at retail outlets, hold your Apple iPhone 13 (top being close to the reader) and wait for the checkmark and Done message.
Step 6: To pay using Apple Pay on websites, choose Apple Pay as the payment method, double press the Side Button, look at your Apple iPhone 13, and wait for the Done message and checkmark to finish the process.
II.III Lowering Ringer and Alarm Volume Automatically
Face ID also enables what Apple calls Attention Aware features that are conveniences afforded to users who have a Face ID enabled iPhone.

Setting up and using Attention Aware features is easy:
Step 1: Go to Settings > Face ID and passcode.
Step 2: Toggle Require Attention For Face ID On.
Step 3: Toggle Attention Aware Features On.
That‘s it. Now, when you get a call and your Apple iPhone 13 13 is ringing loud, looking at your Apple iPhone 13 13/12/11 will cause it to lower the volume. When an alarm goes off, you can lower the volume by simply looking at your Apple iPhone 13. Additionally, your Apple iPhone 13 screen will not dim or switch off for the duration you are looking at it. This means you can now read those books on Kindle without constantly tapping the screen for it to stay awake.
II.IV Filling Passwords in Safari Automatically Using Face ID
Face ID also allows users to fill passwords in Safari automatically for a faster and more convenient login experience on your Apple iPhone 13 with Face ID.
Step 1: Go to Settings > Face ID and Passcode and toggle Password Autofill On.
Step 2: Now, when you use Safari to open a website that requires a login, tapping the username field or password field will bring up the keyboard, and on top of that keyboard there will be your credentials for the website if you have saved them in iCloud Passwords. Tap the credentials.
Step 3: Look at your Apple iPhone 13 to authenticate yourself with Face ID and Safari will autofill the credentials for you.
II.V Animojis and Memojis
Up until now, we saw how Face ID enables productivity features and how convenient it is to use it. Now, we come to the fun part - Animojis. Apple launched Face ID in 2017 on the Apple iPhone 13 X with much fanfare and a huge part of that fanfare was Animojis. Over time, Apple brought new capabilities to the Apple iPhone 13 and added Memojis alongside Animojis.

Animojis are animated emojis. These are made possible with advanced algorithms enabled by the TrueDepth camera in Face ID. Animated emojis or Animojis can mimic your facial expressions and you can use them in your message conversations in apps.
Here‘s how to send Animojis in conversations on your new iPhone 13/12/11:
Step 1: Open a message conversation in the Messages app.
Step 2: Tap the Memoji button (a character in a yellow frame) and swipe to select the desired Animoji/ Memoji you want to send.

Step 3: Tap the Record button and you now have 30 seconds to do what you want with your face and the character will reproduce it on screen for you.
Step 4: When done, the Record button changes to Send:

Tap Send to send your first Memoji/ Animoji.
Part III: How to Remove Face ID on Apple iPhone 13
For all the hardware and software that make for a great experience for nearly all users around the world, Face ID can have its fair share of issues. Sometimes, your face might not get recognized, sometimes it might not work altogether.
Lately, with the COVID-19 pandemic, we have seen how Face ID struggles to work for us, and why? Because it cannot scan our faces with masks! So, it makes sense to remove Face ID from our iPhones and rely solely on passcodes. Alternatively, you want to reset your Face ID on your Apple iPhone 13 13/12/11 and set it again if you have put on some ‘COVID weight’ owing to working from home.
Most of the time, the best and the simplest thing you can do to resolve your hardware and software issues is to restart the Apple iPhone 13 device in question. To restart your Apple iPhone 13 13/12/11, long-press the Side Button until the power slider appears and drag it to shut the Apple iPhone 13 device off. Then, use the Side Button to start the phone again.
Sometimes, the issues have a way of persisting, and a restart does not resolve them. the TrueDepth system might have developed a fault and Face ID might stop working. Or you got the dreaded “problem detected with TrueDepth camera” message on your Apple iPhone 13 13/12/11. In that case, you would like to know how to reset and remove Face ID on your Apple iPhone 13 13 to see if that helps, before you are required to go to an Apple Store for service.
Step 1: Go to Settings > Face ID and Passcode.
Step 2: Scroll and tap the option “Reset Face ID” to remove Face ID on your Apple iPhone 13 13/12/11.

Part IV: How to Set Up Face ID on Your Apple iPhone 13
Sometimes, you may just want to disable Face ID temporarily or the issue gets solved, and want to activate Face ID again. Setting up a Face ID on your Apple iPhone 13 13 is easy. To set up Face ID, sit in a comfortable spot with adequate lighting and follow these steps:
Step 1: Go to Settings > Face ID and Passcode and enter your passcode. If you have not set up a passcode yet, you will necessarily have to create one now before proceeding forward.
Step 2: Tap Set Up Face ID to start the process.
Step 3: Hold your Apple iPhone 13 in the portrait orientation at about an arm‘s length away from your face and then tap Get Started.

Step 4: Adjust to have your face inside the shown circle and then slowly rotate your head in a smooth motion to complete the circle. This step will be done one more time.
Step 5: When done, tap Done.
In case you are getting the following error:

There are a few things you can try to resolve this, you can try to update your Apple iPhone 13 13/12/11 to the latest iOS. At this point, you may even try running a beta version to see if that helps. If you are running a beta version, you may downgrade back to the release version to see if that resolves the error. Betas can both make and break things.
If this does not resolve it, you need to take the Apple iPhone 13 device to the nearest service center. The TrueDepth camera system has components that might have been damaged or might not be working properly, for whatever reason, and the service personnel is equipped to resolve this issue for you at the earliest.
Part V: The Bottom Line
Face ID is more than a nifty authentication system in iPhones (and iPads) and brings some unique features that are not found in previous Touch ID enabled devices and enable the users to interact with people (Animojis and Memojis) and with the Apple iPhone 13 (user authentication via facial metrics, Attention Aware features) in new ways. There are times when this does not work as expected, and you can reset and remove Face ID if you feel this is not your cup of tea. Apple iPhone 13 can be used solely with passcodes if you want. If you find that your screen is locked and you can‘t unlock it, you can always find help in tools such as Dr.Fone - Screen Unlock (iOS). So go ahead, use the new Face ID on your Apple iPhone 13 with confidence, and enjoy a more secure experience on your new iPhone than ever before.
Dr.Fone - Screen Unlock (iOS)
Unlock iPhone/iPad Lock Screen Without Hassle.
- Simple, click-through, process.
- Unlock screen passwords from all iPhone and iPad.
- No tech knowledge required, everybody can handle it.
- Supports iPhone 13/ iPhone XS (Max) / iPhone XR / iPhone X / 8 (Plus)/ iPhone 7(Plus)/ iPhone6s(Plus), iPhone SE and the latest iOS version fully!


4,395,217 people have downloaded it
How To Fix Auto Lock Greyed Out on Apple iPhone 13
Auto-lock on iOS devices serves multiple purposes - it conserves battery life, secures your data, and more. But have you encountered the Auto-Lock greyed-out dilemma, fixed at 30 seconds? When this setting becomes inaccessible, it limits your control over screen timeout.
Read on if you’ve encountered a similar problem on your iOS device. In this guide, we’ll explore the possible reasons and offer steps to fix Auto-Lock greyed out on iPhone and iPad devices. If force restarts or settings resets haven’t worked for you, we’ve got alternative solutions. Let’s get started.

Part 1: Why Is Auto-Lock Greyed Out on iOS Device?
There are a few reasons why the Auto-Lock might be greyed out on your Apple iPhone 13 or iPad device, preventing you from adjusting the duration. Here are the most common culprits:
Low Power Mode
When you activate Low Power Mode on your iOS device, you might notice the screen automatically locking after 30 seconds of inactivity. This quick sleep setting, implemented to minimize power usage, explains why the Auto-Lock option appears greyed out and inaccessible.
Screen Time Restrictions
Screen Time restrictions can impact Auto-Lock. For instance, if your downtime schedule blocks all apps, the screen locks itself, even if the Auto-Lock timer hasn’t run out.

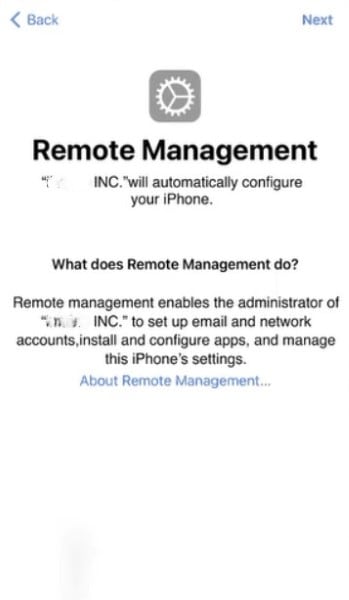
MDM Profile Restrictions
If the Auto-Lock is greyed out on your iPad or iPhone and you use it for work or school, a Mobile Device Management (MDM) profile might be the reason. This profile restricts settings, including Auto-Lock. To fix this, contact your IT administrator and ask if they can adjust the MDM profile settings.
Alright, you know the possible reasons why the Auto-Lock option is not working on your iOS device. Still, you might be wondering how to fix the Auto-Lock greyed-out issue. Below are several ways to get your iPad or iPhone Auto-Lock working normally again.
Fix No.1: Disable Low Power Mode
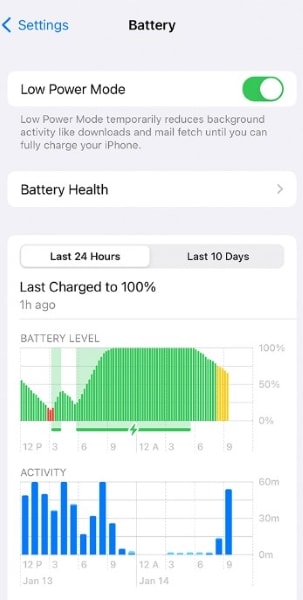
Your iPhone Auto-Lock greyed out because Low Power Mode limits background activities, including the Auto-Lock option. In this mode, you cannot change the Auto-Lock settings. Turn off Low Power Mode to fix this issue and choose your preferred timeout. Here’s how:
- Step 1: Go to your Apple iPhone 13 or iPad’s Settings app.
- Step 2: Scroll down and tap Battery. It will show you your device’s battery usage and available settings.
- Step 3: Turn off the Low Power Mode. Now, the greyed-out Auto-Lock option in Settings should be available again.

Low Battery Mode can stretch your battery life further. But if you need your screen to stay on longer, like while reading an article or watching a video, you can turn it off. It lets you adjust the screen timeout in Settings so it stays awake for as long as you like.
Fix No.2: Check Screen Time Restrictions
You’ve ruled out the Low Power Mode, but the Auto-Lock greyed out on iPad or iPhone remains. If Low Power Mode isn’t causing the problem, your screen time settings might be the issue. Some app restrictions can limit your screen use to specific times, causing it to lock automatically. Resolve this by removing limits, such as downtime and app restrictions, or turning it off.
- Step 1: Open the Settings app on your iOS device.
- Step 2: Go to Screen Time, then scroll down.
- Step 3: Tap Turn Off Screen Time.

Fix No.3: Remove MDM Configuration Profile
A configuration profile is a file that contains settings and restrictions that can be applied to an iOS device. Organizations, schools, or IT administrators often use it to manage devices remotely and enforce specific configurations. Once installed, the settings within a profile override the Apple iPhone 13 device’s default settings. It can include restrictions related to security, network access, app usage, and more.
Since an MDM configuration profile causes limitations, like the greyed-out Auto-Lock on iPad, removing it can be the solution. Doing so frees your iOS device from external settings imposed by the profile. Then, it could allow you to adjust the Auto-Lock time setting as you normally would.
Step 1: See the configuration profiles you installed on your iOS device.
Go to Settings> General > VPN & Device Management on your Apple iPhone 13.
Go to Settings> General > Profiles & Device Management on your iPad.
Step 2: Select the configuration profile you need to delete.
Step 3: Tap Remove Profile, enter your device passcode, then tap Remove.

Fix No.4: Remove Network Settings Installed by MDM
Businesses often use Mobile Device Management (MDM) to remotely manage their employees’ iPhones and iPads. MDM lets IT admins push software updates, restrict apps, and remotely wipe a lost device. This keeps corporate data safe and devices under control, whether the company or the employee owns them.
If you’re having trouble with a greyed-out Auto-Lock timeout setting, disassociating your device from MDM might be an option. But remember, this is a big step. Make sure you follow your company’s authorized procedures to avoid unintended consequences.
If your IT team gives the green light, you might also be able to remove the network settings installed by MDM. Just proceed with caution, as messing with these settings could lead to instability or data loss. Here’s how:
- Step 1: Open the Settings app on your iOS device.
- Step 2: Navigate to General > Profile or VPN & Device Management (or a similar section).
- Step 3: Select the management and tap Remove Management.

If the option is unavailable, only the person who used Apple Configurator 2 or handles your company’s mobile device management platform can remove it.
Fix No.5: Use Dr.Fone To Bypass MDM Lock Without Data Loss
Unfortunately, manually removing profiles can be tricky, especially if they’re associated with MDM, Apple School Manager, or supervised configurations. These often require the removal of passwords, admin privileges, or complete data wipes. But there’s good news. Wondershare Dr.Fone - Screen Unlock (iOS) provides a simpler and safer solution.
Here’s why you should try it:
- **Speedy and Efficient:**No more endless troubleshooting. Dr.Fone bypasses the MDM lock in minutes, saving you precious time.
- **Data Stays Safe:**Unlike factory resets, Dr.Fone keeps all your precious photos, messages, and apps right where they belong.
- **No Jailbreaking:**Say goodbye to complex hacks and warranty voiding. Dr.Fone works without jailbreaking your Apple iPhone 13, keeping it healthy and secure.
- **Universal Compatibility:**Whether you own the latest iPhone with iOS 17 or an older version, Dr.Fone has your back. It supports all iOS devices and versions starting from iOS 7.0.
Have you ever bought a used iPad or Apple iPhone 13 to find the Auto-Lock option greyed out and isn’t working? Mobile Device Management (MDM) profiles, often deployed by companies or schools, can restrict functionality. If you lack the credentials to bypass or remove it, Dr.Fone can help remove all MDM restrictions on your iOS device. Here’s how:
- Step 1: Download and open Dr.Fone on your computer. Next, connect your Apple iPhone 13 or iPad to the computer using a USB cable and navigate to Toolbox > Screen Unlock > iOS.

Tips: Are you searching for a powerful Screen Unlock tool? No worries as Dr.Fone is here to help you. Download it and start a seamless unlock experience!
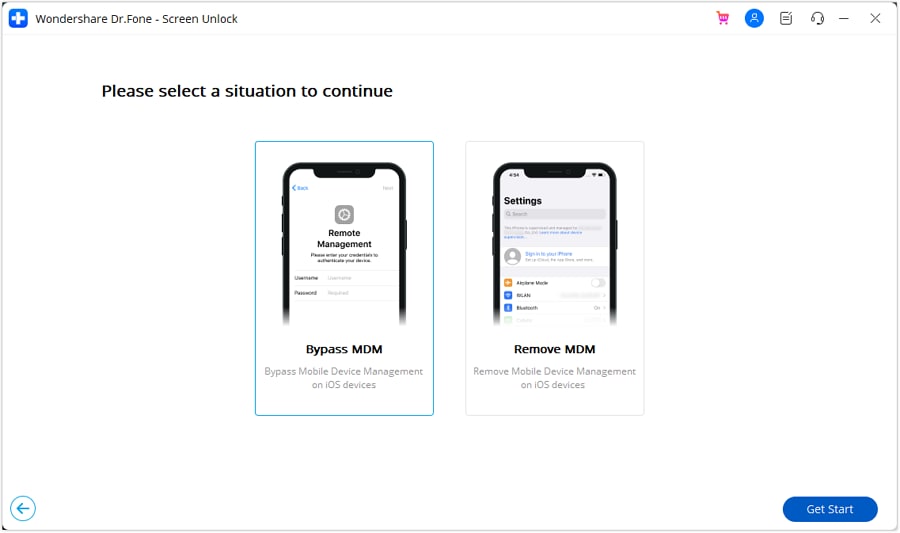
- Step 2: Within the Screen Unlock tool window, select Unlock MDM iPhone.

- Step 3: Select Bypass MDM, then click Get Start to proceed.
- Step 4: Please review the message carefully before initiating the MDM bypass process. Once you’ve read it, click Start to Bypass to proceed.

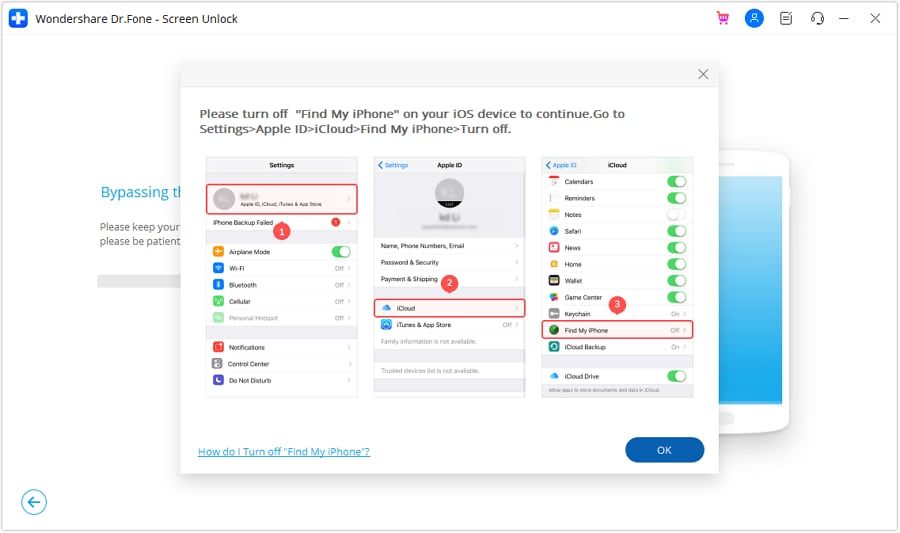
- Step 5: If prompted, go to your device’s Settings > Apple ID > iCloud and turn off the Find My feature. Next, click OK to initiate the MDM bypass.
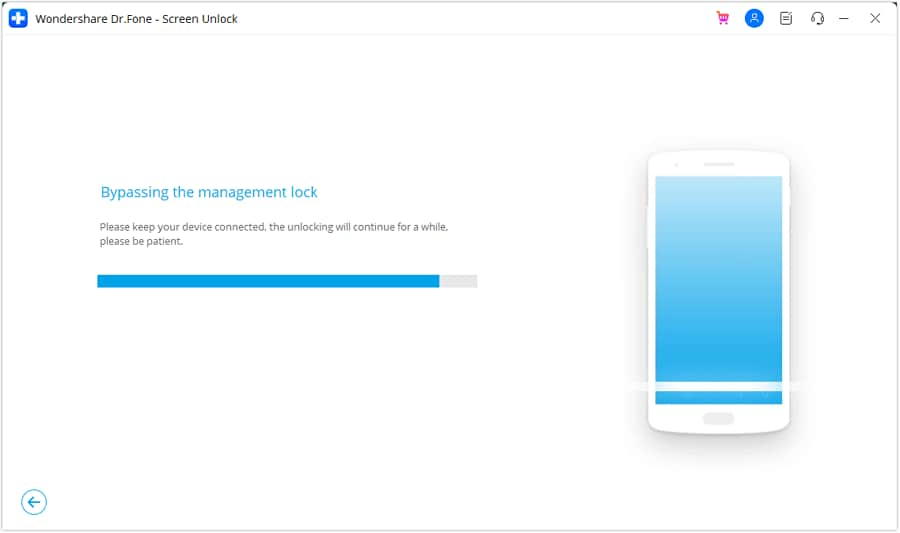
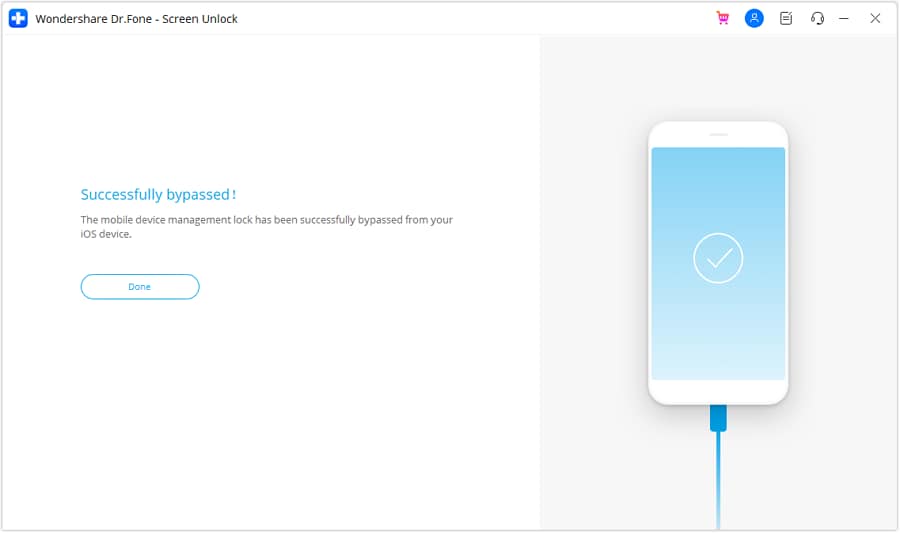
- Step 6: The software will display the progress of the bypass. Wait for it to complete.
- Step 7: You’ll see a confirmation message once the bypass is successful. Click Done to exit. Your device should now be free from MDM restrictions.
Fix No.6: Check and Adjust Auto-Lock Settings
Once you’ve tried all the fixes above, you might need to set up the Auto-Lock timeout again.
- Setup Auto-Lock on iPad
Here are the steps on how to change Auto-Lock on iPad devices:
- Step 1: Within the Settings app, scroll down the list on the left-hand side and tap Display & Brightness.
- Step 2: On the right-hand side of the Display & Brightness screen, tap the Auto-Lock option.

- Step 3: A list of time options will appear, ranging from 2 minutes to 15 minutes, as well as Never. Select the time you want your iPad to wait before automatically locking the screen after inactivity. If you want the screen to stay on indefinitely, choose Never.

Step 4: Once you’ve selected your preferred auto-lock duration, you can exit the Settings app. The change will be applied automatically.
- Setup Auto-Lock on iPhone
Here’s how to change Auto-Lock on iPhone devices:
- Step 1: Open the Settings app.
- Step 2: Tap on Display & Brightness, scroll down, and tap Auto-Lock.
- Step 3: Choose the desired time interval for your Apple iPhone 13 to automatically lock. The available options typically range from 30 seconds to 5 minutes. You may also have the option to select Never if you prefer to have the screen stay on indefinitely until you manually lock it.

Conclusion
There you have it. This guide has equipped you with the knowledge and solutions to fix the Auto-Lock greyed out on your Apple iPhone 13 or iPad devices. From identifying the reasons like Low Power Mode and MDM configurations to implementing actionable fixes, you can now change your screen timeout. So, turn off those restrictions, remove MDM profiles, and head back to Settings.
For an easy solution, use Dr.Fone Screen Unlock to bypass MDM restrictions, giving you control over your device. Whether it’s a work phone or a personal device under MDM, Dr.Fone can offer an efficient solution. With a few clicks, you’ll have the Auto-Lock back on track, ensuring your iOS device works again just how you want it.
Tips: Are you searching for a powerful Screen Unlock tool? No worries as Dr.Fone is here to help you. Download it and start a seamless unlock experience!
How To Change Your Apple ID on Apple iPhone 13 With or Without Password
The Apple ID is a unique identifier used to log in to all Apple services, including iCloud, the App Store, Apple Music, and more. You can track purchases and manage your account settings through your Apple ID. But what if you need a new one for security or moving to a new location?
Whatever the reason, learning how to change your Apple ID on your iPad is straightforward. And this guide will show the steps and provide some tips at the end.

Part 1: Reasons Why You Might Need To Change Your Apple ID
Your iOS devices contain most of your digital data. That includes your contact list, email, financial information, and social media passwords. All this data is valuable - others can use it to do identity theft, fraud, and other crimes.
If you feel the existing Apple ID isn’t secure enough, it’s a good idea to change your Apple ID on your iPad or other devices. Aside from this, there are a few scenarios where you might find yourself needing to change your details:
You No Longer Use the Email Address or Phone Number Associated With Your Apple ID
Life moves fast, and sometimes contact info changes. If the email or phone number linked to your Apple ID becomes outdated, it’s a good idea to update it. That way, you won’t miss out on vital notifications or have trouble recovering your account if needed.
You Want To Simplify Your Online Life
If you have multiple email addresses, you may want to consolidate them into one email address. It can make it easier to manage and remember your online accounts, including your Apple ID.
You Are Relocating to a Different Region or Country
Moving abroad? Your Apple ID may need an update to match your new location. It ensures access to region-specific apps and services. You need to have a few things in place before you can do that: add a payment method for your new location, cancel your subscriptions, and spend your store credit. Aside from that, you will also need to change your Apple ID country or region.
Changing your Apple ID can be smart, ensuring your digital life stays up-to-date, secure, and tailored to your needs. It’s not complicated, and it’s all about making your Apple experience better suited to you. So, go ahead and learn how to change your Apple ID on your iPad in the following sections.
Part 2: How To Change Apple ID on iPad Without Losing Data?
If you receive a notification from Apple about suspicious account activity, it’s time to act. Before you learn how to change the Apple ID on an iPad – for yourself or others, here are some common signs of a compromised Apple ID:
- A login attempt from a device or location that you don’t recognize
- A password change that you didn’t know about
- Unauthorized messages or purchases
- A password that no longer works
- Unfamiliar account details
If you suspect unauthorized access to your Apple ID, below is what you can do.
Steps To Change Your Apple ID to a Different Email Address
If you are worried about losing data such as purchases and contacts, don’t worry. You can update your Apple ID account anytime without disrupting your data. Here’s a step-by-step guide on how to change your Apple ID email address. Just sign out of all Apple services and devices that use your account first.
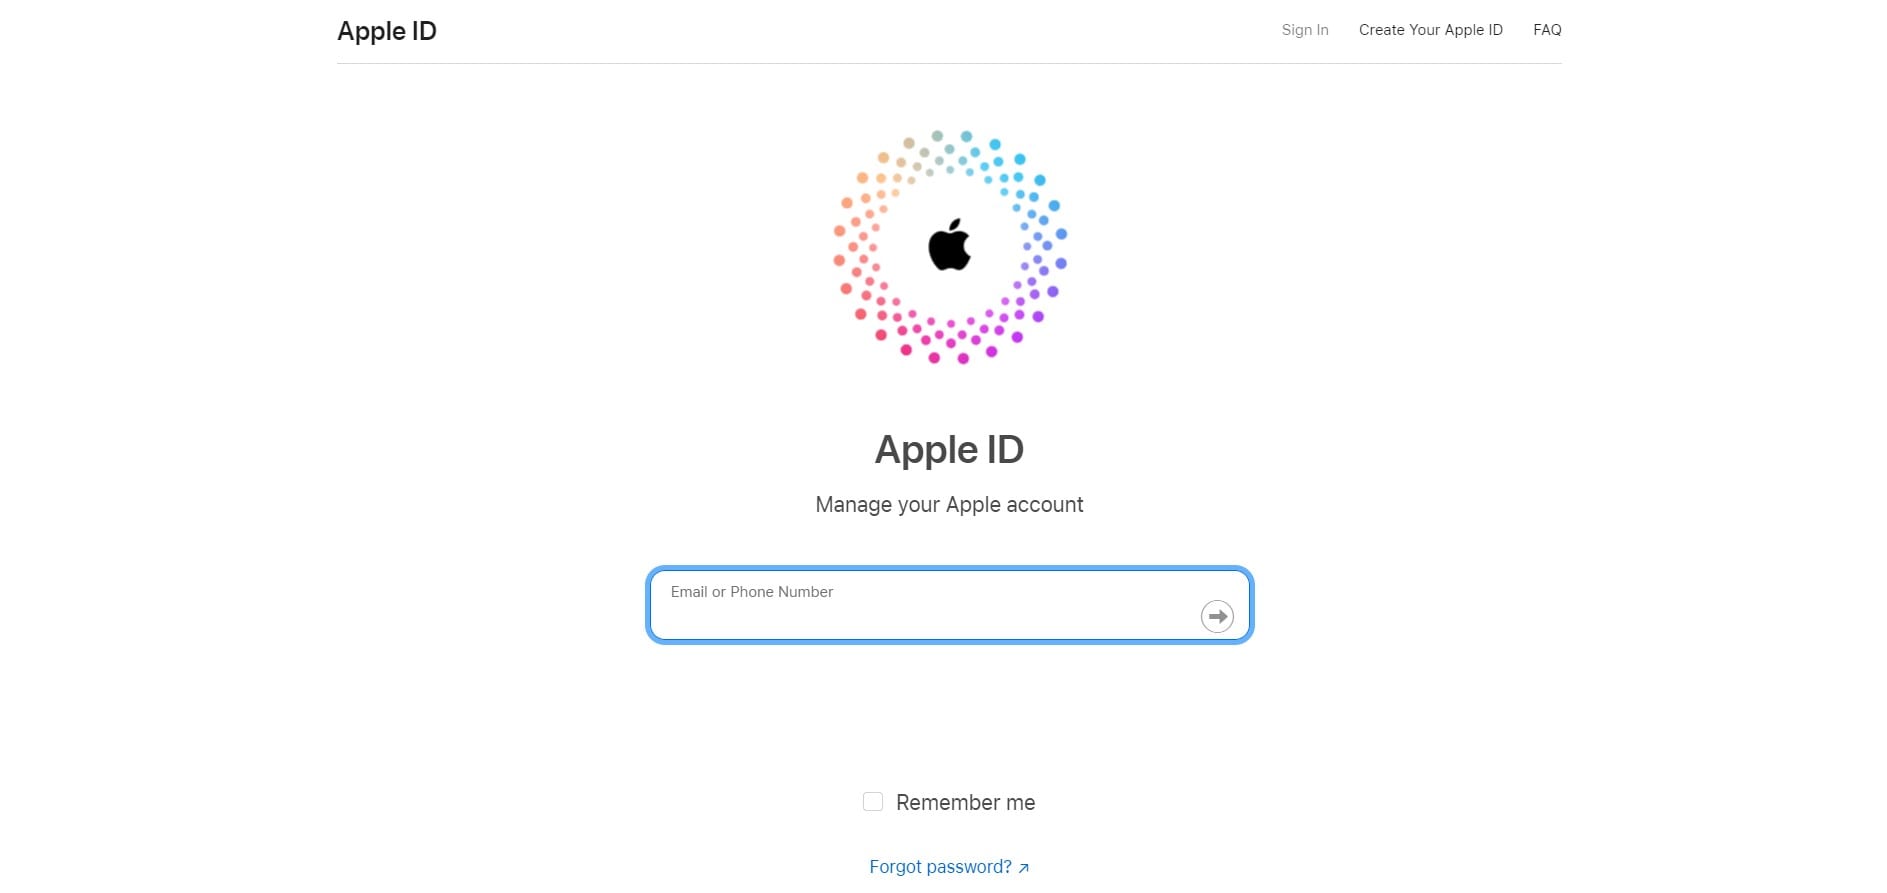
- Step 1: Visit the Apple ID official website and log in to your account credentials.
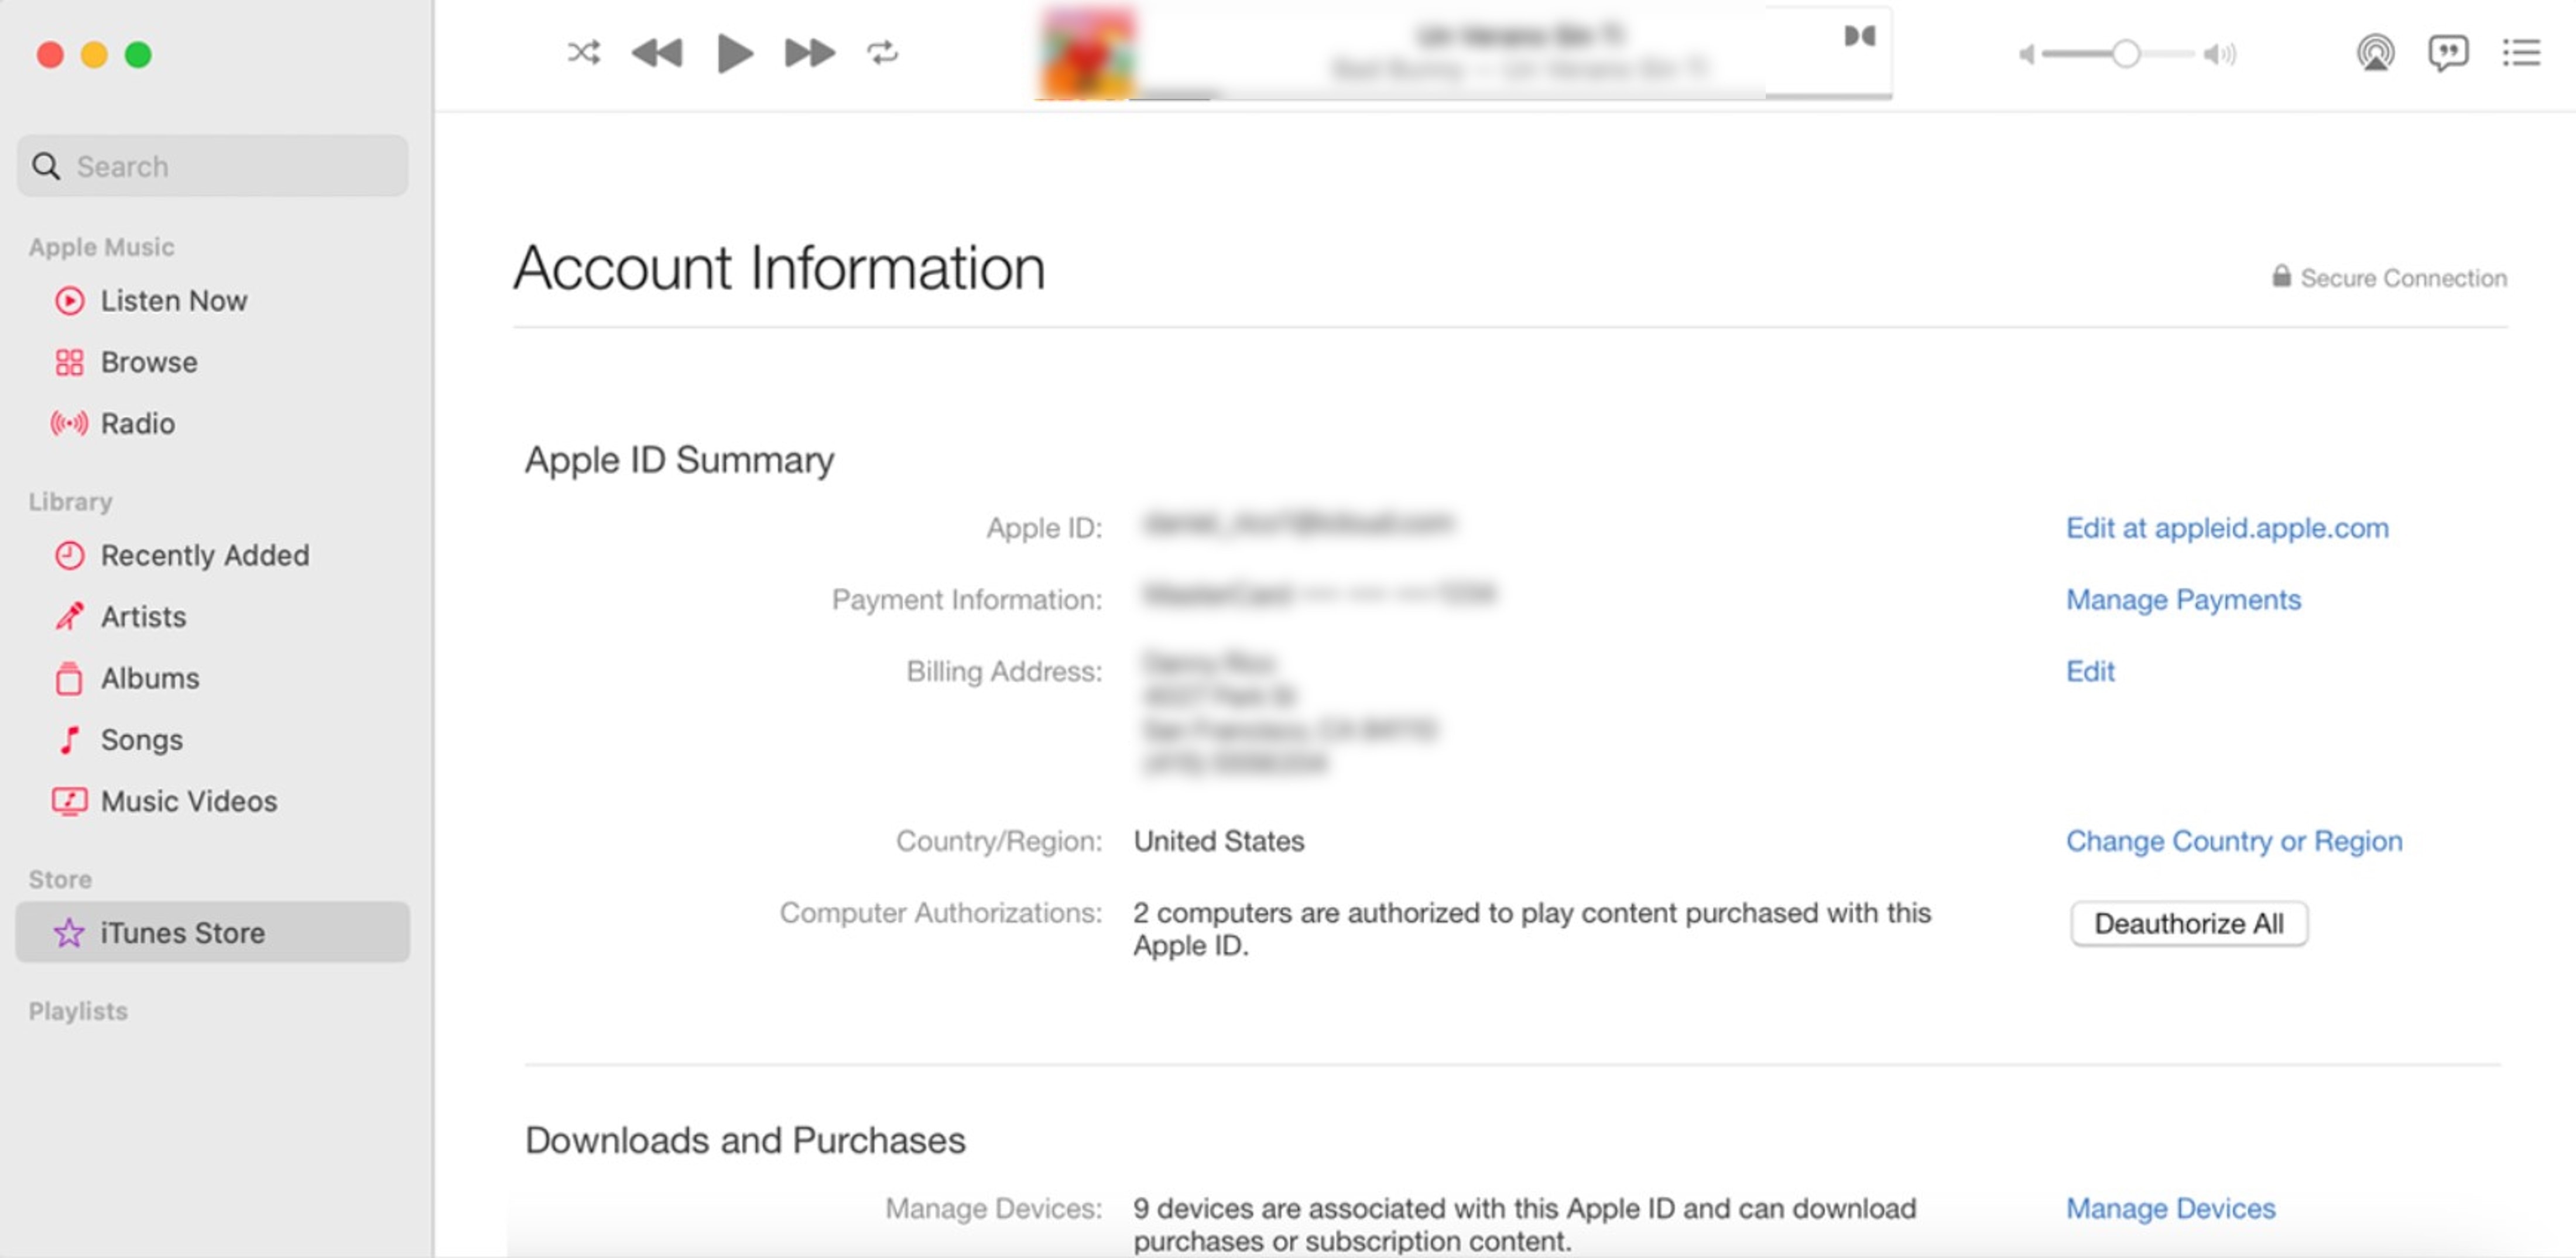
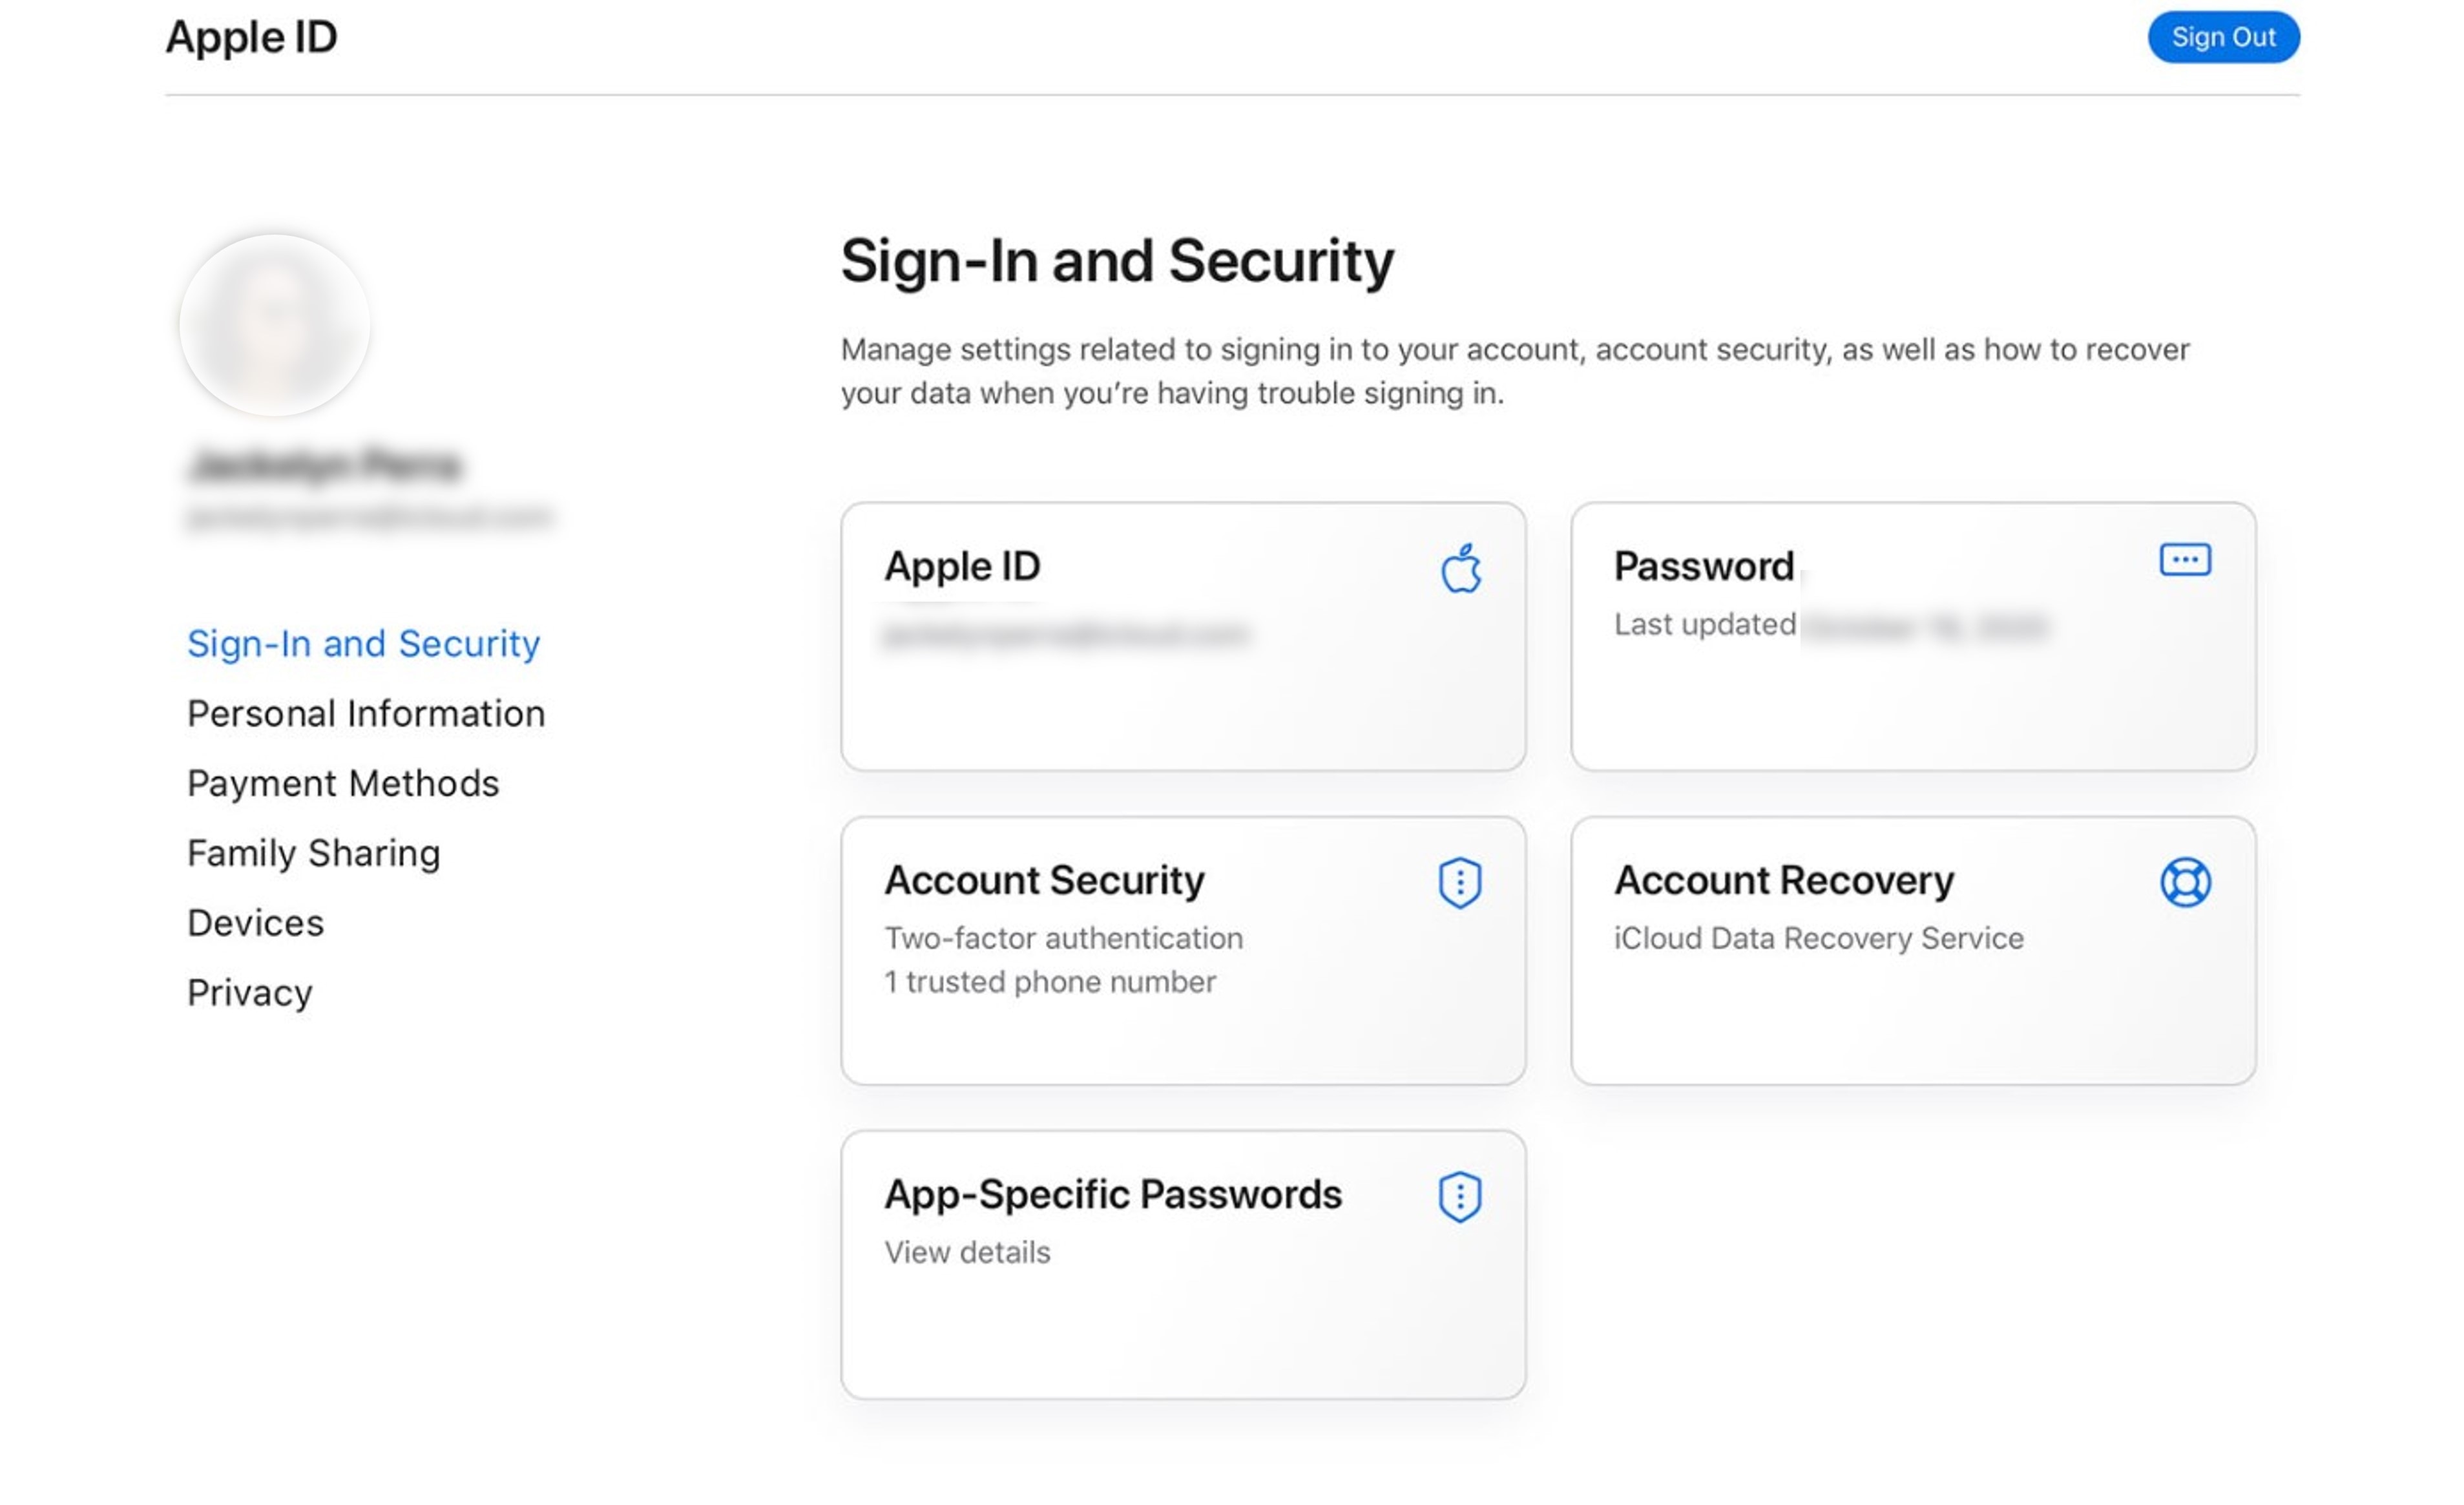
- Step 2: Once logged in, select Apple ID in the Sign-In and Security section.
- Step 3: From the Apple ID pop-up window, enter your new Apple ID in the Change your Apple ID text field.
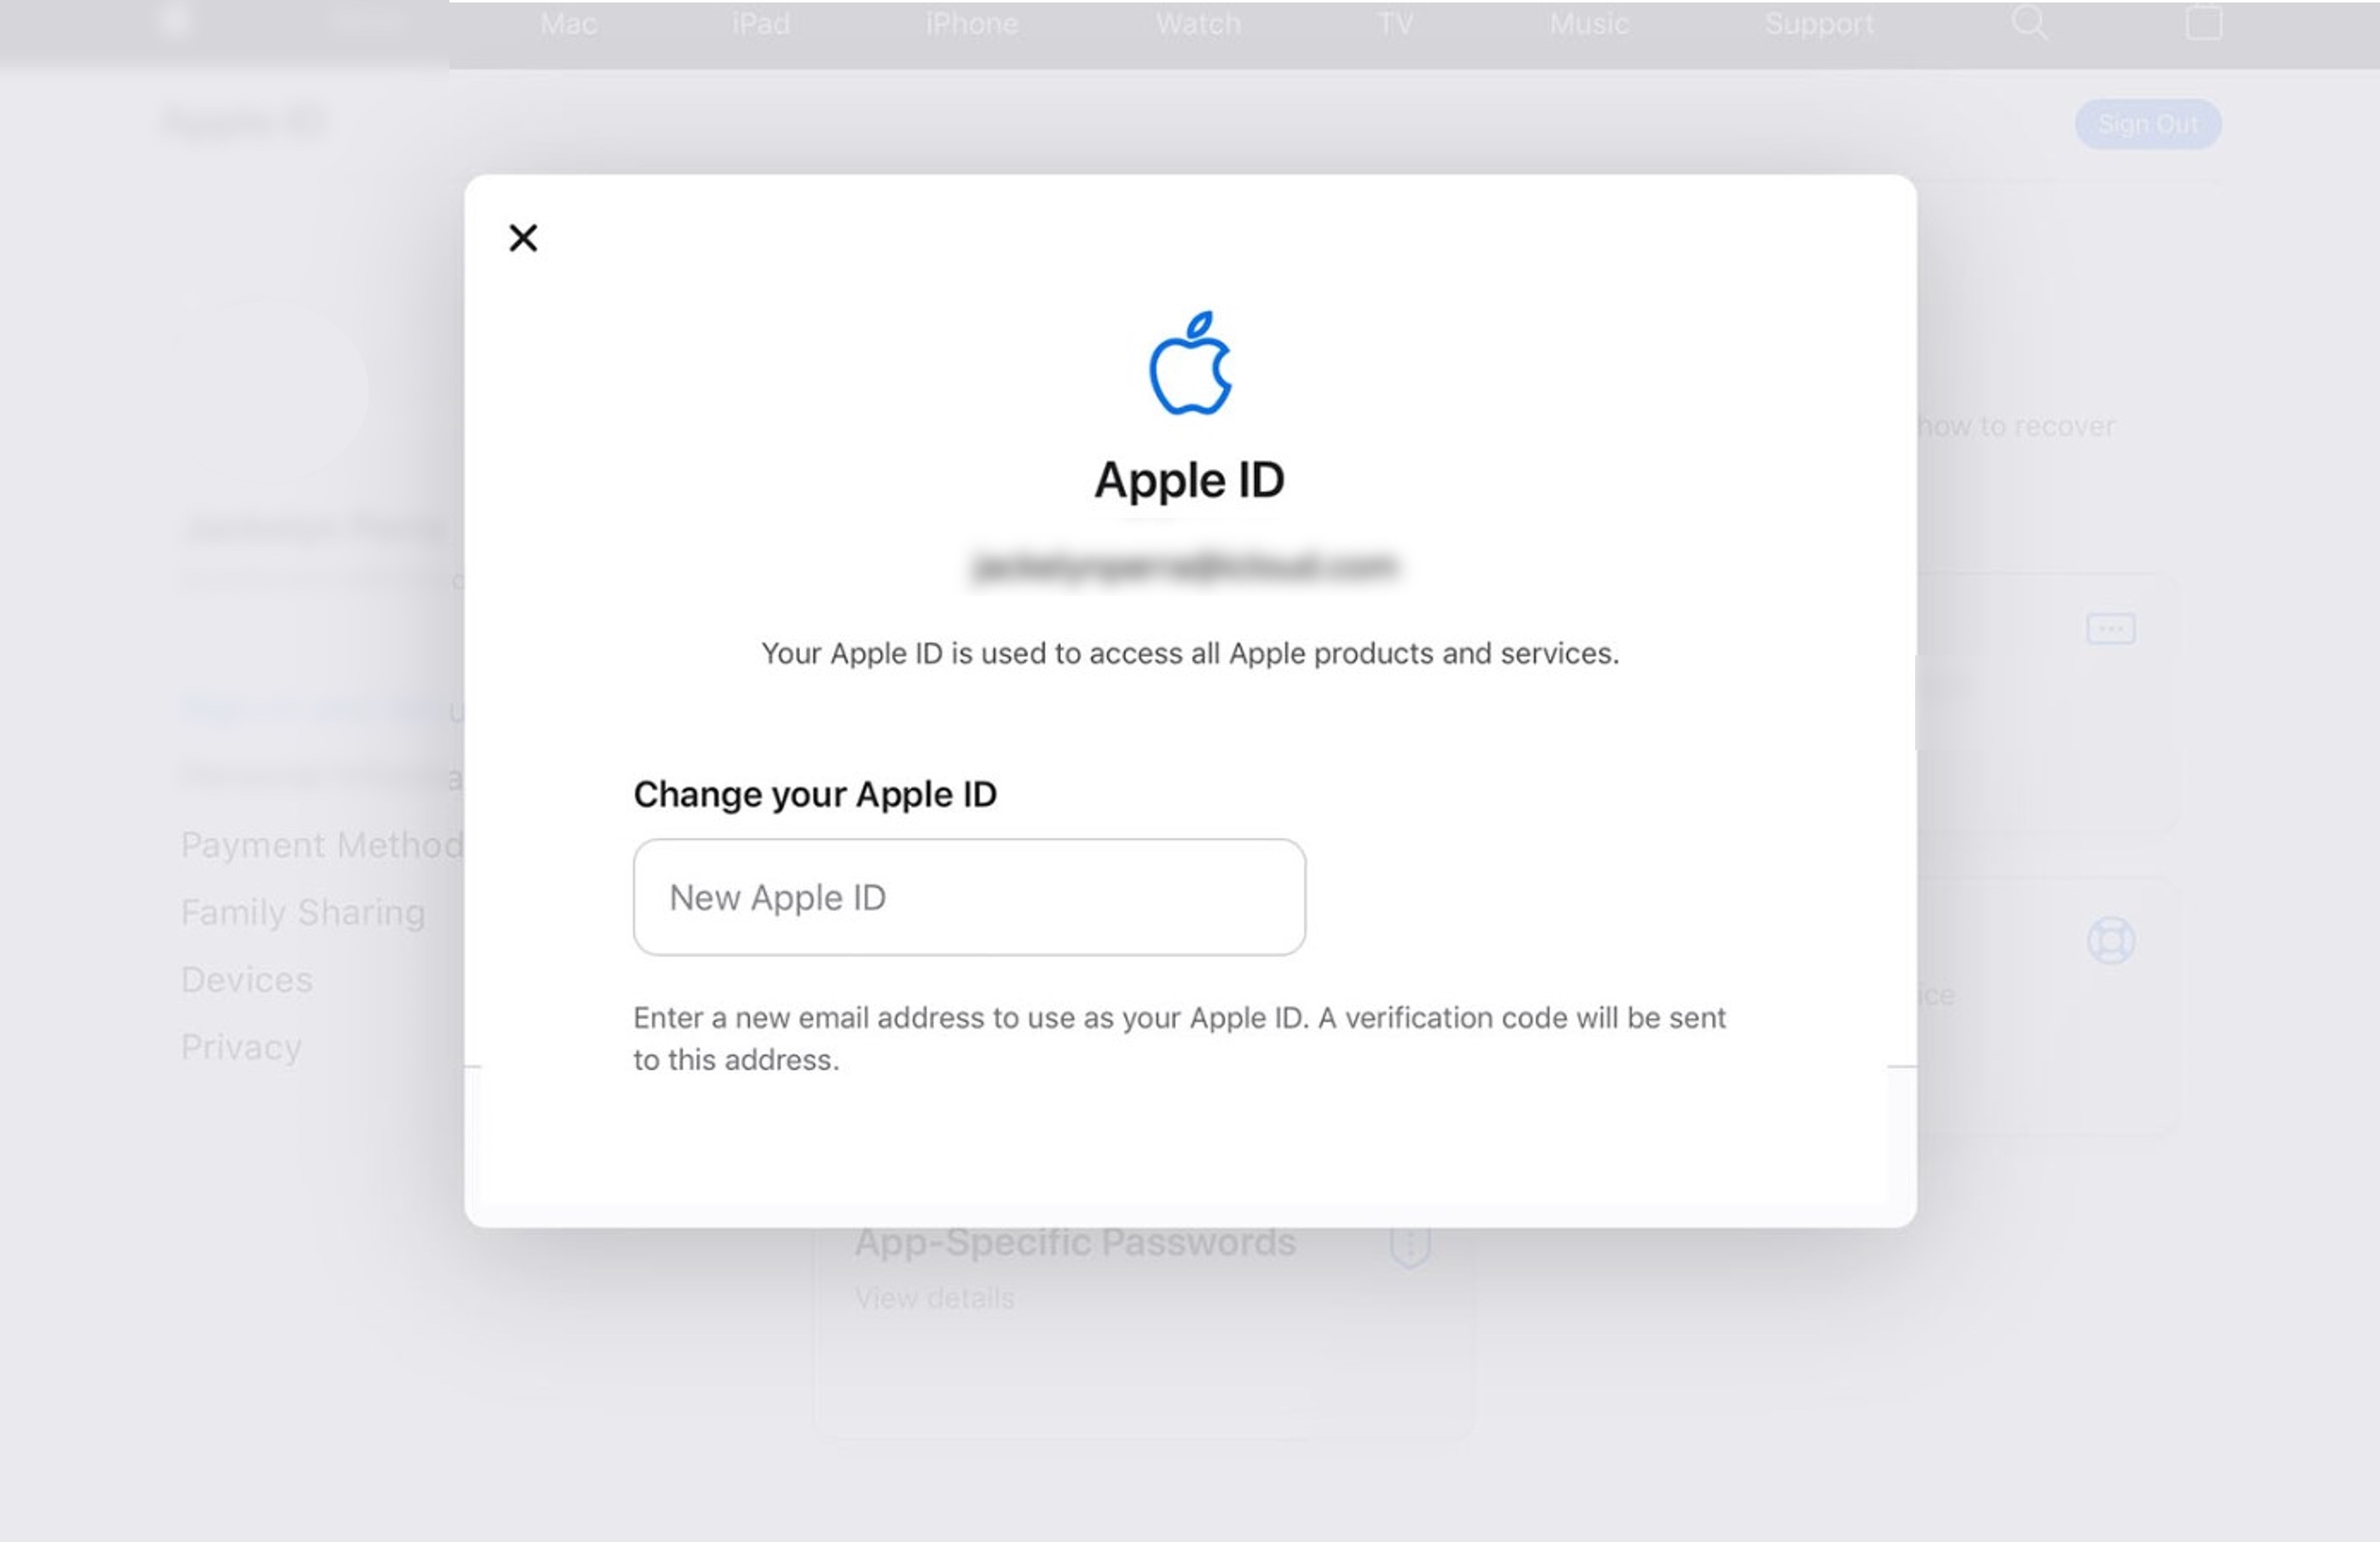
- Step 4: Select Change Apple ID to proceed.
- Step 5: Check your email to get a verification code sent by Apple to ensure that only you can change it to a third-party email address. Enter the code to complete the update.
Step 6: Sign in to Apple services such as iCloud and Messages, using your new Apple ID to continue sharing with others.
Steps To Change Your Apple ID to a Different Mobile Number
Do you want to use Your Apple iPhone 13 number as your Apple ID username? It’s possible, but it depends on your location, how you created your account, and what version of iOS you’re using.
If you’re in China mainland or India, and you’re using iOS 11 or later, you can create a new Apple ID with Your Apple iPhone 13 number as the username. However, Your Apple iPhone 13 number must be (+86) or (+91). So, if you’re thinking of, “How can I change my Apple ID on my iPad if it’s a mobile phone number?” then this guide is for you:
- Step 1: Log out of all Apple services and devices currently signed in with your Apple ID, except the one you’re using to change your Apple ID.
- Step 2: On your iPad, go to Settings > [your account name] > Sign-in & Security.
- Step 3: Tap Edit next to Email & Phone Numbers.
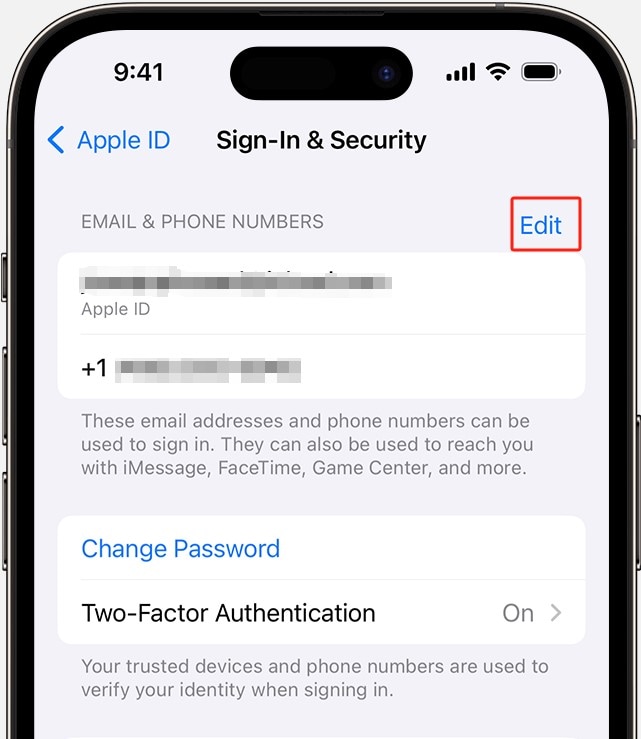
- Step 4: Go to the Delete icon next to your mobile number and follow the directions given.
- Step 5: Enter the code sent to the mobile number you added as your new Apple ID to verify it.
- Step 6: Log into all Apple services using your new Apple ID.
Even if you can’t change your Apple ID on your iPad to a mobile phone number, you can still associate it with a phone number on your account page. It means you can use a different email address or mobile phone number to log in to your Apple ID. See the next sections for more information on the workarounds you can try.
Part 3: What To Do if You Cannot Change Your Apple ID on iPad?
Changing your Apple ID on an iPad is usually easy. However, there can be setbacks during the process. Now, here’s what to do if you find yourself unable to do it and why it might be happening:
Try Again Later
If you encounter errors during the process, give it a little time and try again. Mayne it is because you changed your Apple ID on your iPad to an iCloud email address within 30 days.
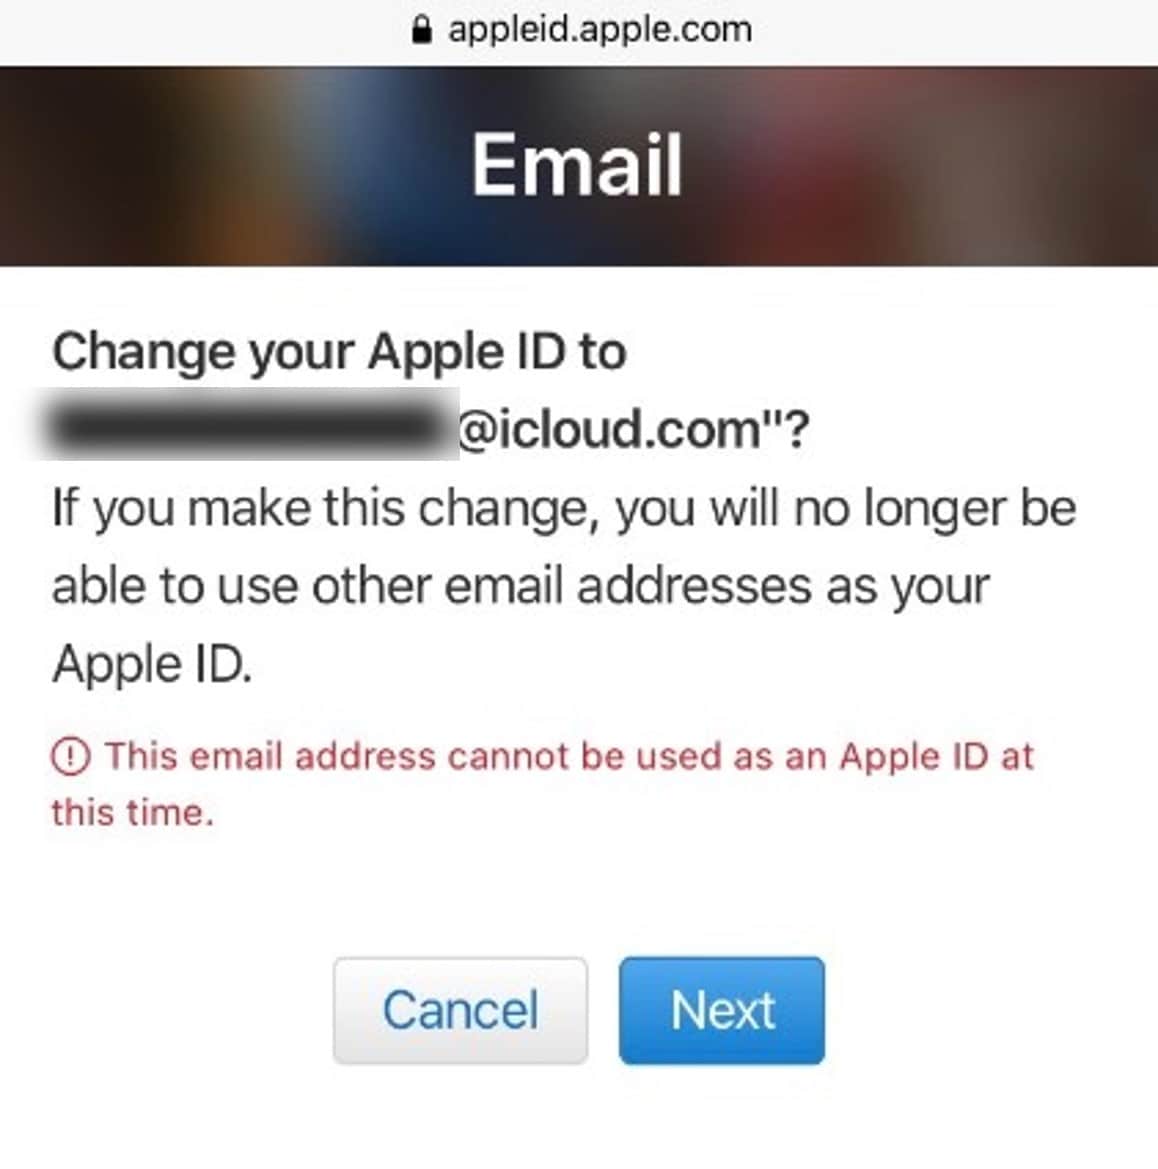
Check if Apple ID Is Already in Use
Apple IDs are unique, and you can’t have two identical ones. If you’re trying to change your Apple ID to one that’s already in use, you’ll hit a roadblock. Ensure that the new Apple ID you want isn’t already taken. Remove it from the family member’s account if they are using it.
Your Apple ID Is an Email Address
If your current Apple ID is an email address, you won’t be able to change it to a mobile phone number directly. Instead, you can add an email or phone number to your account for contact purposes.
If you’ve addressed these issues and still can’t change your Apple ID, don’t worry. Apple customer support is available to assist you with account-related challenges. Contact them for guidance and solutions tailored to your situation.
However, if you can’t change your Apple ID on your iPad because you forgot or don’t have access to the password, you can use a third-party tool such as Dr.Fone. This tool is easy to use and can help you unlock your iPad and remove the Apple ID in a few clicks.
Part 4: Using Wondershare Dr.Fone
Dr.Fone Screen Unlock (iOS) tool is your go-to solution for unlocking iOS devices without a passcode. The best part? It is easy to use for users of all technical backgrounds. With Dr.Fone, you can unlock iOS screens protected by 4 to 6-digit passcodes, Face ID, Touch ID, and more.
But it doesn’t stop there; Dr.Fone can also help remove the iCloud activation lock, unlock Apple ID without a password, and much more. This powerful tool is a lifesaver for iOS users, supporting the latest iPadOS 17, iOS 17, and iPhone 14.
Step-by-Step Guide to Removing Apple ID on iPad Using Dr.Fone
Dr.Fone can bypass the Find My/Find My iPhone feature to remove your Apple ID from your iPad, iPhone, or iPod Touch. Follow the steps below to learn how to use this feature on your iOS device.
Step 1: Get Wondershare Dr.Fone from their website and install it on your computer.
Step 2: From the app’s Toolbox homepage, click Screen Unlock, and select iOS.
- Step 3: Select Remove AppleID from the available Screen Unlock tools.

- Step 4: Connect your iPad or other iOS device to your computer, then click Unlock Now to continue.

- Step 5: Click Yes to confirm your device has a screen lock. Otherwise, it won’t work.

- Step 6: Enable the Two-Factor Authentication on your iPad so you can unlock your Apple ID. Then, click Yes to proceed.

- Step 7: Follow the on-screen instructions to put your iPad in Recovery Mode.

- Step 8: The next screen will demonstrate the Device Model information. Select an option from the System Version dropdown list and click Start.

- Step 9: The iOS firmware will start downloading, and you can see the progress on the next screen. If you’re experiencing slow download speeds, click Copy to get the link and download it.

- Step 10: Review the Device Model and System Version, then click Unlock Now to proceed.

- Step 11: From the Warning dialogue box, enter the code shown in the text field, then click Unlock.

- Step 12: Wait and refrain from using your device while it’s connected to avoid a bricked device.

- Step 13: Once finished, click Done, then check your iPad. If your Apple ID is not unlocked, you may need to click Try again to restart.

Best Practices To Secure Your iOS Data
Changing your Apple ID on your iPad can be a great way to protect your privacy and security. However, it’s important to take steps to ensure that your iOS data remains safe during the process. Here are some tips to help you do just that:
- Backup Your Files
Before you change your Apple ID on your iPad, create a backup of your data so you don’t lose important files. You can create a backup using iCloud or Dr.Fone.
Dr.Fone also allows you to view the contents of your backup before you restore it, so you can ensure that you’re getting back exactly what you want. This way, you can restore your data to your new Apple ID if needed.
- Password Check
Review your current passwords. Change any weak or compromised ones, including your Apple ID password, and never share it with anyone.
- Avoid Sharing an Apple ID
It’s best practice for each family member to have their own Apple ID. Sharing one can lead to problems with app purchases, data syncing, and privacy.
- Enable Two-Factor Authentication (2FA)
If not already enabled, turn on 2FA for an extra layer of security. It’s simple and highly effective.
Conclusion
Changing your Apple ID on your iPad or other iOS devices is a simple process that can help you protect your privacy and information. With the tips above, you can ensure your iOS data is safe and secure during the switch.
And if you need to remove your Apple ID without a password, Dr.Fone is a good option. Dr.Fone is a powerful iOS toolkit that can help you with various phone solutions. It’s easy to use and can help you solve mobile problems in just a few minutes.
Also read:
- [New] Crafting Full-Sphere Videos on iPhone, Ideal for Facebook for 2024
- [Updated] Best Free Screen Cast Options on Windows, Ranked #1 to #5 for 2024
- [Updated] From Airwaves to iPhone Essential Knowledge on Podcast Downloads
- 2024 Approved Ace Your Gameplay Innovative TVs to Boost Your Xbox Series X Adventure
- Expert Strategy Seamlessly Integrating Subtitles in Videos
- Full Guide to Unlock iPhone 11 Pro with iTunes
- How Do You Unlock your iPhone 13? Learn All 4 Methods
- How To Change Country on App Store for Apple iPhone SE (2022) With 7 Methods
- In 2024, 7 Top Ways To Resolve Apple ID Not Active Issue For iPhone 8 Plus
- In 2024, A Comprehensive Guide to iPhone 8 Plus Blacklist Removal Tips and Tools
- In 2024, How to Detect and Stop mSpy from Spying on Your Honor X50i+ | Dr.fone
- In 2024, How to Unlock iPhone 14 Pro With an Apple Watch & What to Do if It Doesnt Work
- In 2024, Remove Device Supervision From your iPhone 8 Plus
- Leading CUDA-Based Tools for Superior Video Transcoding: The Ultimate Guide
- Learn How To Lock Stolen Your iPhone 7 Properly
- Transform Your Tech Life by Upgrading to Corsair's iCUE Link Benefits
- Updated Looking For the Best VHS Video Effect Makers? Get To Know the Top List for 2024
- Title: How to Remove and Reset Face ID on Apple iPhone 13
- Author: Sophia
- Created at : 2024-09-28 17:46:41
- Updated at : 2024-10-03 16:53:51
- Link: https://ios-unlock.techidaily.com/how-to-remove-and-reset-face-id-on-apple-iphone-13-by-drfone-ios/
- License: This work is licensed under CC BY-NC-SA 4.0.