
How to Unlock Apple iPhone 15 Plus Passcode without Computer?
How to Unlock Apple iPhone 15 Plus Passcode without Computer?
“How to unlock Apple iPhone 15 Plus passcode without computer? I have been locked out of my iPhone and can’t seem to remember its passcode!”
Lately, we have got plenty of queries like this from users who have forgotten their iPhone passcode and can’t access it. If you are also going through the same and wish to learn how to bypass iPhone 5 passcode without computer, then you have come to the right place. In this post, we will make you familiar with two different solutions to unlock your Apple iPhone 15 Plus and that too without using your computer. In this way, you don’t need to use any third-party tool to learn how to unlock iPhone 5 passcode without computer. We have provided a stepwise solution for the same in the coming sections.
Part 1: How to unlock Apple iPhone 15 Plus passcode without computer using iCloud?
If you remember your iCloud credentials, then you can easily learn how to unlock Apple iPhone 15 Plus passcode without computer. Though, this comes with a catch. Since Apple doesn’t allow a direct way to reset iPhone passcode, you need to erase your device. It will reset your device’s passcode and your data would be lost. Therefore, before we proceed, make sure that you have a backup of your device ready. In this way, you can restore the backup and won’t suffer from any kind of data loss. To learn how to bypass iPhone 5 passcode without computer, follow these steps:
1. To start with, you need to log-in to iCloud’s official website right here: https://www.icloud.com/ . You can do this on any other handheld device.
2. Provide the iCloud credentials of your account that is already linked to your Apple iPhone 15 Plus.
3. The iCloud home page will provide various options. Just click on the “Find iPhone” to proceed.

4. This will launch the Find my iPhone interface on the screen. To choose your Apple iPhone 15 Plus, click on the “All Devices” option and select the Apple iPhone 15 Plus that is locked.

5. As you would select your Apple iPhone 15 Plus, it will display various options related to it.
6. Simply click on “Erase iPhone” and confirm your choice.

7. Wait for a while as it will reset your Apple iPhone 15 Plus remotely.
As you can see, the Find my iPhone service was majorly introduced to discover the location of a lost iOS device. Though, you can use it to ring your device or erase it remotely as well. In this way, you can learn how to unlock iPhone 5 passcode without computer. The technique can also be implemented in other iPhone versions like Apple iPhone 15 Plus, 6 Plus, 7, 7 Plus, and more.
Attention: All your data will be erased while you are unlocking with this tool.
Dr.Fone - Screen Unlock (iOS)
Unlock iPhone/iPad Lock Screen Without Hassle.
- Intuitive instructions to unlock iPhone without the passcode.
- Removes the iPhone’s lock screen whenever it is disabled.
- Works for all models of iPhone, iPad and iPod touch.
- Fully compatible with the latest iOS 11.


3981454 people have downloaded it
Part 2: How to unlock Apple iPhone 15 Plus passcode without computer using Siri bug?
This might surprise you, but there is a loophole in Siri that can be exploited to unlock the Apple iPhone 15 Plus device. Even though the solution might not work every time, there is no harm in giving it a try. By following this technique, you would be able to learn how to unlock Apple iPhone 15 Plus passcode without computer while experiencing no data loss. Essentially, it works for iOS devices running on iOS 8.0 to iOS 10.1. You would be needed to follow these stepwise instructions to learn how to bypass iPhone 5 passcode without computer.
1. To start with, you need to activate Siri on your device. This can be done by simply long pressing the Home button.
2. Now, ask Siri about the present time by giving a command like “Hey Siri, what time is it?”

3. This will make Siri display the present time with a clock icon adjoining to it. Just tap on the clock.
4. This will let you access the World clock feature on your device. From here, you can view the clock interface. Tap on the “+” icon to add another clock.

5. The interface will provide a search bar from where you can look for a city. Just write anything to provide a textual entry.
6. Tap on the text to get various options related to it. Go with the “Select all” option to proceed.

7. This will again provide various options like cut, copy, define, etc. Tap on the “Share” button.

8. From here, you can get various options to share this text. Out of all the provided options, tap on the Message icon.

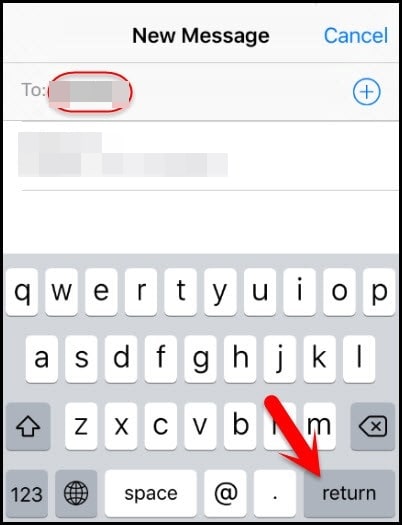
9. This will open a new interface from where you can draft a new message. On the “To” field, you can type any text and tap on the return button on your keyboard to continue.
10. This will make the text go green. As it would be selected, tap on the add icon (“+”) once again.
11. As you would tap it, it will launch a new interface. Tap on the “Create new Contact” to proceed.

12. This will launch a new interface to add a contact. You can just tap on the “Add Photo” option.

13. From the provided options, tap on the “Choose Photo” button to select a photo from the library.
14. As the photo library will be launched, you can browse the album of your choice.

15. Wait for a few seconds and tap on the Home button one more time. This will lead you to the Home screen of your device.

By following these simple steps, you can learn how to unlock iPhone 5 passcode without computer. The same procedure can also be applied to other versions of iPhone as well to unlock it without any data loss.
You can follow either of these solutions to learn how to unlock iPhone 5 passcode without computer. Since iCloud will erase your iOS device, you can take advantage of Siri’s vulnerability. This will let you unlock your device without losing your data. Go ahead and give these solutions a try and let us know about your experience in the comments below.
Remove Device Supervision From your Apple iPhone 15 Plus
Supervising devices is a proven technique for companies to monitor their employees. With this, they keep track of their performance on all associated devices. If you’ve decided to leave an organization, ensure that you retain the Apple iPhone 15 Plus device’s ownership by removing supervision access. If you’re looking for a guide on how to remove device supervision from your Apple iPhone 15 Plus, you can find some effective methods here.

Part 1. Answering Top Queries About Removing Device Supervision From iPhone
Many questions often pop up in users’ minds when considering removing device supervision. This section unveils some top queries with authoritative answers before heading to the main guide:
|
You May Want to Ask
|
Authoritative Answer
|
| — | — |
|
1. Does removing device supervision impact the iPhone’s functionality?
|
Removing device supervision does not compromise the fundamental functionality of your Apple iPhone 15 Plus. It is important to note that any administrative restrictions or configurations will be lifted. However, it might result in losing access to specific apps related to that organization.
|
|
2. Can device supervision be reinstated after removal?
|
Device supervision can be re-applied by the designated supervisor or IT administrator. However, this process usually involves resetting the Apple iPhone 15 Plus device to its factory settings if needed.
|
|
3. What information can be accessed through device supervision on iOS?
|
Once user’s devices are supervised, organizations can conveniently check settings, apps, and accounts being managed. They can also apply extra restrictions such as disabling Apple Music or putting the Apple iPhone 15 Plus device into Single App Mode.
|
Part 2. Remove Device Supervision With Perfection Using Wondershare Dr.Fone - Screen Unlock
Undoubtedly, device supervision is the most reliable method for organizations to monitor connected devices and analyze reports. If you have left a company where the administrator supervises your iOS device, your device needs to be unsupervised. For this process, you can bypass the MDM lock on your iOS device through a reliable tool.
Here, Wondershare Dr.Fone stands tall to help out your ventures and provide executable techniques explaining how to remove supervision from iPhone. This tool allows you to bypass the MDM lock without data loss on your Apple iPhone 15 Plus using easy steps. Consequently, you can also use other advanced functions, such as removing lock screens and unlocking Apple ID in different instances.
Features of Wondershare Dr.Fone To Consider
- Wondershare Dr.Fone lets you bypass iCloud Activation Lock completely and set a new Apple ID on the Apple iPhone 15 Plus device.
- This tool is compatible with all iOS devices, even iOS 17, and helps users experience creative features.
- Users can remove iTunes backup encryption by changing the encryption setting without losing data.
Step-by-Step Guide to Remove MDM Lock Using Wondershare Dr.Fone
Wondershare Dr.Fone provides the simplest method to remove the MDM lock and bypass device supervision access. Here is a comprehensive step-by-step guide to help users remove supervision from iPhones.
- Step 1. Initiate and Proceed With the Screen Unlock Feature
First, launch Wondershare Dr.Fone on the computer and connect it to your Apple iPhone 15 Plus. Move into the “Toolbox” tab and select the “Screen Unlock” function.

- Step 2: Select iOS and Head To Unlock MDM
After that, choose “iOS” as the Apple iPhone 15 Plus device type to open the related tool. Once the tool starts working, select the “Unlock MDM iPhone” option from the list.

- Step 3. Select Remove MDM Function To Start the Process
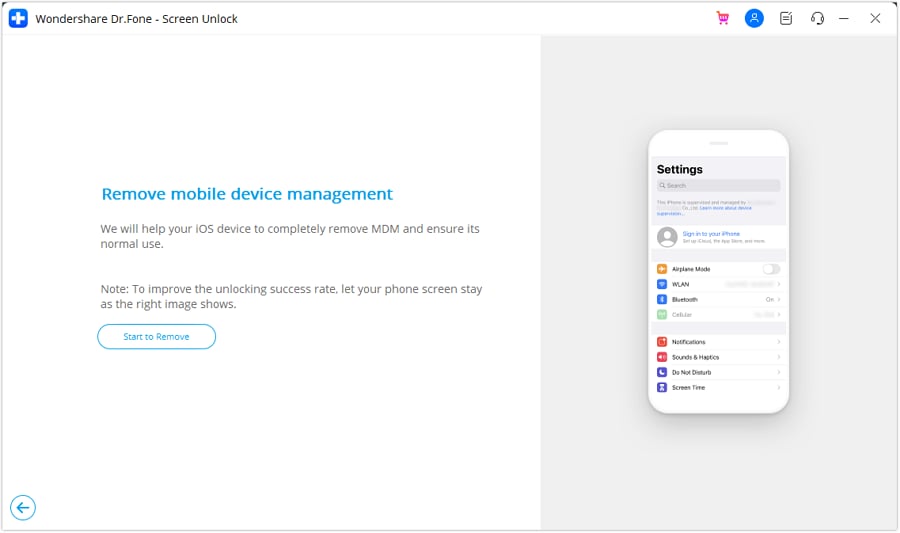
On the next screen, you will see two options, “Bypass MDM” and “Remove MDM.” Select “Remove MDM” and hit the “Get Start” button. After that, you will be taken to another screen where you need to tap on “Start to Remove” to execute the process.
- Step 4. Disable Find My Feature and Complete the Process
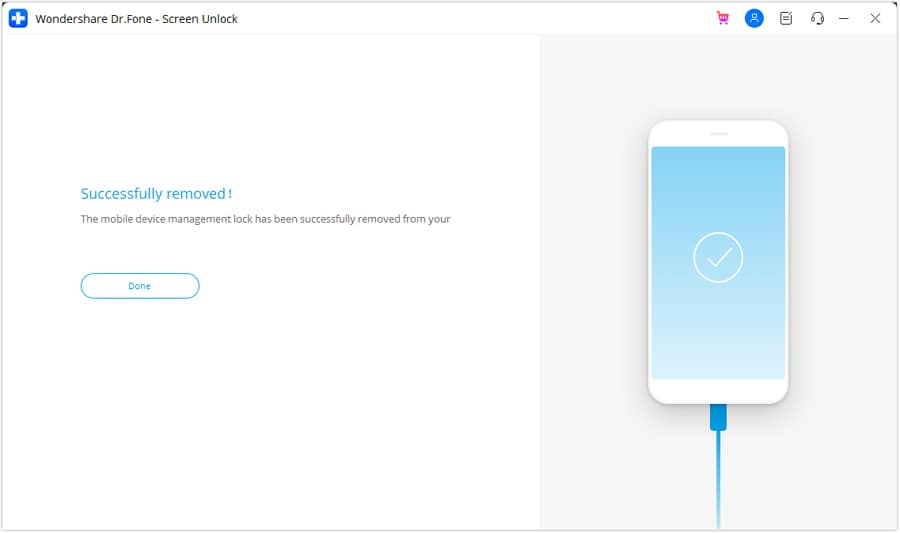
A prompt will pop up stating that you need to turn off the Find My feature on your iOS device. For this, open your device “Settings” and choose the “iCloud” option. Lastly, disable the “Find My iPhone” feature and hit the “OK” button. Wait a few seconds to complete the process and click “Done” to conclude the MDM removal process.
Part 3. Easy Removal of Device Supervision From Settings
Looking for other conventional methods about how to remove supervision from iPad or iPhone? If you wish to perform such actions, you can access some options in your Apple iPhone 15 Plus settings. However, to utilize this method, you should know the login information and password of the Apple iPhone 15 Plus device. If you have them with you, follow the given steps to remove device supervision from iPhone settings:
- Step 1. Initially, open the “Settings” and move into the “General” section. After that, select the “VPN & Device Management” option to see which MDM profiles supervise your iOS device.

- Step 2. Select the MDM profile you want to remove and tap on “Remove Management” to delete that profile from your iDevice. Then, you will be prompted to enter your login info or password and type your information to bypass supervision access.

Part 4. Using Apple Configurator 2 for Removing iPhone Supervision System
Apple Configurator is a free tool for Mac users that provides a simple technique for removing iPhone supervision. To use this method, you must have a password for the Apple iPhone 15 Plus device; otherwise, you will need to contact the organization to get the necessary permissions. Below are easy steps about how to remove device supervision from iPad and iPhone through your Mac:
Instructions. First, download and launch the Apple Configurator tool on your Mac. Connect the iDevice to the Mac using a compatible USB-C cable. Click on “Actions” from the top bar of the tool. In the drop-down list, choose the “Advanced” option and select “Erase All Content and Settings” to remove iPhone device supervision. Enter your device password to start using your Apple iPhone 15 Plus normally.

Part 5. Directly Contact Administration for Removing Device Supervision
If you’ve forgotten the username and password of your management profiles, you cannot remove MDM profiles from iPhone settings. In that situation, you can only seek help from the company admin, as this iPhone is supervised and managed by them.
You can contact the administrator and share a valid reason why you want to remove supervision access. They can remove your device directly from their system or provide you with the correct password to proceed with the login process.
Conclusion
Removing device supervision is simple, but getting familiar with the safest method is necessary. Considering this, we have covered some techniques to bypass MDM locks on your iOS device. These can easily resolve your issue of how to remove device supervision from iPhone queries. Conclusively, Wondershare Dr.Fone is the recommended tool to bypass the MDM lock without data loss.
Tips: Are you searching for a powerful Screen Unlock tool? No worries as Dr.Fone is here to help you. Download it and start a seamless unlock experience!
How To Change Country on App Store for Apple iPhone 15 Plus With 7 Methods
Changing your App Store country can give you access to apps that are not available in your region. Whether getting region-specific apps, accessing exclusive content, or switching to a country with better app offerings, it’s a valuable capability.
The article below guides you through seven methods on how to change the country of your App Store.Following the guide ensures access to a world of apps and content tailored to your preferences. Keep reading the page below to achieve this.

Part 1. Pros and Cons of Changing Your App Store Country
Changing your App Store country on your Apple iPhone 15 Plus can offer various benefits, but it also comes with certain drawbacks. It’s necessary to consider the pros and cons before making this decision.
Pros
- **Access to Region-Specific Apps.**Different countries have unique apps tailored to their markets. By changing your App Store country, you can access apps that might not be available in your current region. For example, some popular Chinese and Japanese apps are unavailable in the US App Store. If you want to use these apps, you will need to change your App Store country.
- **Getting App Updates.**Sometimes, apps receive updates and features in certain regions before others. Changing your App Store country can give you early access to these updates, improving your app experience. For example, a gaming app might first release new levels or features in select countries.
- **Access Exclusive Content.**Some apps and content are exclusive to certain countries. By switching your App Store country, you can enjoy movies, music, or TV shows unavailable in your current region. For instance, certain Netflix shows are restricted to specific countries due to licensing agreements.
Cons
- **Loss of Access to Purchases.**If you’ve made purchases in your current App Store country, changing it can result in losing access to those purchases. The loss includes paid apps, in-app purchases, and subscriptions. For example, if you switch from the US to the UK store, you may lose access to US-specific subscriptions.
- **Offload Apps.**When you change your App Store country, your device may prompt you to offload apps that are not available in your new region. This can be inconvenient if you rely on specific apps for daily use. For instance, a banking app may be region-specific and unavailable in your new country.
- **Family Sharing Issues.**If you’re part of a Family Sharing group, changing your App Store country can affect the access and sharing of purchased apps and subscriptions. Family members may lose access to content tied to your previous country. For example, if you switch from the UK to the US store, your family members might no longer have access to UK-specific content.
Part 2. Different Methods to Change Your App Store Country
Changing your App Store country can be done through various methods. Below are different ways to achieve that, along with step-by-step instructions for each technique.
Method 1: Changing Apple ID Region via iPhone
It is the most common and straightforward way to change your App Store country. To do this, follow these steps:
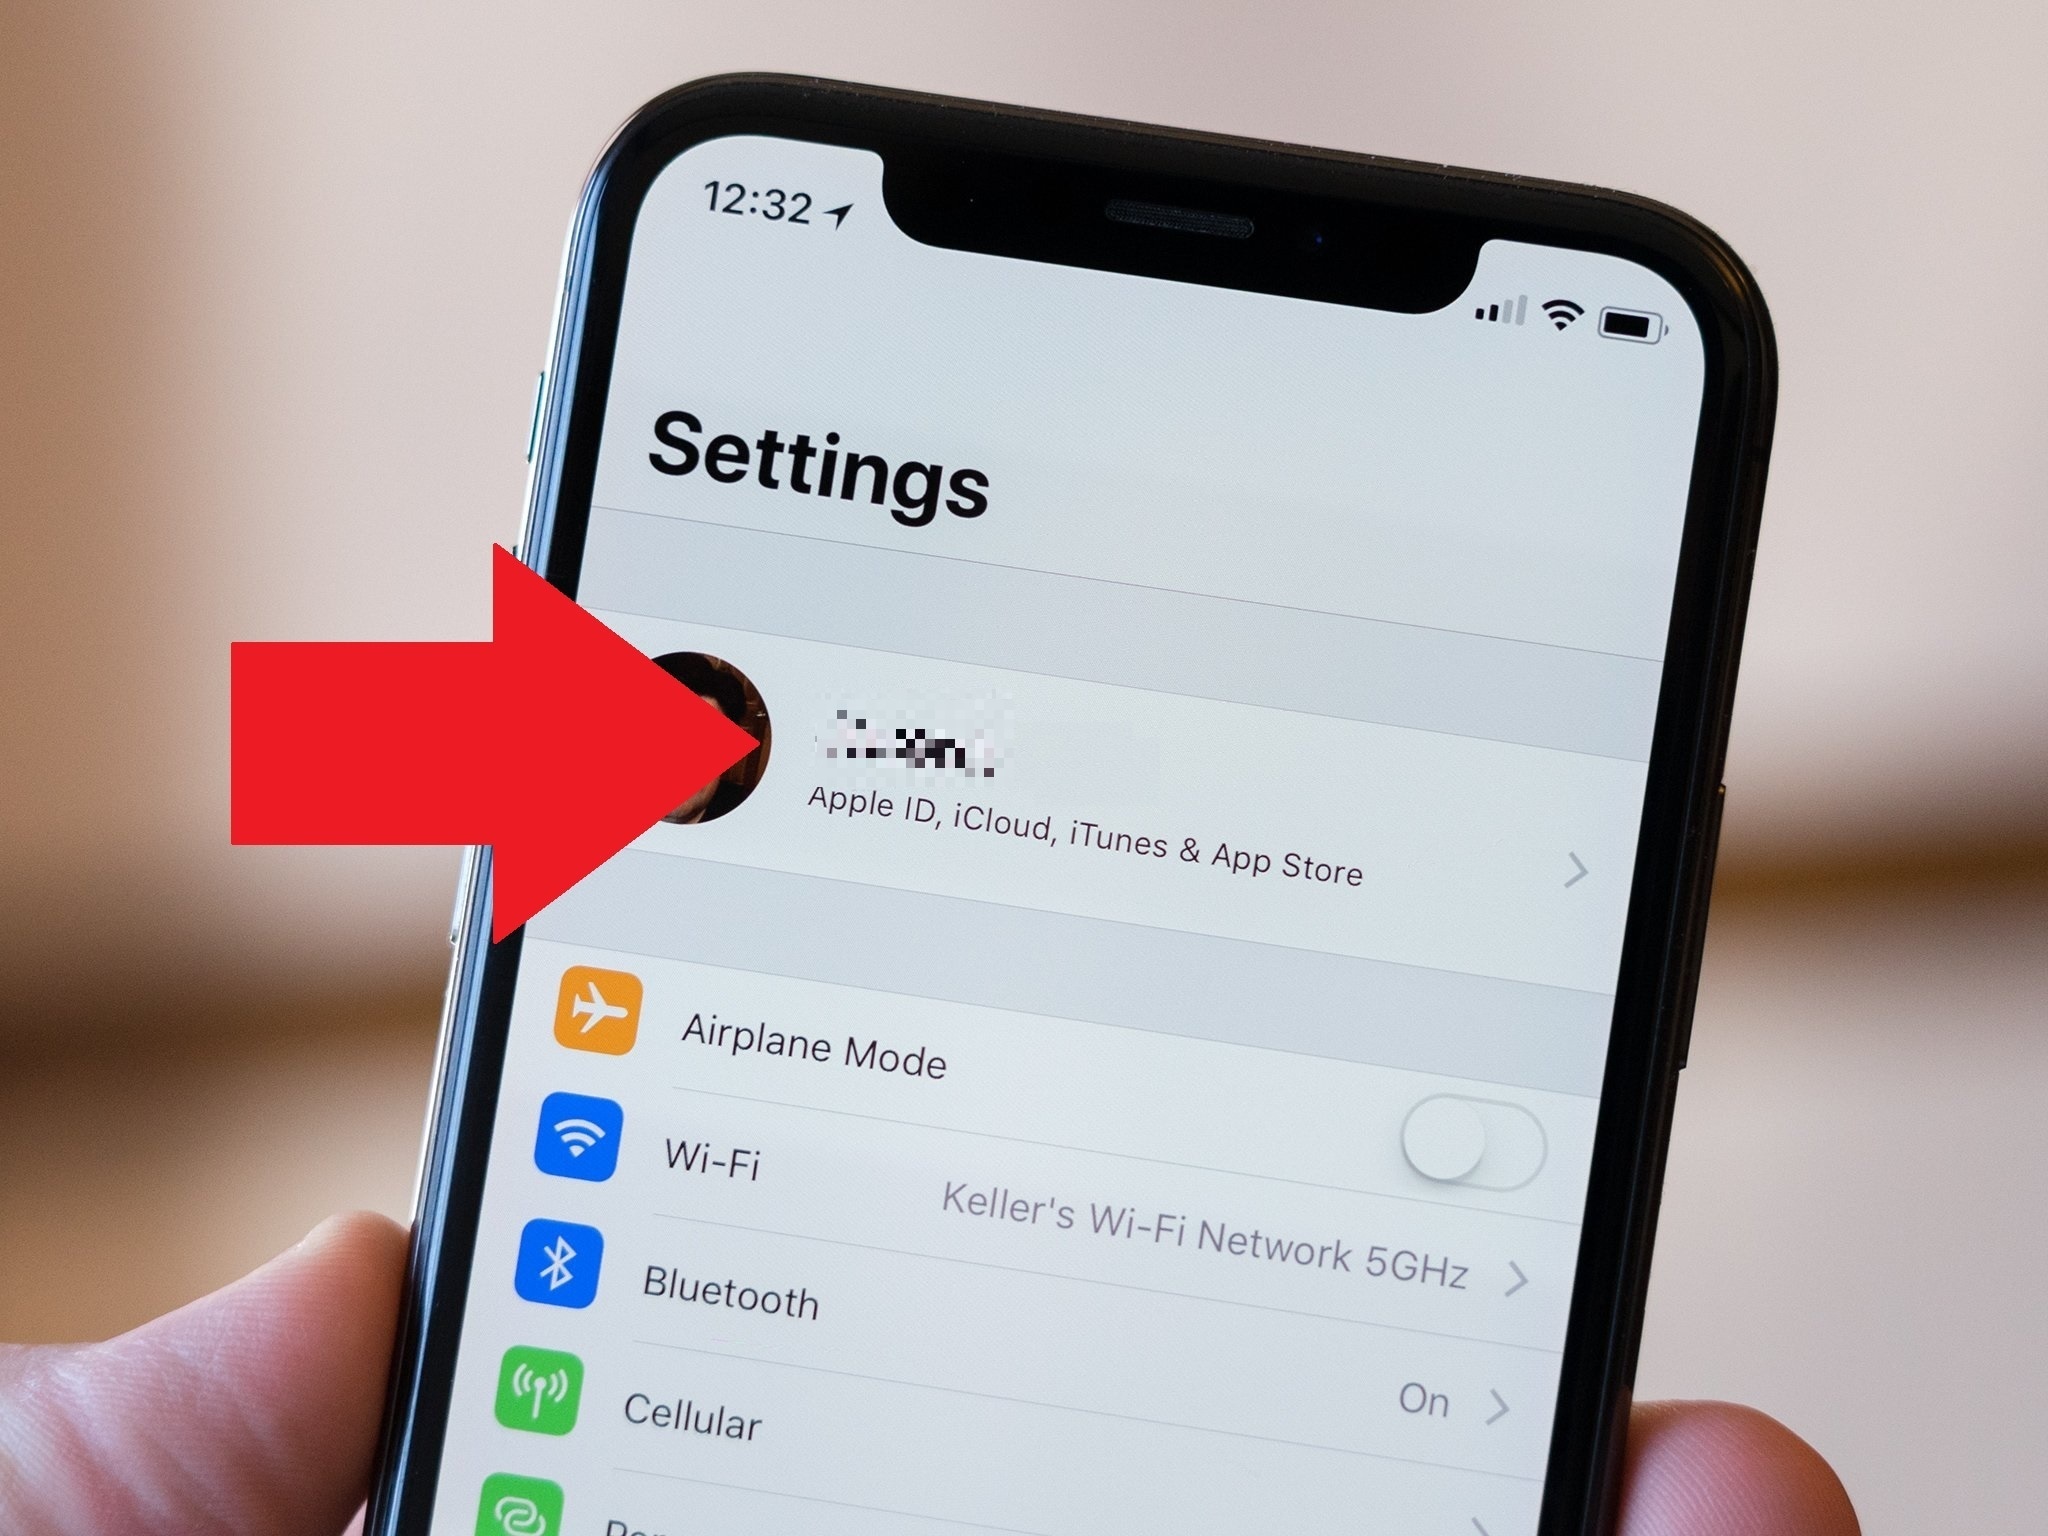
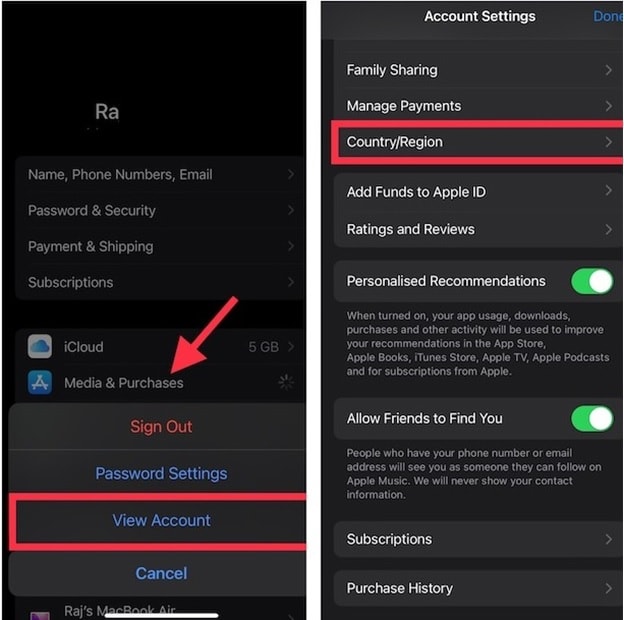
- Step 1: Open Settings on your Apple iPhone 15 Plus and tap your Apple ID at the top.
- Step 2: Tap on Media & Purchases > View Account. Sign in with your Apple ID. Next, Tap Country/Region > Change Country or Region and choose your desired country. Follow the on-screen prompts.
Method 2: Changing Apple ID Region via Mac/Windows
To change your Apple ID region via Mac/Windows, follow these steps:
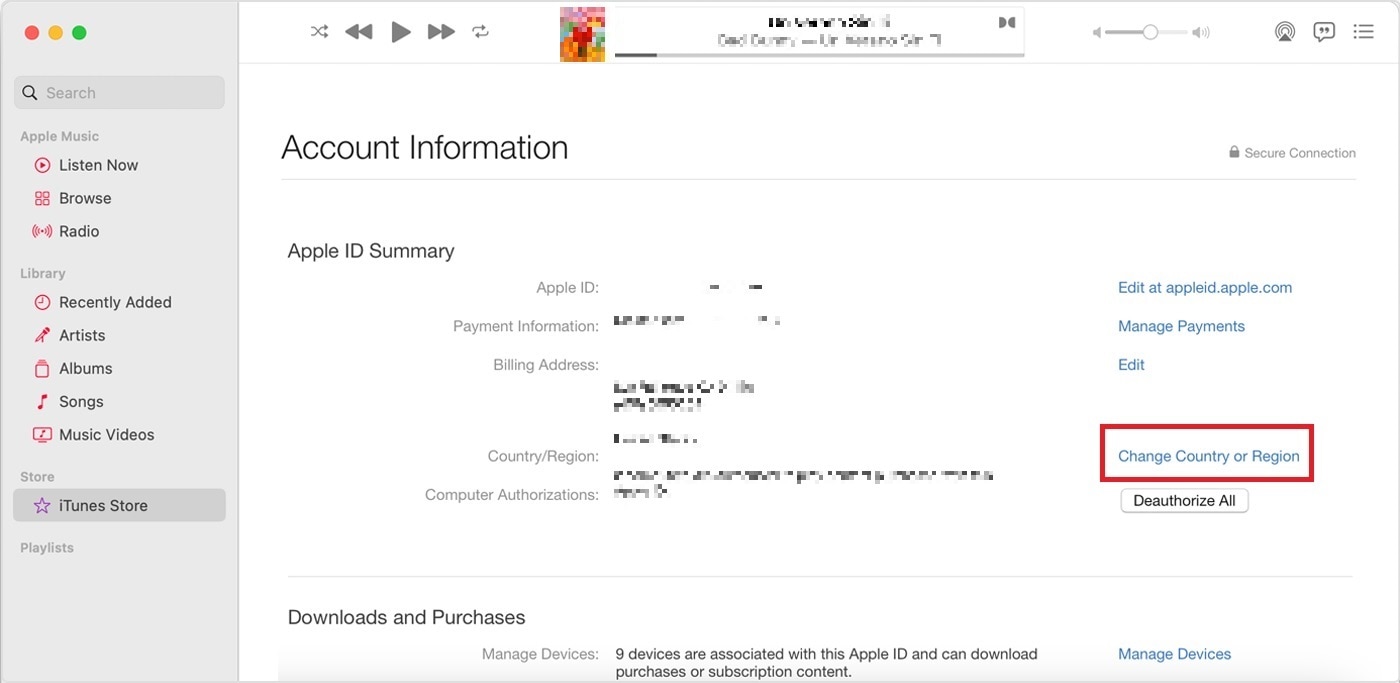
- Step 1: Open iTunes (on Windows) or Music (on Mac). Sign in with your Apple ID.
- Step 2: Go to Account > View My Account. Under Apple ID Summary, click Change Country or Region. Click your desired country and follow the instructions.
Method 3: Changing Apple ID Region via Web
The steps below are to change your Apple ID region via the web.
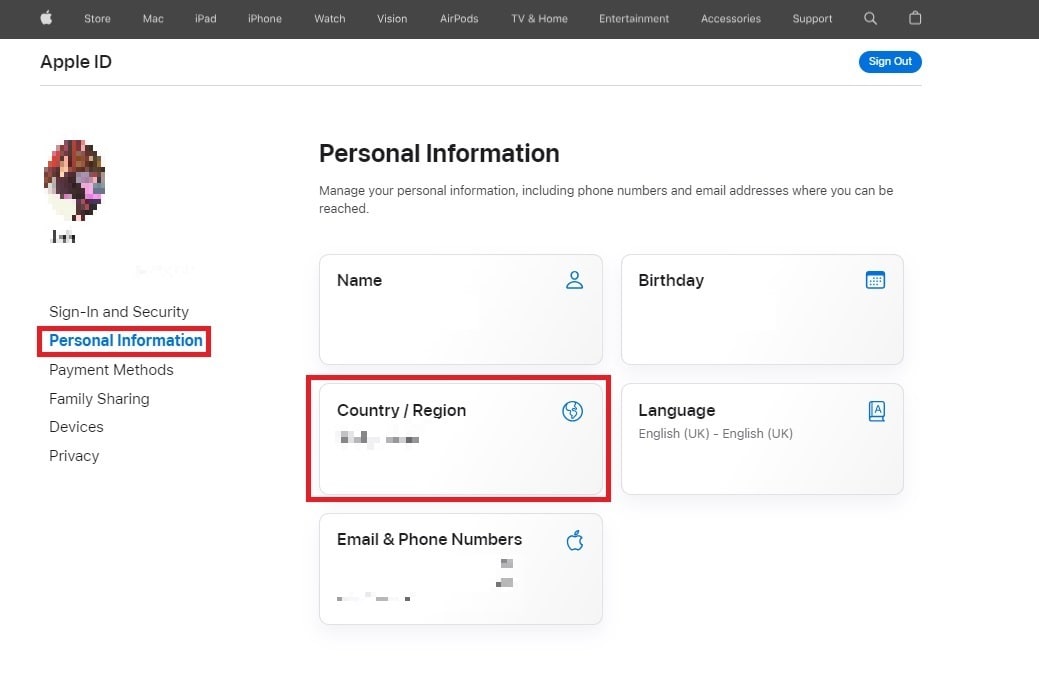
- Step 1: Open a web browser on your desktop or mobile device. Next, go to appleid.apple.com. Sign in with your Apple ID.
- Step 2: Under Personal Information, click the Country/Region button. Next, click the Change country or region and choose your preferred country.
Method 4: Leaving a Family-Sharing Group
If you’re part of a family sharing group, you need to leave the group before you can change your App Store country. To leave a family sharing group and change your app store country, follow the steps below.
- Step 1: Open the Settings app on your Apple iPhone 15 Plus and tap Family.
- Step 2: Tap your name and tap Stop Using Family Sharing. Once you have left the family sharing group, you can change your App Store country by following the aforementioned manners.

Method 5: Cancel All Subscriptions
If you have any subscriptions, you must cancel them before changing your App Store country. Here are the steps below.
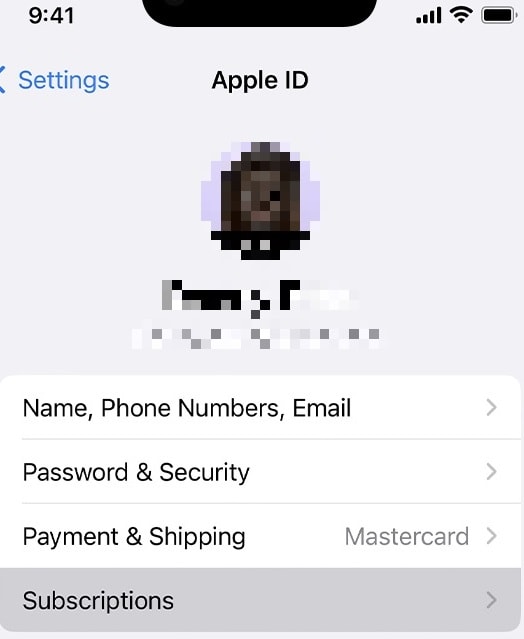
- Step 1: Open Settings on your Apple iPhone 15 Plus. Next, tap your name at the top of the screen.
- Step 2: Tap Subscriptions > Cancel Subscription. Once you cancel all of your subscriptions, you can change your App Store country.
Method 6: Using a VPN
You can also use a VPN to change your App Store country. However, this method is not recommended, as it can be unreliable and may result in your account being banned. Here are the steps below.
- Step 1: Install a VPN app from the App Store.
- Step 2: Connect to a server in your desired country. Open the App Store and see content from the connected country.
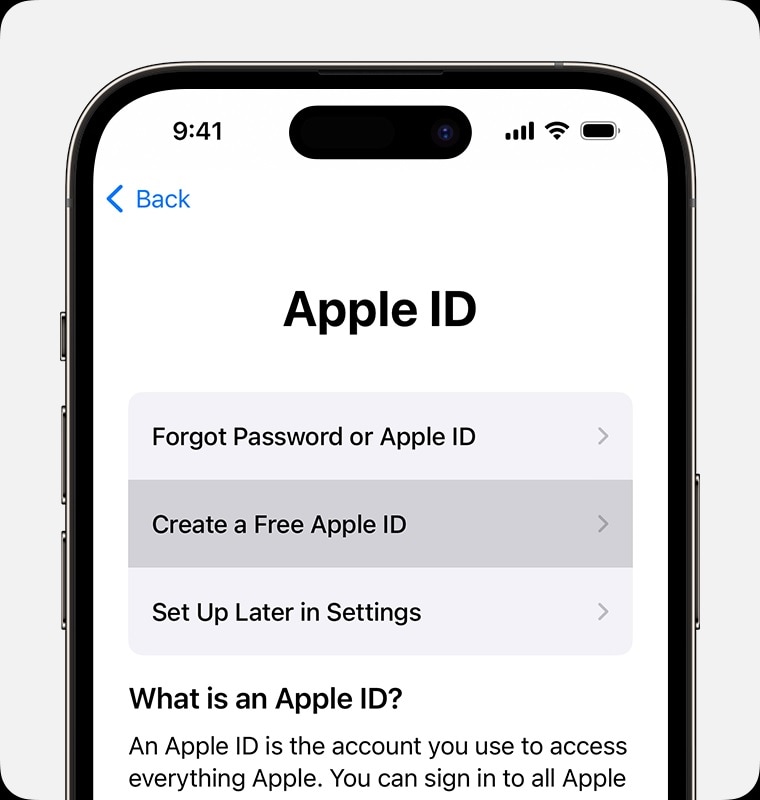
Method 7: Creating a New Apple ID
Finally, you can create a new Apple ID account with the country you want your App Store country to be. Here are the steps below.
- Step 1: Sign out of your current Apple ID in Settings.
- Step 2: Create a new Apple ID with your desired country as the region.
Sometimes, changing your App Store country can lead to issues. It can lock you out of your Apple ID, or you’re forgetting your password. During these events, it can restrict your App Store access. In such cases, a tool like Dr.Fone - Screen Unlock (iOS) can come to the rescue.
Part 3. Changing Countries Not Going Your Way? Use Wondershare Dr.Fone – Screen Unlock
Dr.Fone - Screen Unlock (iOS) helps you regain access to your Apple ID and fix any login-related problems. It ensures that you can continue enjoying your App Store without any hindrance. It’s a safe and reliable software tool that is used by millions of people to unlock their devices. It is also easy to use, even if you are not tech-savvy.
Key Features
Dr.Fone - Screen Unlock (iOS) is a powerful tool that can help you to:
- **Unlock iOS Device Without Passcode.**Regain access to your locked iPhone or iPad without needing the passcode.
- **Remove All Lock Screen Types.**Versatile unlock support for 4-digit/6-digit passcodes, Touch ID, and Face ID lock screens.
- **Unlock Apple ID Without Password.**Effortlessly unlock your Apple ID without requiring the password, simplifying access.
How To Unlock Your Apple iPhone 15 Plus in Seconds
Dr.Fone’s Screen Unlock tool offers a streamlined solution to get you back into your device within seconds. Here’s a simple guide on how to do it.
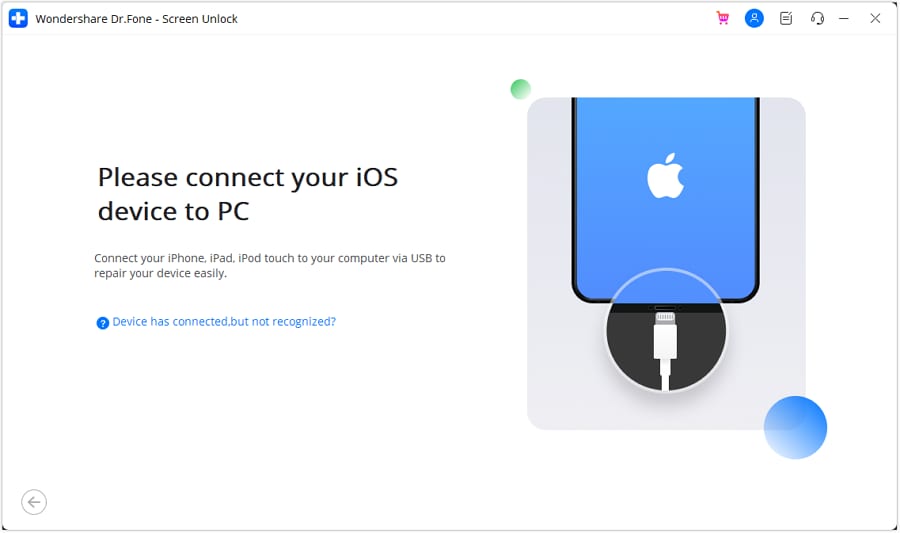
- Step 1: Download Dr.Fone - Screen Unlock (iOS) on your computer and install it. Next, launch the app.
- Step 2: Connect your locked Apple iPhone 15 Plus to your computer using a compatible USB cable. Afterward, click Start on the program. Follow the on-screen prompts on Dr.Fone. It will tell you to boot differently into DFU mode. Once your device enters DFU mode, Dr.Fone will present device details, including phone generation, iOS version, and more.
- Step 3: Dr.Fone will download the necessary firmware for your device. Follow the on-screen instructions to finish the unlocking process. Once done, Dr.Fone will remove the activation lock from your device.

Conclusion
Changing your App Store country can open doors to region-specific apps, exclusive content, and timely updates. However, it’s important to consider the potential drawbacks, such as losing previous purchases.
When changing the App Store country on your Apple iPhone 15 Plus, it’s important to consider Apple ID access issues. You never know when you will get locked out or suddenly forget your password. Wondershare Dr.Fone - Screen Unlock (iOS) offers a reliable solution during these instances. The tool ensures uninterrupted access to your App Store and Apple ID account, making it a valuable resource for managing your digital experience seamlessly.
Also read:
- [Updated] 2024 Approved Event Harmony Sourcing Perfect DJ Video Templates
- 7 Top Ways To Resolve Apple ID Not Active Issue For Apple iPhone 14 Pro
- Comparing MP4 Recorders - The Latest Edition for 2024
- Complete Guide For iPhone 8 Lock Screen
- Forgot iPhone Passcode Again? Unlock Apple iPhone 12 Without Passcode Now
- How Do You Unlock your iPhone 6s? Learn All 4 Methods
- How to Repair Broken video files of Realme 11 Pro?
- How To Unlock SIM Cards Of Xiaomi Redmi 12 5G Without PUK Codes
- In 2024, 5 Most Effective Methods to Unlock Apple iPhone 14 Pro in Lost Mode
- In 2024, 5 Ways to Transfer Music from Realme 12+ 5G to Other Android Devices Easily | Dr.fone
- In 2024, Budget-Conscious Broadcayer's Guide to Cheap Mics
- In 2024, How To Fix Apple iPhone 6s Plus Unavailable Issue With Ease
- Paying Monthly for Premium Apple Knowledge: A Potential Opportunity at Only $20 a Pop, According to ZDNet.
- Revolutionary AI for Artistic Photography for 2024
- Title: How to Unlock Apple iPhone 15 Plus Passcode without Computer?
- Author: Sophia
- Created at : 2024-10-17 20:19:12
- Updated at : 2024-10-20 17:03:32
- Link: https://ios-unlock.techidaily.com/how-to-unlock-apple-iphone-15-plus-passcode-without-computer-by-drfone-ios/
- License: This work is licensed under CC BY-NC-SA 4.0.