
In 2024, Complete Fixes To Solve Apple iPhone X Randomly Asking for Apple ID Password
Complete Fixes To Solve Apple iPhone X Randomly Asking for Apple ID Password
Apple ID is a crucial part of the Apple ecosystem that enables users to access a wide range of services and applications. It is a unique identifier that links all Apple devices, services, and applications together.
However, sometimes iPhone users may encounter an annoying issue where their iPhone randomly asks for an Apple ID password without any apparent reason. This problem can be frustrating and disruptive! It can interrupt your workflow and prevent you from using your phone normally.
Fortunately, we have comprehensive solutions to help you resolve this persistent issue once and for all. Let’s dive in and return your device to its happy, non-nagging self!
Part 1: Common Causes for Random Apple ID Verification Pop Up
The random Apple ID verification pop-up can be caused by a range of factors, from simple settings misconfigurations to more complex account-related issues. So it’s important to identify the root cause to find the appropriate solution that addresses the underlying issue.
Take a closer look at these common reasons why your Apple iPhone X may be randomly asking for your Apple ID password:
- iOS Software Update****:
One of the most frequent causes of the Apple ID password prompts is when your Apple iPhone X has undergone a software update. The update may require you to re-verify your Apple ID credentials to ensure security and privacy.
- iCloud Account Settings****:
If the settings are not in sync with your Apple ID credentials or if there are inconsistencies, it can trigger repeated password prompts.
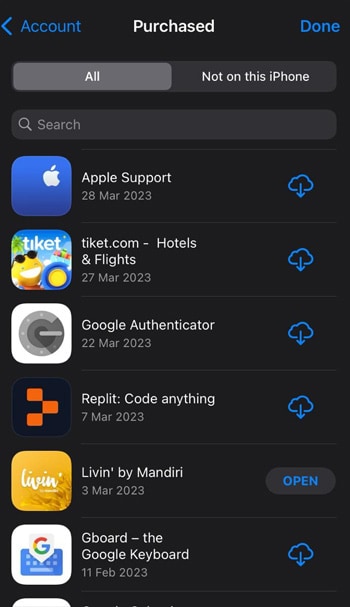
- App Store/iTunes Purchase****:
If there was an issue when you purchased or downloaded something, your Apple iPhone X might prompt you to verify your Apple ID to complete the purchase.
- iCloud Keychain****:
The iCloud Keychain is a feature that stores your passwords and other sensitive information across your Apple devices. If there are inconsistencies or conflicts with the iCloud Keychain data, it may prompt you to verify your Apple ID password.
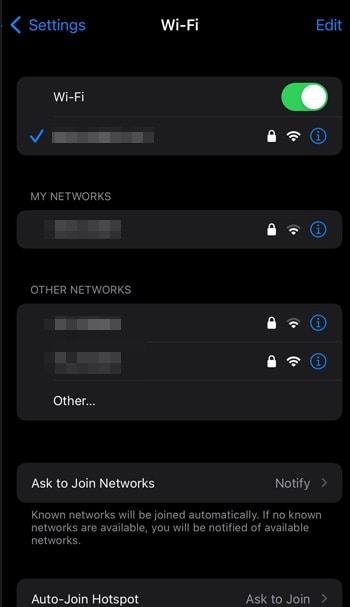
- Network Connectivity****:
Sometimes, network connectivity issues can cause the Apple ID password prompts to appear repeatedly. If your Apple iPhone X is struggling to establish a stable internet connection, it may trigger verification prompts.
These are some of the common causes that can trigger the random Apple ID verification pop-up on your Apple iPhone X. Now, we’ll delve into the solutions to help you resolve this matter.
Part 2: Solutions To Stop iPhone Randomly Asking for Apple ID Password
After we’ve concluded the “Why does my iPhone keep asking for my apple ID” question, let’s explore solutions to help you end this annoyance. Here are eight methods that you can try to stop your Apple iPhone X from repeatedly asking for your Apple ID password:
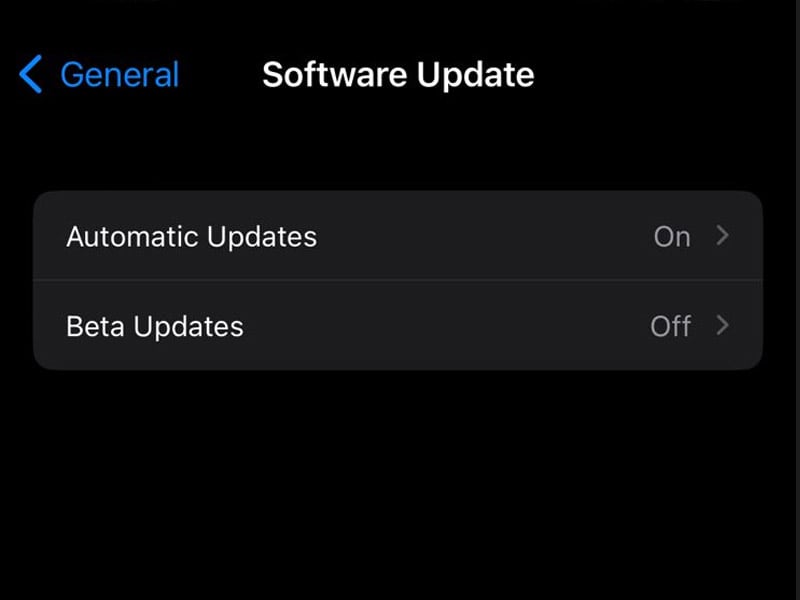
Method 1: Update iOS.
Ensure that your Apple iPhone X is operating on the most up-to-date iOS version. Software updates usually incorporate bug fixes and security improvements that can address the problem effectively.
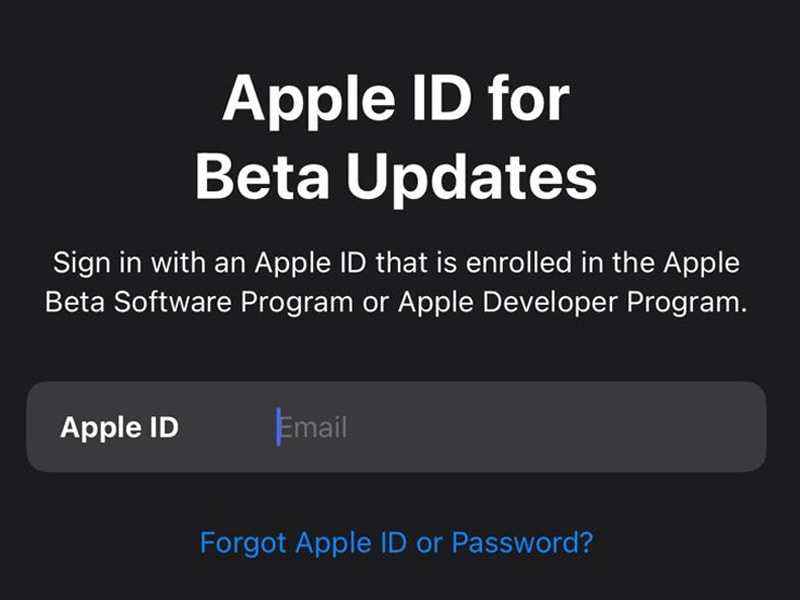
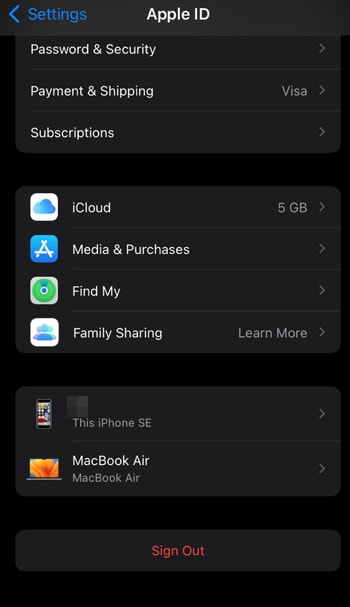
Method 2: Sign Out and Sign In to Apple ID.
Sign out and then sign back in your Apple ID. This method can refresh the credentials and resolve any authentication issues.
Method 3: Remove Apple ID with Wondershare Dr. Fone
If you forget your Apple ID and cannot access your device, Wondershare Dr. Fone’s Screen Unlock tool can help. This powerful tool lets you remove your Apple ID from your device, even if Find My Service is enabled.
Before we begin, it’s crucial to remember that this process will erase all data from the Apple iPhone X device. Now, follow the steps below if your iPhone keeps asking for an Apple ID password:
- Step 1: Launch the Dr. Fone Screen Unlock
Open Wondershare Dr. Fone on your computer and navigate to the Toolbox > Screen Unlock to activate the feature.
- Step 2: Choose Remove Apple ID
In the next window, select the option to Remove Apple ID to initiate the process of removing your Apple ID.

- Step 3: Connect Your Device
Link up your iOS device to the computer using a USB cable. The software will display the connectivity status on the next screen. Click the Unlock Now button to proceed.

- Step 4: Confirm Screen Lock and Two-Factor Authentication
The software will ask if your device has a screen lock. Confirm whether you have a screen lock enabled on your device by clicking Yes. Then, it will also confirm if your device has Two-Factor Authentication enabled.
- Step 5: Put Device in Recovery Mode
The program will display on-screen guidelines to help you put your device in Recovery Mode. Follow the instructions that match your iOS model. If it doesn’t work, you can also try DFU Mode by clicking Try DFU Mode on the bottom-left of the screen. Then, follow the instructions.

- Step 6: Recognize the Apple iPhone X device Model and Select System Version
Once your device is in Recovery Mode, you can see its details on the next screen. Then, select the System Version and Start to proceed. You can manually set the details if there are any differences in recognition.

- Step 7: Download iOS Firmware
The software will start downloading the corresponding iOS firmware. If the firmware download is slow, you can copy the link and download the iOS firmware.
- Step 8: Confirm the Prompt to Unlock
Once you download the firmware, it will be verified by the software. Click Unlock Now until a prompt window appears. It will ask you to enter a code to continue. Enter the code and click Unlock to start the process.

- Step 9: Monitor Apple ID Removal Progress
Keep your device connected and avoid any disconnections. Once the Apple ID is unlocked, the software will prompt the completion. Click Done to conclude the process. If the Apple ID is not unlocked, you can click Try Again.

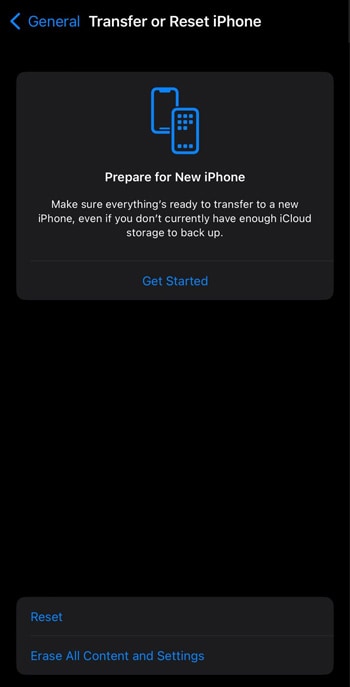
Method 4: Reset iCloud Account SettingsResetting your iCloud account settings can help clear any inconsistencies or conflicts that may be triggering the password prompts. Open Settings, and navigate to General > Transfer or Reset Phone > Reset.
Method 5: Check App Store/iTunes Purchase
Verify and complete any pending app purchases or downloads from the App Store or iTunes. If there was an issue with a previous transaction, resolving it can stop the password prompts.
Method 6: Disable iCloud Keychain
Turning off iCloud Keychain and then turning it back on can help refresh the data and resolve any syncing issues. Go to Settings > [Your Name] > iCloud > Keychain > Toggle off and on.

Method 7: Check Network Connectivity
Make sure that your Apple iPhone X has a reliable internet connection. Weak or unstable networks can trigger password prompts. Try to switch between different Wi-Fi networks or use cellular data.
Method 8: Contact Apple Support
If none of the above methods work, contacting Apple Support can be a viable option. They can provide further assistance and guidance in resolving the issue.
These are some of the methods that can help you stop your Apple iPhone X from randomly asking for your Apple ID password. Don’t forget to always back up your data before changing your Apple iPhone X settings.
If the issue persists, it’s recommended to visit an authorized Apple service center.
Bonus Part: How To Get Your Apple ID Password Back if You Forget It
It’s not uncommon for people to forget their Apple ID password at times, especially with the ever-increasing number of online accounts we manage. But fret not! There are reliable password manager tools available, such as Dr.Fone Password Manager. It can help you handle this issue seamlessly and regain access to your Apple ID.
Let’s explore some of the Dr.Fone Password Manager tool:
- Password Recovery:
Allows you to recover your Apple ID password quickly and easily, even if you’ve forgotten it. With its intuitive interface and step-by-step guidance, you can reset your Apple ID password hassle-free.
- Data Security:
It prioritizes data security, ensuring that your Apple ID password and other credentials are securely stored and encrypted. It provides a safe and reliable way to manage passwords without compromising privacy.
- iCloud Backup and Restore:
It enables you to create a backup of your iCloud data, including your Apple ID password, and restore it whenever needed. This feature can be handy if you need to retrieve your password from a previous backup.
- Cross-Platform Compatibility:
It is compatible with various platforms, including iOS, Android, Windows, and Mac, making it a versatile password management solution that you can use across different devices.
If you forget your Apple ID password, Wondershare Dr.Fone can be a valuable tool to help you retrieve it and manage your passwords securely. Its features make it a comprehensive solution for handling password-related issues.
It’s essential to use secure and unique passwords for your accounts. Then, consider using a reliable password manager like Dr.Fone Password Manager to simplify your password management process.
3 Ways to Unlock Apple iPhone X without Passcode or Face ID

“How to unlock Apple iPhone X without passcode? I have forgotten the passcode of My Apple iPhone X and can’t seem to unlock it after consecutive efforts.”
If you have been locked out of your Apple iPhone X due to different reasons, then you have come to the right place. Lately, many users have told us that their Apple iPhone X won’t unlock as they have forgotten the new passcode or bought someone else’s device. No matter the situation, you can learn how to unlock Apple iPhone X without a passcode or Face ID.
As an expert, I tried and tested these methods to unlock iOS devices without using the pre-set passcode. So what are you waiting for? Read on and learn how to unlock iPhone X if you forgot its passcode.
Part 1: How to unlock Apple iPhone X with a professional tool?
One of the easiest solutions to bypass a locked iPhone is using a dedicated tool like Dr.Fone - Screen Unlock (iOS) . Developed by Wondershare, the tool provides a simple click-through process that can unlock iOS devices easily. It doesn’t matter if the Apple iPhone X device is locked after consecutive wrong attempts or you have just forgotten your device’s passcode tool can help you in different situations.
Note: This tool may erase all your data from your iOS devices after unlocking
It is compatible with all the leading iOS devices, including the latest models like iPhone 15. Without any prior technical experience, you can use this tool and fix an Apple iPhone X that won’t unlock. Here are some main features of this unlocking tool.
Dr.Fone - Screen Unlock
Remove iPhone Lock Screen without Hassle.
- Unlock an iPhone whenever the passcode is forgotten.
- Save your Apple iPhone X quickly from the disabled state.
- Works for all models of iPhone, iPad, and iPod touch.
- Fully compatible with the latest iOS version.


3981454 people have downloaded it
Prerequisites:
Before you proceed, you need to turn off Find My iPhone if it’s enabled. To do this, go to iCloud’s website, log in to your Apple account, and select the “Find my iPhone” service. From all the provided lists of the connected devices, remove your Apple iPhone X to disable the Find my iPhone service.
Follow these steps to learn how to unlock Apple iPhone X without a passcode.
Step 1: Connect your iOS device to the system
Download Dr.Fone - Screen Unlock (iOS) on your Mac or Windows PC and launch the application. Then go to Toolbox > Screen Unlock > iOS > Unlock iOS Screen to launch the specific tool on a new window.

Using a lightning cable, connect your Apple iPhone X to the system. Once your Apple iPhone X is detected, click on the “Start” button to commence the process.

Step 2: Put your Apple iPhone X in Recovery mode.
You need to put your Apple iPhone X in the Recovery mode using the right key combinations. The key combinations would be different for various iPhone models. The interface also provides quick instructions to do the same. Here’s how you can put your Apple iPhone X in Recovery mode.

Step 3: Provide basic details of your device
As soon as your Apple iPhone X would enter the Recovery mode, the application will detect it automatically. It will display the following window to provide basic details related to your Apple iPhone X, like its model, iOS version, etc.
After proving the relevant information, click on the “Download” button and wait for a while as the application would download the firmware update for the Apple iPhone X device.
Step 4: Unlock your device.
Once the respective firmware update has been downloaded, you will be notified. To fix your Apple iPhone X won’t unlock, click on the “Unlock Now” button.

Sit back and wait for a while as the application will restart your device. There won’t be any lock on the Apple iPhone X device now, and you can access it without any trouble.
In this way, you can learn how to unlock iPhone without a passcode or Face ID. Though, you should know that the existing data on your phone would be erased. Sadly, there is no solution to unlock an iOS device without deleting its existing data. Therefore, this is a risk you need to take if you wish to unlock your iOS device.
 safe & secure
Part 2: How to unlock Apple iPhone X with iTunes?
Just like Dr.Fone - Screen Unlock (iOS), you can also use iTunes to fix the Apple iPhone X won’t unlock the problem. Though, the solution is not as user-friendly or effective as Dr.Fone’s. You need to take care of some prerequisites before following this technique. Also, to unlock your device with iTunes, you need to put your phone in recovery mode. The key combination would slightly vary among different iPhone models.
Prerequisites:
- Just like Dr.Fone, this technique will only work if the Find My iPhone service is not enabled on your Apple iPhone X. You can go to iCloud’s website and disable the feature under the “Find my iPhone” option.
- Also, you need an updated version of iTunes to make it work. This is because an older version of iTunes won’t be compatible with iOS 13. Go to the iTunes menu, check for updates, and follow the simple on-screen instructions to update iTunes.
Step 1. Put your phone in the Recovery Mode
After meeting the basic prerequisites, you need to put your Apple iPhone X in recovery mode by following these steps:
- Connect your Apple iPhone X to the system (Mac or Windows) and launch an updated version of iTunes on it.
- Press the Volume Up key quickly. That is, press it only for a second and release it.
- Similarly, quick-press the Volume Down key as well.
- Once the Volume Down key is released, press the Side button.
- Keep pressing the Side key until the connect-to-iTunes symbol would appear on the screen.
Make sure that all the key combinations should be pressed consecutively. That is, you should not take an evident pause in between.

Step 2. Restore Apple iPhone X in Recovery Mode
As soon as your phone would enter the recovery mode, iTunes will detect an issue with your device and display the following prompt. Click on the “Restore” option and follow the simple on-screen instructions to reset your phone entirely.

Once your phone would be restored, it will be turned on without any existing lock.
Part 3: How to unlock Apple iPhone X without a passcode using iCloud?
Another way to learn how to unlock Apple iPhone X without a passcode or Face ID is by using iCloud. Instead of turning off the Find my iPhone service, we will use it to erase the Apple iPhone X device remotely. Though, you should know your Apple ID and password to implement this technique.
- Go to iCloud’s official website and log in with your Apple ID and password.
- From here, click on the “Find my iPhone” service.
- It will provide a list of all the Apple iPhone X devices linked to your Apple account. Select your Apple iPhone X.
- Click on the “Erase” button and answer the security question correctly to confirm your choice.

If you get a prompt on your phone regarding the respective actions, agree to it and wait for a while as your phone would be restarted. Since this will erase all the existing data on your phone, you can later use a backup file to restore the lost content.
Part 4: Does the tricking Siri method unlocks Apple iPhone X?
Lately, there have been a lot of articles about this method. As an expert, I would like to clear the air – you can’t trick Siri to unlock your Apple iPhone X. In some iPhone models, we could trick Siri into unlocking our device and entering the home page without bypassing the lock screen. The trick worked for a few devices and was an instant hit as it retained our data while unlocking our device.
It was a loophole from Apple’s end, which was present in iOS 10.3. Therefore, if your device is still running on iOS 10.3, then you might give it a try. Sadly, the only way to bypass an Apple iPhone X that won’t unlock now is the restore your device (erasing its existing content). Since Apple iPhone X currently runs on iOS 14, the trick won’t work.
Part 5: Tips for protecting your Apple iPhone X X/Apple iPhone X from being unlocked by thieves
It would help if you always protected your Apple iPhone X from being misused by others. If your device is lost or stolen, you should make sure that the perpetrator won’t be able to unlock it. If they can bypass the security lock on your phone, then they can easily resell it. To protect your device, we recommend following these suggestions.
5.1 Enable Find my iPhone
This is the most important thing to do to protect your phone from being misused. As you can see, a perpetrator can only unlock your device if the Find my iPhone service is turned off. Therefore, you should make sure that the feature is on. To turn it off, they would need to access your iCloud account first, which would require a lot of effort.
Just go to the iCloud settings on your phone and turn on the “Find my iPhone” service. Also, enable the “Send Last Location” feature. This will automatically send the last location of your device whenever its battery would be critically low.
5.2 Use Find my Friends
Just like Find my iPhone, Find my Friends is a native location-sharing feature developed by Apple. You should have at least 2-3 people with whom you are sharing your location. Go to the Find my Friends app on your device, enable the location sharing feature, and add your close friend and family.
In this way, if your device is stolen, you can track it immediately with the help of your friends.

5.3 Enable two-factor authentication
Your iCloud account should be protected at any cost. By infiltrating your iCloud account, anyone can erase your phone remotely. It is recommended to enable the two-factor authentication on your account to strengthen its security. Go to your device’s Settings > Apple ID > Passcode & Security and enable the two-factor authentication feature.
5.4 Erase data after failed unlocking attempts
This is a crucial setting that you should enable to protect your data from unknown perpetrators. If someone tried to unlock your device and get 10 failed attempts, your data would automatically be erased from your phone.
Go to Settings > Face ID & Passcode and turn on the “Erase Data” option. Though, if you have enabled the option and have forgotten the passcode of your phone, then you should be alarmed.

When you know how to unlock Apple iPhone X without the passcode, you can easily fulfill your requirements. Out of all the provided options, Dr.Fone - Screen Unlock (iOS) is recommended. This is because using the Dr.Fone toolkit is extremely easy. You won’t face any compatibility issues or need to have the technical experience to use this reliable tool. Try it for free and download it on your system to bypass a locked Apple iPhone X right away.
safe & secure
Is Your Apple iPhone X in Security Lockout? Proper Ways To Unlock
Apple has strict mechanisms to prevent unauthorized access and safeguard valid users’ data. If you are facing a security lockout issue on your Apple device, it means you have entered the wrong passcode multiple times.
To bring back your Apple iPhone X in a working state, this guide provides some authentic methods to fix security lockout iPhone errors. Moreover, you will also find an advanced tool here that helps to resolve the security lockout at a high success rate.

Part 1. Understanding Security Lockout in iPhone: What It Is?
Security lockout error appears when you try entering a wrong passcode several times. That is when you have no chance left to enter the passcode, so you should be aware of the number of attempts.
Events to Security Lockout
The security lockout issue does not appear immediately on your Apple iPhone X. The points below give insights about the streak of events that take your Apple iPhone X/iPad to security lockout error:
- Your Apple iPhone X only vibrates and shows no error till 5 wrong password attempts.
- When you enter an incorrect password 6 times consecutively, your Apple iPhone X will get disabled for at least 1 minute to try the next passcode.
- If you input the wrong password 7 times on your Apple iPhone X, it shows an “iPhone is disabled” error for 5 minutes.
- After the 8th attempt, you will have to wait for 15 minutes to try again.
- iPhone gets disabled for at least 60 minutes after 9 consecutive wrong passcode attempts.
- After the 10th incorrect password attempt, your Apple iPhone X will get into a “Security Lockup” error that doesn’t allow you to enter the password again.
If you have encountered this issue, unfortunately, we will offer easy solutions to fix iPhone or iPad security lockout errors.
Part 2. [Easiest Way] Remove Security Lockout From iPhone Using Wondershare Dr.Fone
As you’ve gone through the entire issue of Security Lockout in iOS devices, you will need to find an appropriate solution. Wondershare Dr.Fone provides a dedicated screen unlock tool to solve all relevant iOS unlocking issues. When discovering how to unlock the Apple iPhone X security lockout, Wondershare Dr.Fone helps you resolve it in no time.
You can find the latest support of iDevice and iOS versions across the tool, which makes it a versatile option. Consequently, you can bypass all types of screen locks from your Apple iPhone X or iPad without any inconvenience. This includes support in removing the carrier and iCloud activation locks.
Key Highlights of Dr.Fone
- You can remove Touch ID, Face ID, alphanumeric passcode, and Screen Time passcode at a high success rate within a few minutes.
- When unlocking your iDevice’s lock screen, it is unnecessary to deactivate Find My services to make Wondershare Dr.Fone operate.
- It also helps to remove MDM profiles and bypass MDM lock without data loss.
Steps To Unlock iPhone Screen Using Wondershare Dr.Fone
Do you have a query about how to get out of security lockout on your Apple iPhone X with no effort? Wondershare Dr.Fone offers a legitimate and easy method to unlock your Apple iPhone X screen within no time:
- Step 1. Initiate and Select the Screen Unlock Feature
First, run Wondershare Dr.Fone on your computer and connect to your Apple iPhone X via cable. Open the “Toolbox” and select the “Screen Unlock” option.

- Step 2. Advance to Unlocking iOS Screen
After that, choose “iOS” to run the required process. On the next window, select the “Unlock iOS Screen” option. The tool will take you to the next screen, and there, click the “Start” button to proceed with unlocking the iOS device. Continue to put your iDevice into Recovery Mode as per the provided instructions on-screen.
- Step 3. Set Device Details and Continue To Unlock
Your “Device Model” will be recognized automatically in Wondershare Dr.Fone. Select the “System Version” and hit the “Start” button to download the related iOS firmware. After downloading, click the “Unlock Now” button to execute the screen unlocking process.
- Step 4. Verify iOS Firmware To Complete the Process
Type the code in the confirmation box in the next prompt window and hit the “Unlock” option. After confirmation, a bar shows the Apple iPhone X device unlocking progress on the next screen. Once the Apple iPhone X is unlocked successfully, click the “Done” button to terminate the process.

Part 3. How To Get iPhone out of Security Lockout From iPhone Directly?
Getting your Apple iPhone X out of Security Lockout from the Apple iPhone X directly is a simple and quick technique, but it can cause potential data loss. Users owning an eSIM might get one option of keeping the SIM and its data while executing the process. While you have your latest iPhone locked out, we have provided a simple step-by-step guide explaining how to get your Apple iPhone X out of security lockout:
- Step 1. On your “iPhone Unavailable” screen, tap the “Forgot Passcode?” option in the bottom right corner. To proceed with the next step, you need to remember your Apple ID password.
- Step 2. On the next screen, enter your Apple ID password in the box to sign out your Apple ID from your Apple iPhone X. This will automatically start processing iDevice reset, removing all contents and passcodes in the Apple iPhone X device.

What if I Have Recently Changed My iPhone’s Passcode?
If you have recently changed the iDevice password, you can use your old passcode within 72 hours to sign in temporarily. After getting into your Apple iPhone X, set a new passcode immediately to complete the “Passcode Reset” process.
Part 4: How To Get iPhone out of Security Lockout Using iTunes?
iTunes can reset your Apple iPhone X to its factory settings, allowing you to bypass the screen lock. While you know this platform for music management, it has brought about many features. The following guide presents instructions about how to unlock iPhone security lockout using iTunes:
Step 1. First, launch iTunes on your computer and connect it to your Apple iPhone X. After that, put your Apple iPhone X in the Recovery Mode by following the instructions:
iPhone 6 and Earlier Models: You need to press and hold the “Home” or “Power” button simultaneously until the Recovery Mode screen appears.
iPhone 7 and 7 Plus: Proceed to press and hold the “Power” and “Volume Down” buttons simultaneously until the Recovery Mode screen appears.
iPhone 8 and Later Models: Start by pressing the “Volume Up” button, release it, and continue to press the “Volume Down” button. After releasing it, continue by holding the “Side” button until the Recovery Mode screen displays.

- Step 2. Subsequently, iTunes will detect your Apple iPhone X in Recovery Mode. A prompt will appear stating that you want to “Update” or “Restore” your Apple iPhone X. From there, choose “Restore” and hit the “OK” button to restore your Apple iPhone X.

Part 5: How To Get iPhone out of Security Lockout Using iCloud?
iCloud service is another handy method for people having queries about how to get an iPhone out of the security lockout. You should know this method removes your device data to access the phone screen again. Also, it requires the Find My option enabled on your Apple iPhone X, and you need to know your Apple ID and password to proceed. After having these details, follow the given steps below:
- Step 1. At the start, go to the official iCloud website on any device and enter your “Apple ID” and “Password” in the related boxes. After that, enter a two-factor authentication code to lead into a new window. As you select the “Grid” icon, click “Find My” to view the connected devices with that Apple ID.

- Step 2. On the next screen, choose the Apple iPhone X you want to get out of the security lockout. Then, confirm the process by clicking the “Erase This Device” option.

Conclusion
Security Lockout or “iPhone Unavailable” is a common issue that appears when you enter an incorrect passcode up to 10 times. Our detailed guide provided authentic ways to fix the security lockout iPhone using simple steps. Here, Wondershare Dr.Fone is the most recommended method because it helps recover your Apple iPhone X easily within a few steps.
Tips: Are you searching for a powerful Screen Unlock tool? No worries as Dr.Fone is here to help you. Download it and start a seamless unlock experience!
Also read:
- __Local Labor Costs__ The Availability and Rates of Skilled Electricians in the Area Can Affect Labor Costs Significantly.
- [New] 2024 Approved Maximizing Recording 4 Strategies for Facebook Live
- [Updated] Canva Expertise Ditching Image Backdrops with Ease
- 2024 Approved Discover The Tricks to Recording & Screencasting Your YouTube Views without Cash
- 2024 Approved The Latest Take on the Sony BD PLAY S3700 Review
- Did Your iPhone 12 Pro Passcode Change Itself? Unlock It Now
- Generating a Timeless TikTok Outro Feature for 2024
- How To Unlock A Found Apple iPhone XS?
- Imagem De Implantação Em Redes – Distribuir a Imagem Do SO Para Múltiplos PCs Com Segurança
- In 2024, Easy Steps on How To Create a New Apple ID Account On iPhone XR
- In 2024, How to Make the Most of Your iPhone 15 Plus Lock Screen with Notifications?
- In 2024, How To Open Your Apple iPhone 15 Plus Without a Home Button
- In 2024, How To Unlock A Found Apple iPhone X?
- In 2024, Learn How To Lock Stolen Your iPhone 13 Pro Max Properly
- In 2024, Unlock Your Disabled iPhone 15 Pro Without iTunes in 5 Ways
- In 2024, Which is the Best Fake GPS Joystick App On Motorola G54 5G? | Dr.fone
- NVIDIA HD Sound Drivers: The Modern Windows Guide
- Step-by-Step Guide to Resolve 'Required CD/DVD Drive Device Driver Is Not Found'
- Unlock iPhone XS Without Passcode Easily
- Title: In 2024, Complete Fixes To Solve Apple iPhone X Randomly Asking for Apple ID Password
- Author: Sophia
- Created at : 2025-02-11 23:36:01
- Updated at : 2025-02-14 22:32:21
- Link: https://ios-unlock.techidaily.com/in-2024-complete-fixes-to-solve-apple-iphone-x-randomly-asking-for-apple-id-password-by-drfone-ios/
- License: This work is licensed under CC BY-NC-SA 4.0.