
In 2024, How To Bypass the Required Apple Store Verification For iPhone 14 Plus
How To Bypass the Required Apple Store Verification For Apple iPhone 14 Plus
The Apple App Store is a familiar place for anyone with an iPhone or iPad. It’s where you find all sorts of useful and fun apps. However, one thing that can be a hassle is the store’s strict verification process. Every time you make a purchase, you need to go through this step.
It’s there for a good reason – to stop fraud – but it can get annoying, especially if you forget your Apple ID or have other issues. This article will explore the ways to stop the Apple Store “Verification Required” prompt, making your app downloading experience smoother.

Part 1: Why Does Apple Require Verification in the Apple Store?
When browsing the App Store on your Apple iPhone 14 Plus or iPad and looking to download the latest game or productivity tool, you might have noticed that Apple often asks for some form of verification before you can proceed with your purchase. This is not just a random step; there’s a solid reason behind it.
The primary reason Apple requires verification for App Store purchases is to ensure that you are the person authorizing the purchase. This security measure prevents unauthorized transactions and protects your account from fraud.
What does this verification usually involve? It could be entering your Apple ID password or using Face ID or Touch ID if your device supports these features. These methods are designed to confirm your identity quickly and securely.

Reasons Why the Verification Required Message Might Appear
There are several reasons why you might see an Apple Store’ Verification Required’ message when trying to download an app or make a purchase:
- New Apple ID. If you’ve just created a new Apple ID and need to download or pay for apps, Apple must verify your payment information. Thus, you’ll have to prove everything, especially on a new phone.
- **Payment method needs to be corrected.**Suppose there’s an issue with your Apple ID’s payment method, such as outdated or incorrect details. In that case, verification is required to ensure the account is secure and ready for transactions.
- Invalid credit card. Unsupported or invalid credit cards can trigger the verification notice, as Apple can’t process payments with these cards.
- Unpaid balance. If there’s an outstanding balance on your Apple ID, you can download or pay for new apps once this balance is cleared.
- Family Sharing restrictions. For those using Family Sharing, if the family organizer has placed restrictions on your account, this could result in a verification prompt.
Understanding these reasons is the first step in addressing the ‘Verification Required’ message. It’s not just a random or annoying hurdle; it’s there for your security and to ensure a smooth, safe experience when using the App Store.
Part 2: How To Fix Verification Required Prompt Using Apple ID
Having to deal with the ‘Verification Required’ prompt in the App Store can be a bit of a hassle, especially when you’re eager to get your hands on a new app or game. Fortunately, there are several methods you can use to resolve this issue, most of which are pretty straightforward and can be done right from your device. Here’s how to tackle it:
Update Payment Method
One of the most common reasons for the verification prompt is a problem with your payment method. To fix this, go to your Apple ID settings on your Apple iPhone 14 Plus or iPad. Tap your name at the top of the Settings app, then go to Payment & Shipping. You can update your payment information or add a new payment method here. Make sure the details are correct and up to date.
Check Unpaid Subscriptions
Sometimes, unpaid subscriptions can trigger the verification prompt. Tap the App Store > your profile icon, and select Subscriptions. Here, you can view all your subscriptions, active or expired. Check if there are any unpaid ones and clear any outstanding payments.

Don’t Require Password for Purchases
For less frequent purchases, you should change the settings so you don’t always have to enter your password. Go to Settings, then to Screen Time. Under Content & Privacy Restrictions, select iTunes & App Store Purchases. Here, you can change the settings to Don’t Require for purchases. However, be cautious with this method as it reduces security.

Sign Out of Apple ID and Re-Sign In
Sometimes, simply signing out of your Apple ID and then signing back in can resolve the issue. Go to the Settings app, tap your name at the top, and scroll down to Sign Out. After signing out, restart your device and then sign back in. This can help refresh your account settings and clear up any minor glitches.
Remember, these methods are about bypassing the verification process and ensuring your account is up-to-date and secure. Regularly checking your Apple ID settings and payment information can prevent many common issues with the App Store, including the frustrating ‘Verification Required’ prompt.
Part 3: How To Bypass Verification Required Prompt Without Apple ID
If you need to learn how to bypass the ‘Verification Required’ prompt in the App Store but don’t have access to the Apple ID or password, there’s an alternative approach using third-party software. One such tool that can assist in this situation is Wondershare Dr.Fone - Screen Unlock (iOS), which offers a feature specifically designed for this purpose.
Introducing Dr. Fone’s Screen Unlock (iOS) Feature
Dr.Fone - Screen Unlock (iOS) function includes an Apple ID remover tool. This feature is handy when you cannot remember your Apple ID or password but need to download apps from the App Store. Here’s a step-by-step guide on how to use this feature.
Step-by-Step Guide To Bypass Verification Without Apple ID With Dr.Fone
Here’s a complete guide on bypassing the verification required on the App Store.
Step 1: Install and open Wondershare Dr.Fone on your computer.
Step 2: Navigate to Toolbox and select Screen Unlock followed by iOS.

- Step 3: In the next window, choose Remove Apple ID to proceed.

- Step 4: A connectivity status will appear on the screen with your iOS device connected to the computer. Click Unlock Now to start the process.

- Step 5: Confirm if your iOS device has a screen lock and two-factor authentication enabled. This is crucial for the process to continue smoothly.

- Step 6: Follow the on-screen instructions to put your iOS device in Recovery Mode. If necessary, you can also opt for DFU Mode by following the provided instructions. Once in Recovery Mode, the tool will recognize your device model. You’ll need to select the correct system version to proceed.

- Step 7: The tool will download the appropriate iOS firmware for your device. After the download, it will verify the firmware.

- Step 8: After firmware verification, click Unlock Now. You’ll be prompted to enter a code for confirmation. Once entered, the unlocking process will begin.

- Step 9: You’ll receive a notification once the process is complete. You may try again if the process fails to succeed the first time.

Note: After Apple ID removal, you must re-enter a new Apple ID to access the App Store. Take note of the password now if you forgot your previous one.
Conclusion
In this article, you’ve learned how to remove ‘Verification Required’ in the App Store. The primary takeaway is to try solving the issue using your Apple ID, as this approach typically prevents data loss. However, if you’re in a tight spot without access to your Apple ID, Dr.Fone - Screen Unlock (iOS) offers a reliable alternative to bypass this hurdle.
While it’s an effective solution, always consider it a secondary option to safeguard your data. Additionally, Dr.Fone can be a handy tool for various other phone-related challenges, making it a useful resource for tackling different tech problems.
Tips: Are you searching for a powerful Screen Unlock tool? No worries as Dr.Fone is here to help you. Download it and start a seamless unlock experience!
How To Unlock Apple iPhone 14 Plus Without Passcode? 4 Easy Methods
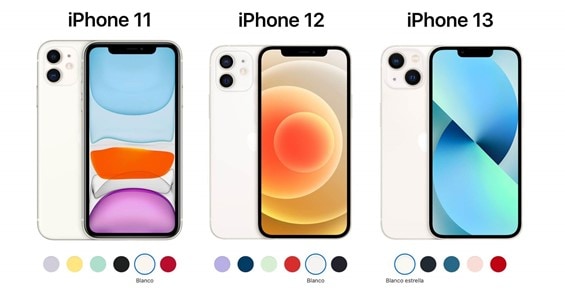
The Apple iPhone 14 Plus are high-end smartphones with many features and capabilities. However, if you forget your passcode, these phones are nothing more than a paperweight. So, if you have also forgotten your passcode, you may be wondering how to unlock your Apple iPhone 14 Plus 11/12 or 13 without a passcode.
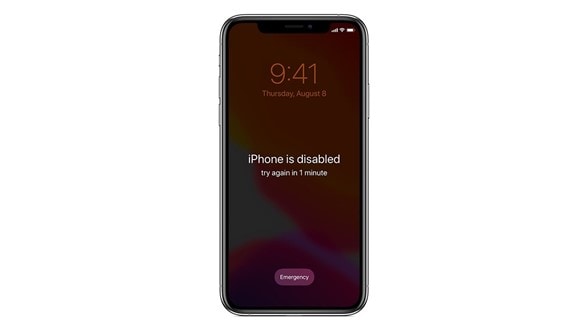
This blog post will discuss several methods to unlock your Apple iPhone 14 Plus without a passcode. So, this article will be very helpful if you have forgotten your Apple iPhone 14 Plus’s passcode or are just looking for ways to unlock iPhones without a passcode.
Is It Possible to Unlock Apple iPhone 14 Plus without a Passcode?
Unlocking an iPhone without a passcode is possible, but it’s not as simple as entering a code. Besides, there are different methods that you can follow to unlock your Apple iPhone 14 Plus on 11/12/13.
And we are going to teach all those methods with some simple steps. So, without any further ado, let’s get started.
5 Easy Ways to Unlock Apple iPhone 14 Plus without Passcode by Yourself
Use Find My iPhone
Once you have activated the Find My iPhone function, then you can try it to unlock your Apple iPhone 14 Plus without a passcode. This is an easy and effective method to complete this task. Here’s how you can do it:
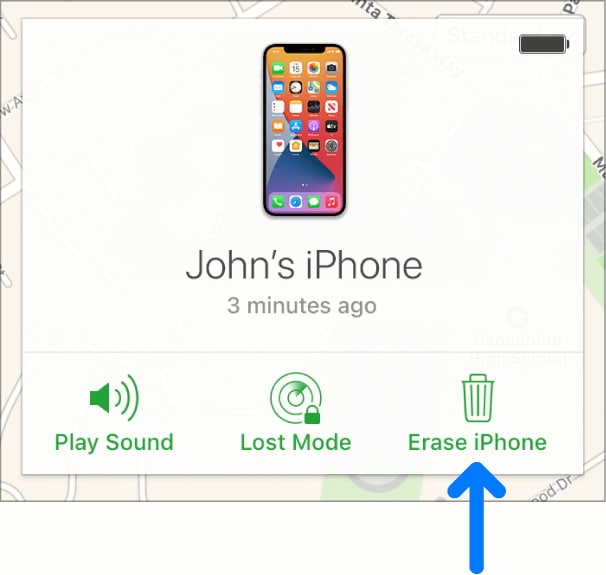
Step 1: Go to icloud.com from any web browser on your computer or another iOS device.
Step 2: Enter your Apple ID and password to log into your iCloud account.
Step 3: Click on the ‘Find My iPhone’ option.
Step 4: Select the ‘All Devices’ option at the top of the screen and select your Apple iPhone 14 Plus from the list of devices.
Step 5: Click the ‘Erase’ option to confirm your action.
Step 6: Once your device has been erased, you can set it up again and use it without a passcode.
Unlock it with iTunes
Another way to unlock your Apple iPhone 14 Plus without a passcode is by using iTunes. For this method to work, you must have synced your device with iTunes at least once. If you haven’t done that, this method won’t work. Here’s how you can use iTunes to unlock your Apple iPhone 14 Plus:
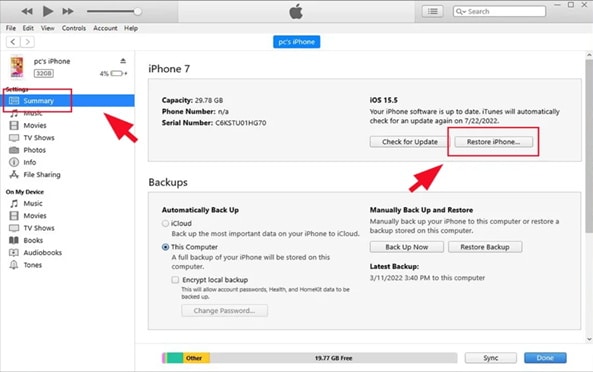
Step 1: Connect your Apple iPhone 14 Plus to the computer you previously used to sync your device with iTunes.
Step 2: Open the iTunes application on your computer and wait for it to recognize your device.
Step 3: Once recognized, your Apple iPhone 14 Plus will appear in the iTunes window. Click on the ‘Summary’ option present in the left sidebar.
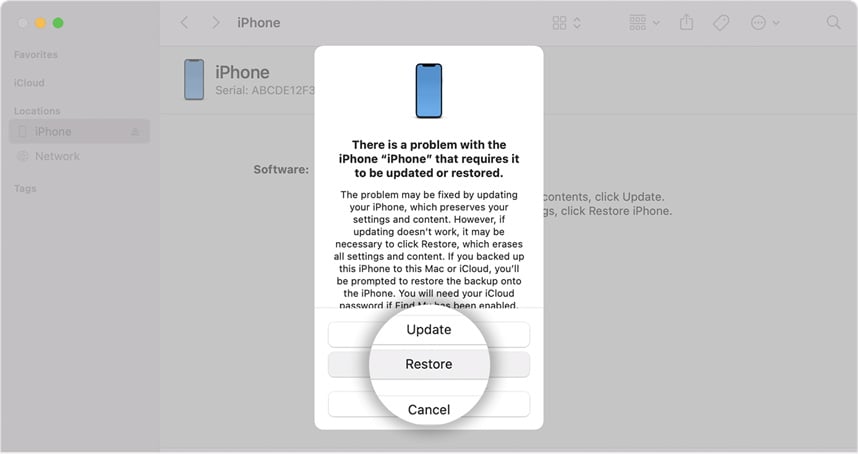
Step 4: Now, click on the ‘Restore iPhone’ button in the right sidebar.
Step 5: Confirm your action and wait for the process to be completed. Once done, you can set up your device as new and use it without a passcode.
Unlock iPhone in Recovery Mode
If you have never tried to sync your device with iTunes or used the Find My iPhone feature, you can use recovery mode to unlock your device. This more complex method will erase all the data on your device. So, ensure that you have backed up your data before proceeding with this method. Here’s how you can use recovery mode to unlock your Apple iPhone 14 Plus:
Step 1: Connect your Apple iPhone 14 Plus to the computer and launch the iTunes application.
Step 2: Press and hold down the ‘Volume’ and ‘Power’ buttons simultaneously for a few seconds.
Step 3: As soon as you see the Connect to iTunes screen, release the buttons.
Step 4: On your computer, you will now see a message that iTunes detected an iPhone in recovery mode. Click on the ‘OK’ button.
Step 5: Now, click on the ‘Restore iPhone’ button in the Summary tab.
Step 6: Confirm your action and wait for the process to be completed. Once done, you can set up your device as new and use it without a passcode.
Use Siri (only iOS version 10)
You can use this hack to unlock your Apple iPhone 14 Plus without a passcode. But it just functions on devices running iOS 10 or lower. So, if you are using a newer version of iOS, this method won’t work for you.
Here’s how you can use Siri to bypass the Passcode:
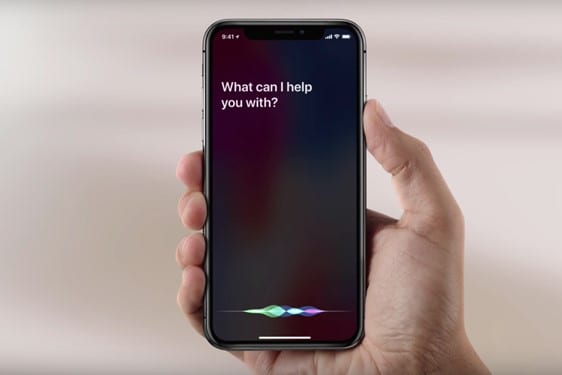
Step 1: Press and hold the Home button to activate Siri.
Step 2: Say something like “Siri, what time is it?” or “Siri, who am I?”
Step 3: Siri will likely respond with an error message saying that she can’t answer these questions while your device is locked. However, she will also give you the option to “Tap to open Clock.”
Step 4: Tap on “Clock,” and you’ll be taken to the Clock app. From here, you can access other apps like Calendar, Reminders, and more.
But this method will not work on newer iPhones 11/12/13 and iPhone 14 because they run on the latest iOS.
Dr.Fone-Screen Unlock
Dr.Fone - Screen Unlock (iOS)
Unlock iPhone Without Passcode.
- Simple, click-through process.
- Unlock screen passwords from all iPhones and iPad.
- No tech knowledge is required. Everybody can handle it.
- Supports iPhone 14/13/12/XS (Max) / iPhone XR / iPhone X / 8 (Plus)/ iPhone 7(Plus)/ iPhone6s(Plus), iPhone SE, and the latest iOS version fully!


4,395,217 people have downloaded it
If no method is applicable, the ultimate solution is Dr.Fone-Screen Unlock. It is a professional tool that can unlock your Apple iPhone 14 Plus without a passcode. It is elementary to manipulate and can unlock any iPhone within minutes. Plus, it doesn’t cause any damage to the Apple iPhone 14 Plus device, which is always a good thing.
If you are interested in using this tool, then here’s how you can do it:
Step 1: Start Dr.Fone on your computer. Then, launch the program and select “Screen Unlock.
Step 2: Create the connection from your Apple iPhone 14 Plus to the computer with a lightning cable.

Step 3: Follow the image on the screen to make your device enter in DFU mode or Recovery mode.
Step 4: Once your device gets into DFU mode or Recovery mode, Dr.Fone will ask you to choose the right firmware for your Apple iPhone 14 Plus.

Step 5: Upon selecting the right firmware, Dr.Fone will start downloading the firmware for your device. Once it’s finished, click “Unlock Now” to remove the Passcode.

You only need to wait for some time as the process may take several minutes. So be patient and don’t interrupt the process; otherwise, it may permanently damage your Apple iPhone 14 Plus.
Once the process is completed, your Apple iPhone 14 Plus will be unlocked, and you can choose a new passcode.
This is the easiest and most effective way to reset your Apple iPhone 14 Plus passcode. So, if you’re looking for a hassle-free solution, this is the one you should choose.
How Can I Turn On/Off the Passcode on My iPhone?
If you want to turn the Passcode ON your Apple iPhone 14 Plus, then follow these steps:
Step 1: Go to ‘Settings’ and select ‘Touch ID & Passcode’ (if you’re using an iPhone with Touch ID). If you’re using an iPhone without a Touch ID, select ‘Passcode.’

Step 2: Enter your current Passcode when prompted.
Step 3: Scroll down and toggle the ‘Passcode’ switch to the ‘ON’ position.
Step 4: Enter a new 6-digit passcode when prompted. Then, please enter it again to confirm.
That’s it! Your Passcode is now turned ON, and your device is more secure than ever.
To shut down the Passcode on your Apple iPhone 14 Plus, follow the steps above and toggle the ‘Passcode’ switch to the ‘OFF’ position.
The Bottom Line
As you see in the article, there are some ways to reset your Apple iPhone 14 Plus passcode. However, if you’re looking for an easy and effective solution, we recommend using Dr.Fone-Screen Unlock. It is a professional tool that can unlock your Apple iPhone 14 Plus without a passcode. Plus, it doesn’t cause any damage to the Apple iPhone 14 Plus device, which is always a good thing.
If you’re not interested in using a third-party tool, you can try one of the methods mentioned above. But keep in mind that these methods may only work on some iPhones. So, if you need help deciding which way to use it, we recommend going with Dr.Fone-Screen Unlock.
5 Most Effective Methods to Unlock Apple iPhone 14 Plus in Lost Mode
Numerous security features make all Mac devices like iPhones, iPads, and Macs stand apart from the opposition in terms of user data safety. Lost Mode is one feature that locks your lost iPhone or other Apple devices so nobody can get to them.
If your device is gone, you can use the Find My application on your other Apple device connected to a similar account to unlock the lost iPhone.
If your Apple iPhone 14 Plus is in Lost Mode and you don’t have the foggiest idea of how to restore it, relax. This guide will cover every one of the techniques that you can use for iPhone Lost Mode unlock.
Part 1: What Will Happen When iPhone Is in Lost Mode?
The Apple iPhone 14 Plus Lock feature permits remotely locking a lost Apple iPhone 14 Plus to prevent people from using its data. If you set a password for a device before enabling the Lost Mode, you will need this password to unlock the Apple iPhone 14 Plus once it has returned to its proprietor.
The Lost Mode menu will ask you to set one if it has no password. Password is obligatory to stop Lost Mode once a device is returned to the owner, as Contact ID or Face ID won’t work for this reason.
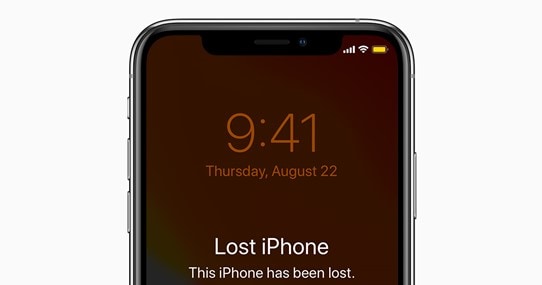
Send a Custom Text Message: When you sort out your lost iPhone and put it in Lost Mode, another supportive feature accessible to you is a custom message shown on the Lock Screen. You can enter any message to let an individual who found it realize this iPhone is lost. This way, you can demonstrate a phone number for the other person. That will expand opportunities to get your device back.
Erase Data Remotely: Lost Mode allows you to delete the Apple iPhone 14 Plus if you believe it’s been some time since it’s gone and you don’t think you can get it back. Doing so will ensure nobody will use your user data.
Track Your Device on Map: An owner can follow their lost iPhone on the map through the Lost Mode menu. The menu additionally gives email warnings to show the last location of your Apple iPhone 14 Plus.
Play Songs: Playing a sound might assist you with finding your lost iPhone if it’s still close by. The Apple iPhone 14 Plus will play a sound at top volume, no matter what volume level was set on the Apple iPhone 14 Plus device when you lost it.
1. Remove lost mode by entering the correct passcode
The most straightforward method for unlocking the Apple iPhone 14 Plus in Lost Mode is entering the password on the actual device. If your device was protected with a password before placing it in Lost Mode, enter it again.
If your device had no password while placing it in Lost Mode and you’ve entered it into iCloud while placing your Apple iPhone 14 Plus into Lost Mode, utilize this password. That will help you unlock lost iPhone, and you can start operating your Apple iPhone 14 Plus again.
2. Remove it from Find My in iCloud
One more method for unlocking the Lost Mode on your Apple iPhone 14 Plus is to utilize the Find My iPhone application on the official iCloud site. Follow the steps underneath to do so:
- Go to <www.icloud.com> and utilize your account details to sign in.
- Click the “Find My iPhone” button and select all iDevices.
- Pick the Apple iPhone 14 Plus device you need to unlock in Lost Mode and tap the “Lost Mode” button.
- Click the “Stop Lost Mode” button to remove the lock from the phone.
- Confirm this activity by clicking the “Stop Lost Mode” button again.
3. Use iCloud DNS Bypass
Domain Name Service is an unsafe technique that utilizes a domain name to an IP address. iCloud stores every iPhone’s information, and when an iPhone is set up, it sends a request through DNS to ensure whether the Apple iPhone 14 Plus device has an activation lock enabled.
The DNS bypass will send a fake “device isn’t locked” message to iCloud through a server. It allows you to go through the setting of your Apple iPhone 14 Plus and access some applications. However, you must remember that this technique works on iOS 11 or older versions. Follow these steps to utilize the iCloud DNS bypassing strategy to unlock lost iPhone:
- Insert SIM in your Apple iPhone 14 Plus, turn it on, and select a preferred language and your location.
- A WiFi screen will spring up. Tap on the “I” icon. If you are now connected with your WiFi, tap “Forget this Network.”
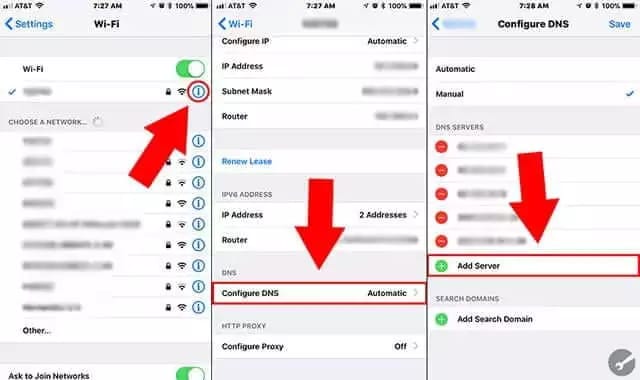
- Tap on “Configure DNS,” and enter a DNS server as per your region from the list underneath:
USA: 104.154.51.7
Asia: 104.155.28.90
Europe: 104.155.28.90
South America: 35.199.88.219
Australia and Oceania: 35.189.47.23
- Clean old DNS server off of ISP modem, select and connect to a WiFi network. Click the Back button when a popup says that the Apple iPhone 14 Plus device is attempting to connect to the Apple servers.
- You will now be on the DNS bypass screen. Pick the applications from the list to keep using your device. However, only a handful of applications are available through this.
4. Use Emergency Call
This technique is the most widely recognized one. You can bypass your iCloud activation by settling on a fake Emergency call. Nonetheless, it is accounted for that this strategy probably won’t work for everyone.
If your Apple iPhone 14 Plus is on lost mode and attempting to unlock it, you can try using this method. Follow these steps for making an Emergency call on your iPhone in Lost Mode unlock:
- Click the “Emergency Call” option on your locked device.
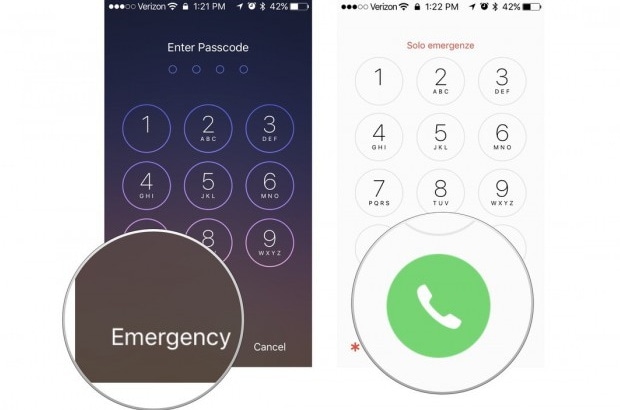
- Dial “*#96274825*0000*1#,” then, at that point, press and hold the dial button for 10 to 15 minutes.
- If it’s not working, try changing the last digit from 1-9. If this doesn’t work, have a go at setting 0 after 9. Remember to hold the dial button.
- Press Home, and it will return you to the beginning screen. Select the language and country, and the activation screen will never appear again. Now create a new password after iPhone Lost Mode unlock.
5. Apple iPhone Unlock
Apple iPhone Unlock is a site that can assist you with iPhone in Lost Mode unlock. You must give them your Apple iPhone 14 Plus’s IMEI and model number to get their services.
The benefit of Apple iPhone Unlock is that they keep themselves updated with the latest technology. They are educated regarding their tool’s advancement by giving updates every time.
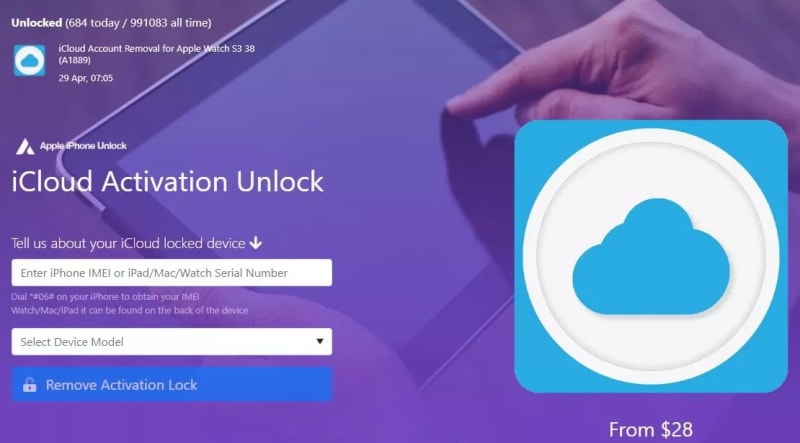
Critical Features of Apple iPhone Unlock:
- As per their site, Apple iPhone Unlock can work with every one of the Apple iPhone 14 Plus devices going from iPhone 4 to iPhone 14 Pro Max.
- Don’t bother downloading anything to your PC or phone like others. Another iPhone lock screen expects you to download their tool or software to work.
Bonus Tips: How to Unlock Our iPhone Screen?
Dr.Fone-Screen Unlock
An expert unlocking tool comes in handy when no other method works. In this case, we strongly suggest you use the Dr.Fone-Screen Unlock tool by Wondershare. Dr.Fone is a reliable tool and has been in the market for a long time. Professional unlock service providers use it because of its ease of use and clean interface.
So, without looking any further, download this tool for a remarkable unlocking experience. The methods below will guide you into unlocking your Apple iPhone 14 Plus within no time:
Step 1. Connect your Apple iPhone 14 Plus/iPad
Open the Dr.Fone software and tap the “Unlock iOS Screen.”
Step 2. Boot iPhone in Recovery/DFU mode
Before bypassing the Apple iPhone 14 Plus lock screen, we want to boot it in Recovery or DFU mode by adhering to the on-screen guidelines. The Recovery mode is suggested for the iOS lock screen. However, if you can’t activate the Recovery mode, you can figure out how to activate the DFU mode from their official site.
Step 3. Affirm Device Information
After getting the phone in DFU mode, Dr.Fone will show the Apple iPhone 14 Plus device information, for example, the Apple iPhone 14 Plus model and other data. You can choose the right information from the dropdown menu if the information isn’t right. Then, at that point, download the firmware for your Apple iPhone 14 Plus.
Step 4. Unlock the Apple iPhone 14 Plus Screen Lock
After downloading the required firmware effectively, click Unlock Now to remove the lock. However, note that this unlocking system will wipe the user data on your Apple iPhone 14 Plus. Truly, there is no answer for iPhone Lost Mode unlock without losing your data.

The Bottom Line
You might forget the password used before placing your Apple iPhone 14 Plus in Lost Mode. It is also likely to purchase a locked device, and then you can’t contact the owner to unlock it and don’t know your Apple ID details. Some might think this is a dead situation, and you can’t use the iPhone.
Luckily, we’re here to provide a series of dependable and secure solutions that will help your iPhone in Lost Mode unlock.
Also read:
- [Updated] 2024 Approved Invisible Footage Methods to Obfuscate Private Elements
- [Updated] In 2024, Mastering the Craft of Professional Gopro Cinematography
- [Updated] Top 8 Proven Video Growth & Promotion Strategies
- How Many Attempts To Unlock iPhone XS
- How to Turn Off Find My Apple iPhone 12 mini when Phone is Broken?
- How To Unlock Stolen Apple iPhone 7 Plus In Different Conditionsin
- In 2024, Complete Guide For Apple iPhone 11 Pro Max Lock Screen
- In 2024, How to Bypass FRP from Infinix Smart 8?
- In 2024, How To Change Country on App Store for iPhone 13 Pro With 7 Methods
- In 2024, Top 12 Prominent Huawei Nova Y71 Fingerprint Not Working Solutions
- Resolve Your iPhone 6s Keeps Asking for Outlook Password
- Solving Windows ISDone.dll Complications Quickly
- Sprinkle Life Into Windows 11: Techniques for Lively Wallpapers
- The Ultimate Guide to Linking FB Stories for 2024
- Title: In 2024, How To Bypass the Required Apple Store Verification For iPhone 14 Plus
- Author: Sophia
- Created at : 2025-01-21 18:11:56
- Updated at : 2025-01-24 18:13:55
- Link: https://ios-unlock.techidaily.com/in-2024-how-to-bypass-the-required-apple-store-verification-for-iphone-14-plus-by-drfone-ios/
- License: This work is licensed under CC BY-NC-SA 4.0.