
In 2024, How To Unlock A Found iPhone 15 Plus?
How to Unlock Apple iPhone 15 Plus?

Human life completely changed since the advent of technology. Today, life is not the same as it used to be. Communication and traveling became so easy. People can fly and within few hours reach the destination. The time span that was once calculated in days has now shrunk to just a few hours. In the early days, no one would have imagined that they could carry the computer in small bags, but laptops were invented to their surprise.
Today, all those computer and laptop qualities are being shifted into a small phone. Something that can fit in a pocket, and a human can carry it anywhere without feeling its weight. A small device, the mobile phone has great competition in the market. Android phones are coming up with brilliant features to stand equally with iPhones, but iOS has its own customers and a powerful market value. Talking about iPhone, let’s discuss how a user can unlock Apple iPhone 15 Plus without a passcode.
Part 1. Unlock Apple iPhone 15 Plus without Passcode or Face ID
A problem commonly faced by all iPhone users is that they forget the password, and then they are stuck because they cannot use their phone anymore. This might seem impossible because iPhone users cannot use the phone without a passcode, but let us show you a magical application that makes this impossible.
Dr.Fone - Screen Unlock (iOS) , the well-known application among most iPhone users, can resolve the problem quickly. This is a very secure platform for iPhone users because it promises to safeguard user’s personal information. The application is easy to use, that even a new person can use it without facing any trouble. Let us highlight its features;
Dr.Fone - Screen Unlock (iOS)
Fix iPhone Lock Screen Password Forgot Issue
- Unlock Face ID, Touch ID, Apple ID without password.
- Bypass the iCloud activation lock without hassle.

- Remove iPhone carrier restrictions for unlimited usage.
- No tech knowledge required, Simple, click-through, process.

3,981,454 people have downloaded it
This might be possible that not all iPhone users know about Dr.Fone – Screen Unlock, so, for such users, let us take you through the steps that are required to unlock iPhone 12 or 12 Pro Max using Dr.Fone – Screen Unlock without a passcode.
Step 1: Download and Install the Application
First of all, the user is supposed to download Dr.Fone – Screen Unlock and install it on your Windows or Mac system. Once it is installed, the application is all set and ready to use; launch it in the time of need and unlock your Apple iPhone 15 Plus without a passcode .
After the application is launched, the Welcome Screen will appear with different options. The user is requested to select the option of ‘Screen Unlock’.

Step 2: Connect Phone with System
In the second step, the user should connect their phone to the system and let Dr.Fone’s application automatically detect it. Whenever you are ready to initiate the process, click on the button ‘Unlock iOS Screen.’

Step 3: Recovery Mode Activation
Once the application has detected your Apple iPhone 15 Plus, you now need to activate the Recovery mode. A step by step illustration on how to activate Recovery mode is shared on-screen.

Step 4: Download Firmware Update
A new window will appear now, on which the application will ask for some information regarding your iOS device. Provide the application with asked information and click on the ‘Download’ button to get the firmware update for your Apple iPhone 15 Plus.

The user is requested to wait for some time, as the firmware update is being downloaded for your phone. Once that is done, now click on the ‘Unlock Now’ button to complete the process.

Step 5: Confirmation Code
The application will now ask for the confirmation code. Just provide the on-screen confirmation code and let the process complete itself. As soon as that is done, the application will notify you through the interface. The process can also be repeated by clicking on the ‘Try Again’ button.

 safe & secure
Part 2. Unlock Locked iPhone 12 by Restoring it to Default Settings – iTunes
iPhone users make sure that they connect and sync their devices with iTunes because their data is safe. iPhone users live without the fear of losing their data because it is backed up. Taking more advantage of this, iPhone users can restore their phone to default settings and can even unlock their iPhone without using a passcode.
Let us show you how to unlock Apple iPhone 15 Plus without using a passcode;
Start the process by turning off your Apple iPhone 15 Plus.
After that, plug in your phone to the computer and open iTunes.
Once the phone is connected with iTunes, click on ‘Summary’ that will appear on the screen’s left side.
After the summary screen is opened, you will see the option of ‘Restore iPhone’; click on that option.

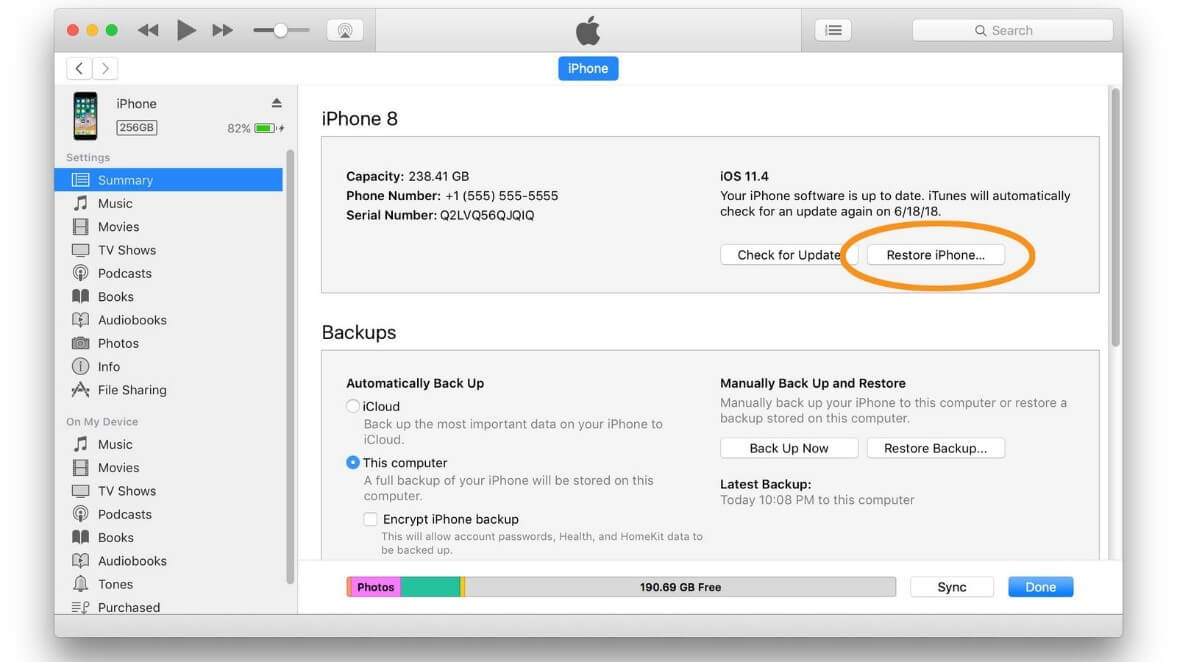
- This option will bring you to a new window that will be asking for your confirmation on the decision to restore your device.
- As soon as that is done and iTunes has finished the process, your Apple iPhone 15 Plus 12 will be restored to default settings.
Part 3. Unlock Disabled iPhone 12 by Erasing iPhone in iCloud
IOS world is different from the Android world, and so, both have different and unique problems to deal with. For example, an android user can never imagine unlocking a disabled phone, but iPhone users surely know how to do it. It might be possible that someone doesn’t know how they can erase the Apple iPhone 15 Plus from iCloud, so for such users, let’s provide a step-by-step guideline;
Firstly, the user is requested to visit icloud.com on your computer or any other device that is in use. Then log in by using the Apple ID and password.
If two-factor authentication is enabled on your Apple iPhone 15 Plus, then hit ‘Trust’ and enter the 6-digit verification code that will be sent to your Apple iPhone 15 Plus.
Once you are logged in, choose ‘Find iPhone’ and enter your Apple ID and password again.
4. Then, you are requested to click on ‘All Devices’ that will appear on the top of the browser and select your device’s name from the list provided.
When you have selected your Apple iPhone 15 Plus, click on the ‘Erase iPhone’ button visible towards the screen’s right side. This will erase all the data and settings from your device. It will also wipe the password.


Part 4. Pros and Cons of Every Method
Different methods have been discussed that use different platforms regarding how a user can unlock an iPhone if a passcode is missing. The user might be confused about selecting the appropriate method, so let’s help the users by sharing some advantages and disadvantages of all the methods discussed above. This will help the user to select the best possible method;
1. Using Dr.Fone - Screen Unlock (iOS)
The known and famous application among iPhone users helps them recover data, unlock a phone even if its passcode is missing, and whatnot. Let us now discuss its amazing pros;
Pros
- The process is completed within few seconds. Users can easily handle the application because of the guidelines that are shared on the screen.
- The application is very convenient to use, and it works on both Windows and Mac.
- Dr.Fone can remove the Apple or iCloud passwords even if they do not have any account details.
- The application can easily unlock a 4-digit or even 6-digit screen passcode, Face ID, or Touch ID.
Cons:
- The Apple iPhone 15 Plus in use will be updated to the latest iOS version as soon as the unlocking process is completed.
- The Apple iPhone 15 Plus must be in DFU mode for the process to unlock the screen.
safe & secure
2. Using iTunes
iPhone users can unlock the phone by using iTunes. Following are its pros and cons;
Pros:
- Most iPhones are synced with iTunes, which benefits the user as it restores the latest backup on iPhone after removing the screen lock.
- iTunes is easy to understand and simple to use.
Cons:
- The biggest drawback people face with iTunes is that the data can be erased if no latest backup is taken.
- Another factor that causes the problem is iTunes’ slow functionality, as it consumes a lot of time to complete a process.
3. Using iCloud
Another known platform for iPhone users is iCloud, which allows users to unlock the screen without using the passcode. Let us share its pros and cons;
Pros:
- The biggest benefit of using iCloud is that the user doesn’t have to connect the Apple iPhone 15 Plus with the system. Just login is required for iCloud.
- Another factor is that no technical skills are needed to use iCloud. The user needs access to their iCloud account.
Cons:
- User requires a strong and stable internet connection to log in to iCloud and in case internet is not available, they cannot unlock the screen.
- Another disadvantage is that if ‘Find my iPhone’ is not enabled on the Apple iPhone 15 Plus device, then the user cannot unlock the screen through iCloud.
Conclusion
The article aimed to provide users with maximum information and knowledge about unlock the Apple iPhone 15 Plus even if you don’t have the passcode. Several methods have been discussed alongside their pros and cons so that the user can select the best.
safe & secure
How to Unlock Apple iPhone 15 Plus With an Apple Watch & What to Do if It Doesn’t Work
There are plenty of reasons why Apple devices are in such high demand. The quality of the products is unquestionable – few can argue the superior quality of the Apple iPhone 15 Plus’s camera, for instance. Almost all devices are long-lasting. They have a great resale value. They offer cutting-edge features.
However, perhaps the greatest advantage of Apple products is just how well they integrate with one another and work together.
With a quick little tap, you can have your Apple iPhone 15 Plus’s camera working as your Mac’s webcam. You can use your iPad as a second Mac display. Take calls using any device.
Moreover, you might be able to use the Apple Watch to unlock your Apple iPhone 15 Plus.
Now, you cannot just unlock any Apple iPhone 15 Plus with your Watch. The devices must be paired, and you’ll need to follow a few steps to enable this option. Here’s how to unlock your phone using your Apple Watch like a pro.
Part 1. Can I Use an Apple Watch To Unlock My Apple iPhone 15 Plus?

The Apple iPhone 15 Plus face ID is one of the simplest, most practical ways to unlock your phone. While you’ll need a passcode just as another security layer, you won’t have to worry about someone else breaking in if they know it, going through your messages, or collecting your private information.
With face ID, only you can unlock your phone, sign in to your favorite apps, and even authenticate purchases.
The problem is that neither face ID nor traditional passcodes aren’t always the most convenient option. If you wear sunglasses, safety goggles, a face mask, or other face coverings and can’t take them off for some reason, face ID won’t work. If you have gloves on and can’t type in your passcode, your passcodes won’t work.
What could work is your Apple Watch.
Depending on the Apple Watch version you own and your Apple iPhone 15 Plus model, you could use your watch to unlock your phone in any circumstances. It’s easy, secure, and convenient, above all else.
Part 2. Requirements for Unlocking Apple iPhone 15 Plus With Apple Watch

Unfortunately, not every Apple iPhone 15 Plus can be unlocked with your Apple Watch, and not every Apple Watch can unlock your Apple iPhone 15 Plus. Both devices must meet some requirements before you can adjust your settings to enable this option.
To be able to use your Apple Watch to unlock your phone with the utmost ease, you’ll need:
- An Apple iPhone 15 Plus with Face ID – Apple iPhone 15 Plus X and newer models;
- iOS 14.5 and newer versions;
- An Apple Watch series 3 and newer models;
- watchOS 7.4 and newer versions.
Additional requirements you’ll need to meet include:
- Your Apple iPhone 15 Plus and Apple Watch need to be paired;
- Both devices need to have WiFi and Bluetooth turned on (but a connection to a WiFi network isn’t necessary);
- You need to have a passcode on your Apple Watch;
- Wrist detection on your watch needs to be turned on;
- The watch needs to be on your wrist and unlocked.
You’ll also need to wear items such as sunglasses, face coverings, ski masks, or others that prevent you from using your Apple iPhone 15 Plus Face ID.
Part 3. How To Unlock Apple iPhone 15 Plus With an Apple Watch

If you meet all the aforementioned criteria, setting up the feature to unlock your Apple iPhone 15 Plus using an Apple Watch is easy. You’ll just have to follow a few steps:
- Step 1: Go to Settings > Face ID & Passcodeon your Apple iPhone 15 Plus;
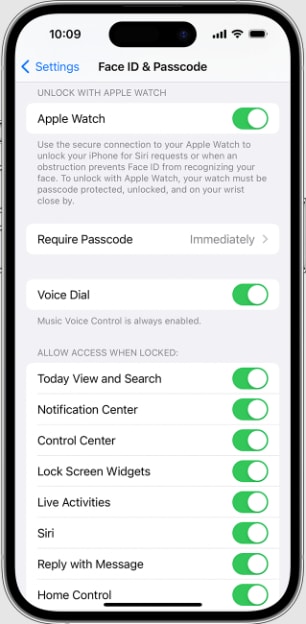
- Step 2: Type in your passcode;
- Step 3: Find and enable Unlock with Apple Watch.
Remember that your Apple Watch’s wrist detection must be turned on for this option to work. When you tap to enable Unlock with Apple Watch, if your wrist detection isn’t turned on, you’ll get a prompt on your phone asking you to turn it on.
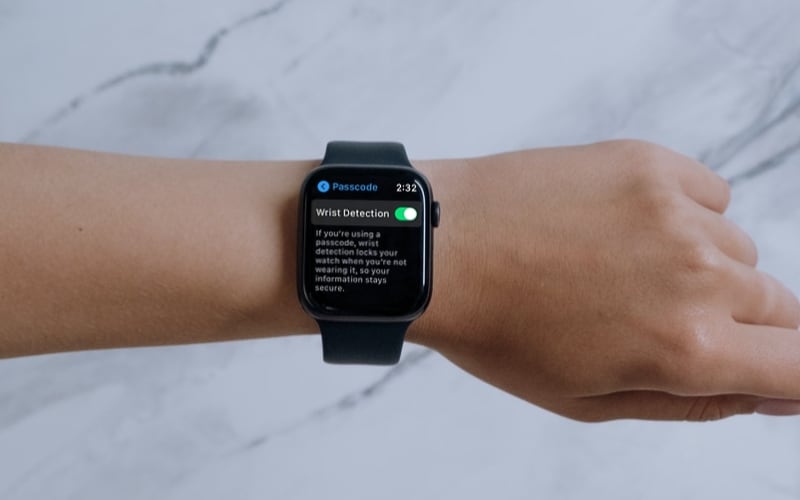
You can turn on wrist detection on your watch by following these steps:
- Step 4: Go to Settingson your Apple Watch;
- Step 5: Tap on the Passcode;
- Step 6: Toggle Wrist Detection
Now that you’ve enabled the option to unlock your Apple iPhone 15 Plus using your Apple Watch, it’s time to simply start using the feature. To unlock your phone, you’ll need to:
- Have your Apple Watch on your wrist, unlocked;
- Tap on your Apple iPhone 15 Plus or raise it to your face to activate it;
- Glance at your phone while wearing a face mask, sunglasses, or another item that’s preventing you from using Face ID;
- Swipe up on your phone’s screen.
Your Apple Watch will send an alert when you’ve used it to unlock your Apple iPhone 15 Plus. If you accidentally unlock your phone, simply tap on the Lock Apple iPhone 15 Plus on the screen of your watch to lock it.
However, remember that the next time you want to use your Apple Watch to unlock your Apple iPhone 15 Plus, you’ll first need to type in your passcode.
Part 4. What To Do if You Can’t Unlock Your Apple iPhone 15 Plus With a Watch

Generally speaking, unlocking your Apple iPhone 15 Plus with an Apple Watch should be a simple, seamless task. Unfortunately, though, that’s not always the case. A glitch or a bug could be preventing you from enjoying this feature, so take a look at a few things you could try to fix it.
1. Check All Settings & Reconfigure
As mentioned earlier, there are a few requirements that your devices need to meet to unlock your Apple iPhone 15 Plus with your Apple Watch.
If you’re using the correct versions of Apple iPhone 15 Plus (iPhone X, iOS 14.5 and newer) and Apple Watch (series 3, watchOS 7.4 and newer), try to reconfigure your settings.
Make sure that you have:
- A passcode on your watch;
- Wrist detection turned on;
- Feature Unlock with Apple Watchturned on on your Apple iPhone 15 Plus.
If all the settings are correct, try one of the following options.
2. Restart Your WiFi/Bluetooth Connection
Your Apple iPhone 15 Plus and your Apple Watch need to have both WiFi and Bluetooth turned on. If they’re turned on on both devices, try turning them off and back on again to restart the connection.
Remember, you only need WiFi and Bluetooth on but don’t need to be connected to a WiFi network.
If the problem persists, you could also restart your devices and try again.
3. Reset Your Face ID
In some instances, it’s the Face ID feature that’s causing trouble, so you might want to try and reset it. It’s much easier than it may sound, you just need to follow the next few steps:
- Step 1: Go to your Apple iPhone 15 Plus’s Settings;
- Step 2: Select Face ID & Passcode;
- Step 3: Tap Reset Face ID.
When you tap on this, you’ll need to go through the process of setting your Face ID as usual. You’ll need to type in your passcode, hold your Apple iPhone 15 Plus in front of you (in portrait orientation), tap to get started, and put your face in the provided frame.
Move your face to complete the circle, then tap on Continue. Repeat the face scan process the second time and select Done.
4. Do a System Repair on Your Apple iPhone 15 Plus
If your Apple Watch unlock is still misbehaving, you might need to do a full system repair. As a general rule of thumb, it’s best to use verified apps like Dr.Fone to prevent the problem from getting worse.
Dr.Fone Apple iPhone 15 Plus system repair is designed to be fast, efficient, and safe. It can repair virtually any system glitch in less than five minutes, ensuring your phone operates seamlessly.
To perform a standard system repair with Dr.Fone, follow the next few steps:
- Step 1: Download and launch Dr.Fone on your computer;
- Step 2: From the Toolboxon your left-hand side, select System Repair;
- Step 3: Connect your Apple iPhone 15 Plus to your PC using a cable connection;
- Step 4: Select your device type in the new window that opens;
- Step 5: Select iOS repair;

- Step 6: Select Standard Repair Mode;
- Step 7: Follow the on-screen instructions and select Enter Recovery Mode;
- (Alternatively, select Guideif your phone is unresponsive);
- Step 8: Select the iOS firmware you want to download and install on your device;
- Step 9: Wait for the download to finish, then select Repair Now;
- Step 10: Wait until the process is complete, then select Done.

If it was a system mistake preventing you from unlocking your Apple iPhone 15 Plus with your Apple Watch, the option should be functioning well after the Dr.Fone iOS repair.
5. Reset Network Settings
If the problem wasn’t due to a system glitch, you should try resetting your Apple iPhone 15 Plus’s network settings. The process is simple, just:
- Step 1: Go to Settings > General > Reset > Reset Network;
- Step 2: Type in your passcode.
Resetting your network settings will clear out data from your internet, local network, and devices, including WiFi passwords, some Bluetooth connections, and more. However, your paired devices, such as the Apple Watch, shouldn’t be removed.
6. Reset Your Watch and Pair It Again
Finally, if you’re still experiencing issues, you might need to reset your Apple Watch and pair it with your Apple iPhone 15 Plus again.
It’s all quite simple:
- Step 1: Press and hold the power button;
- Step 2: Drag the slider under Power offto the right;
- Step 3: Press and hold the power button to turn the Apple iPhone 15 Plus device back on.
To perform a hard reset, simultaneously press and hold the power button and digital crown.
Conclusion
Using your Apple Watch to unlock your Apple iPhone 15 Plus is convenient when you cannot use the Face ID feature. It allows you to seamlessly unlock your phone when wearing sunglasses, goggles, face masks, or other face coverings that prevent the Face ID from working.
Enabling this option is a straightforward process, and if there’s ever a glitch, there are several options you could try to repair it.
How To Change Your Apple ID on Apple iPhone 15 Plus With or Without Password
The Apple ID is a unique identifier used to log in to all Apple services, including iCloud, the App Store, Apple Music, and more. You can track purchases and manage your account settings through your Apple ID. But what if you need a new one for security or moving to a new location?
Whatever the reason, learning how to change your Apple ID on your iPad is straightforward. And this guide will show the steps and provide some tips at the end.

Part 1: Reasons Why You Might Need To Change Your Apple ID
Your iOS devices contain most of your digital data. That includes your contact list, email, financial information, and social media passwords. All this data is valuable - others can use it to do identity theft, fraud, and other crimes.
If you feel the existing Apple ID isn’t secure enough, it’s a good idea to change your Apple ID on your iPad or other devices. Aside from this, there are a few scenarios where you might find yourself needing to change your details:
You No Longer Use the Email Address or Phone Number Associated With Your Apple ID
Life moves fast, and sometimes contact info changes. If the email or phone number linked to your Apple ID becomes outdated, it’s a good idea to update it. That way, you won’t miss out on vital notifications or have trouble recovering your account if needed.
You Want To Simplify Your Online Life
If you have multiple email addresses, you may want to consolidate them into one email address. It can make it easier to manage and remember your online accounts, including your Apple ID.
You Are Relocating to a Different Region or Country
Moving abroad? Your Apple ID may need an update to match your new location. It ensures access to region-specific apps and services. You need to have a few things in place before you can do that: add a payment method for your new location, cancel your subscriptions, and spend your store credit. Aside from that, you will also need to change your Apple ID country or region.
Changing your Apple ID can be smart, ensuring your digital life stays up-to-date, secure, and tailored to your needs. It’s not complicated, and it’s all about making your Apple experience better suited to you. So, go ahead and learn how to change your Apple ID on your iPad in the following sections.
Part 2: How To Change Apple ID on iPad Without Losing Data?
If you receive a notification from Apple about suspicious account activity, it’s time to act. Before you learn how to change the Apple ID on an iPad – for yourself or others, here are some common signs of a compromised Apple ID:
- A login attempt from a device or location that you don’t recognize
- A password change that you didn’t know about
- Unauthorized messages or purchases
- A password that no longer works
- Unfamiliar account details
If you suspect unauthorized access to your Apple ID, below is what you can do.
Steps To Change Your Apple ID to a Different Email Address
If you are worried about losing data such as purchases and contacts, don’t worry. You can update your Apple ID account anytime without disrupting your data. Here’s a step-by-step guide on how to change your Apple ID email address. Just sign out of all Apple services and devices that use your account first.
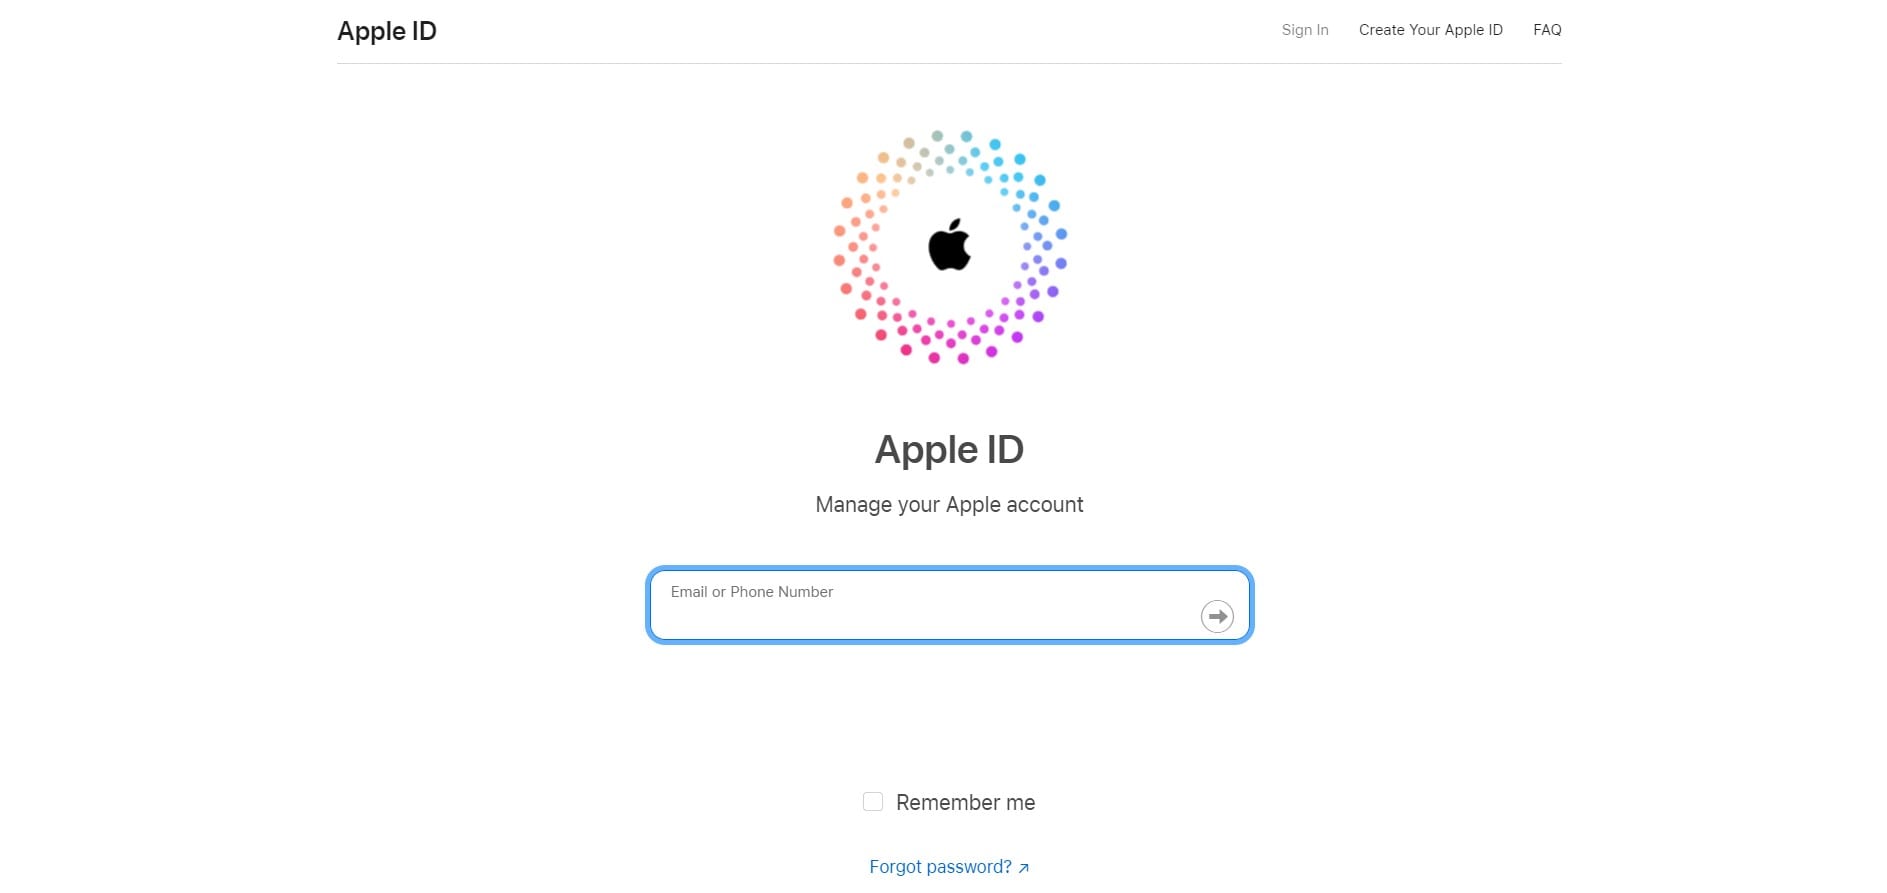
- Step 1: Visit the Apple ID official website and log in to your account credentials.
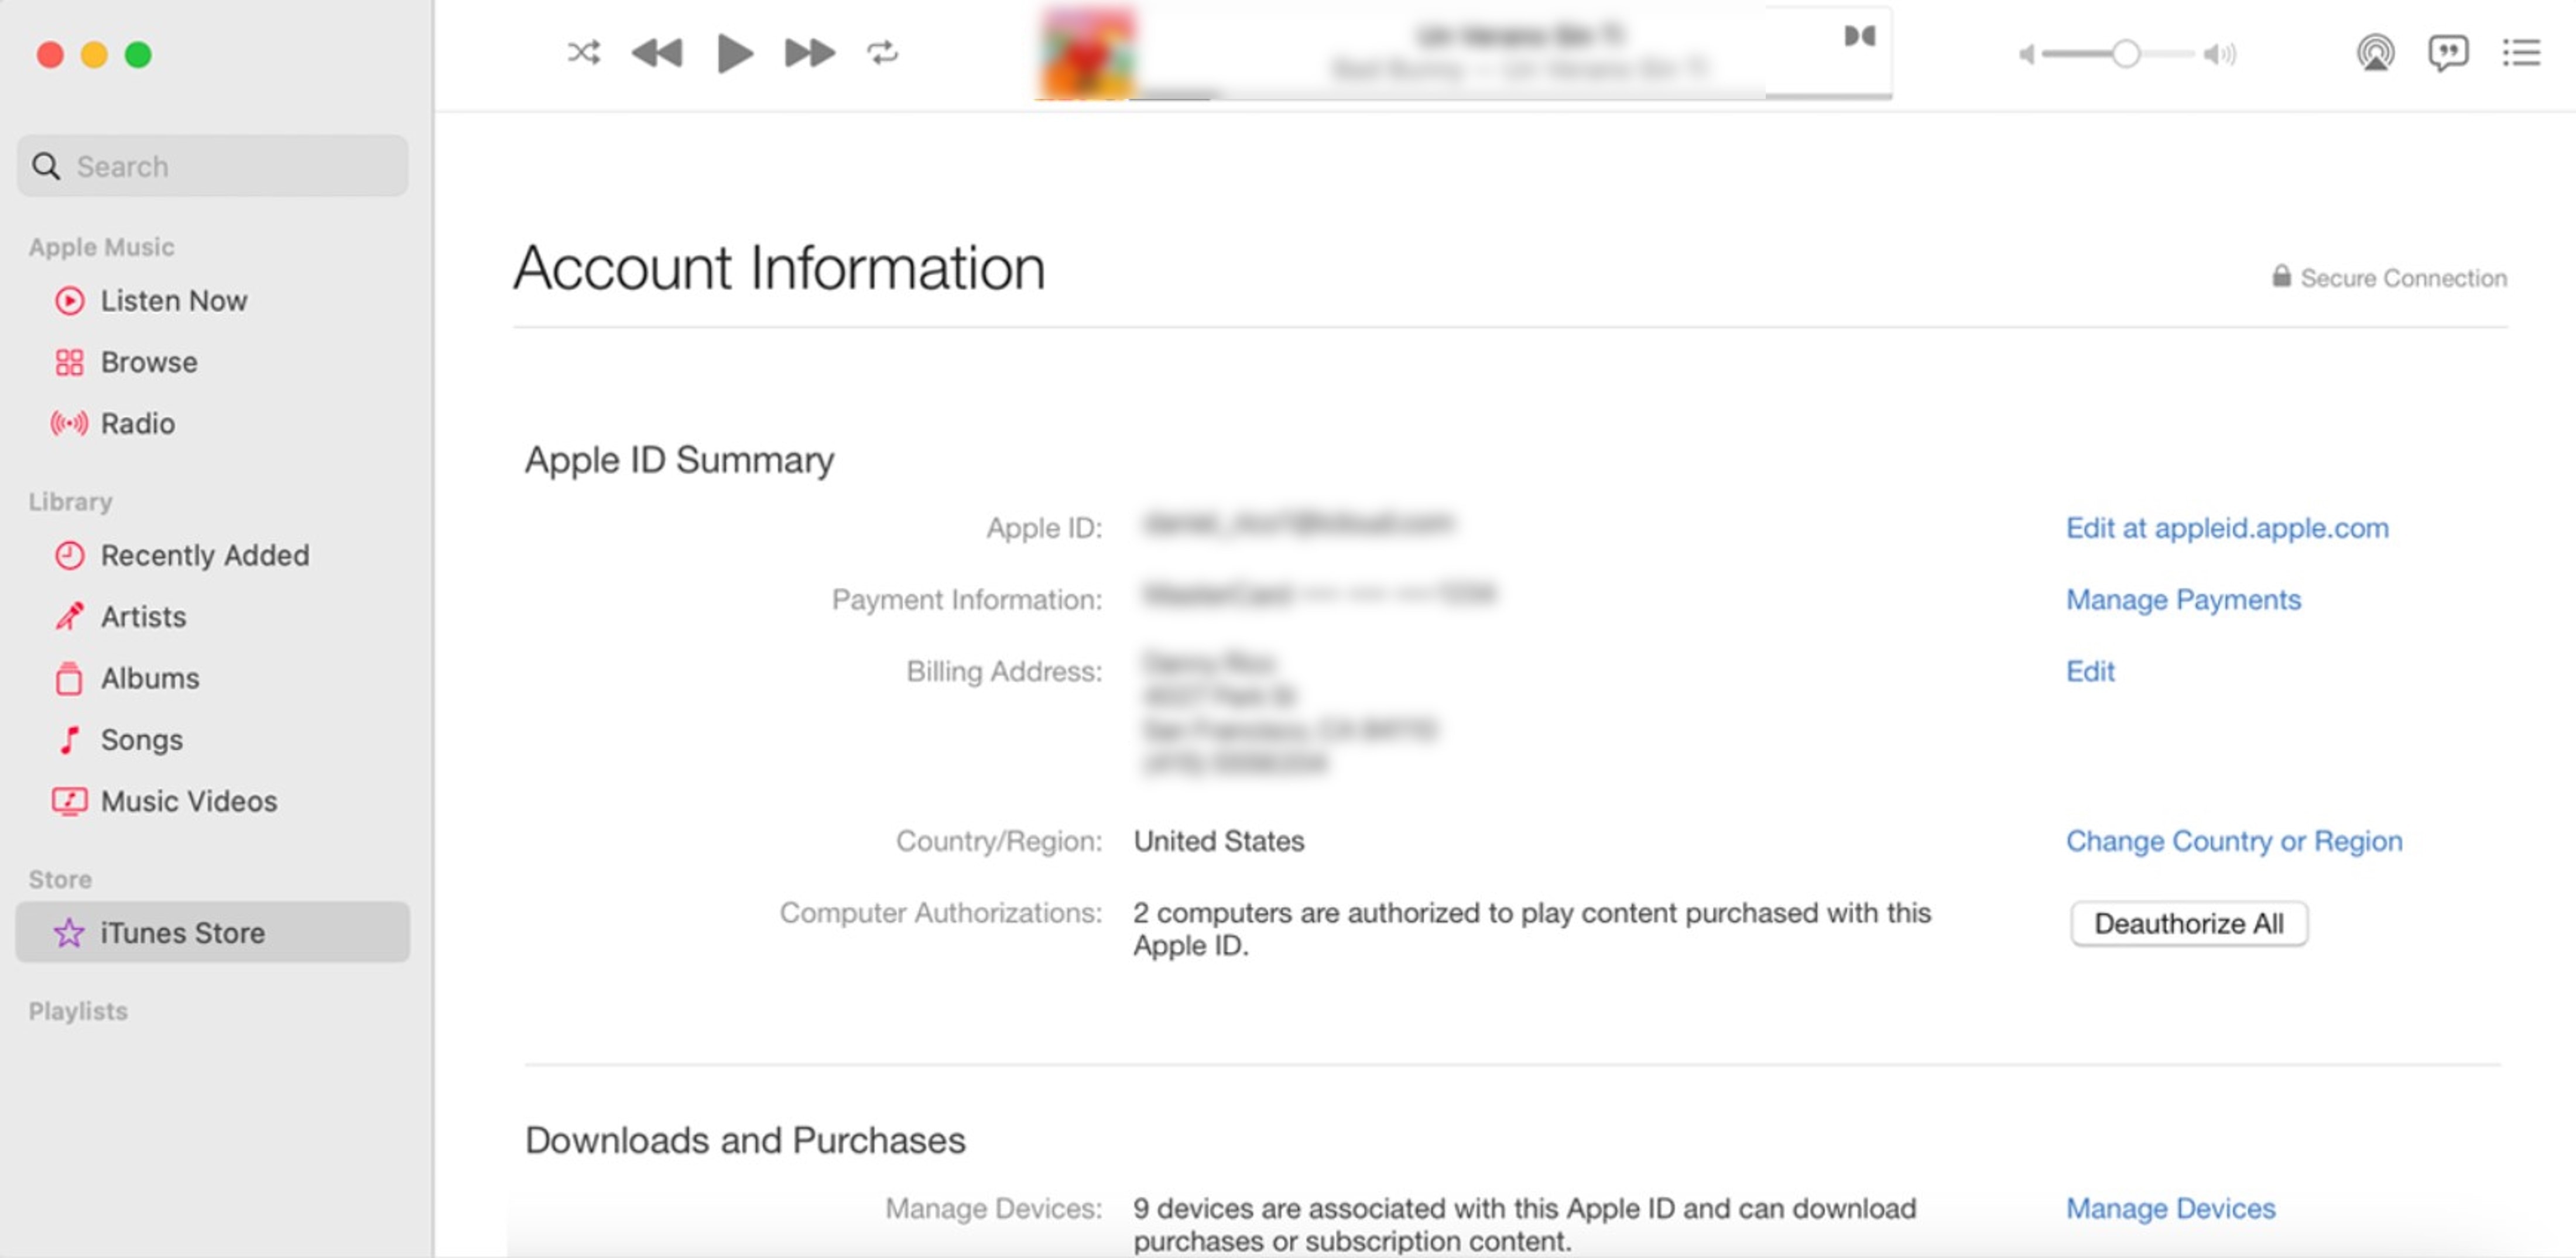
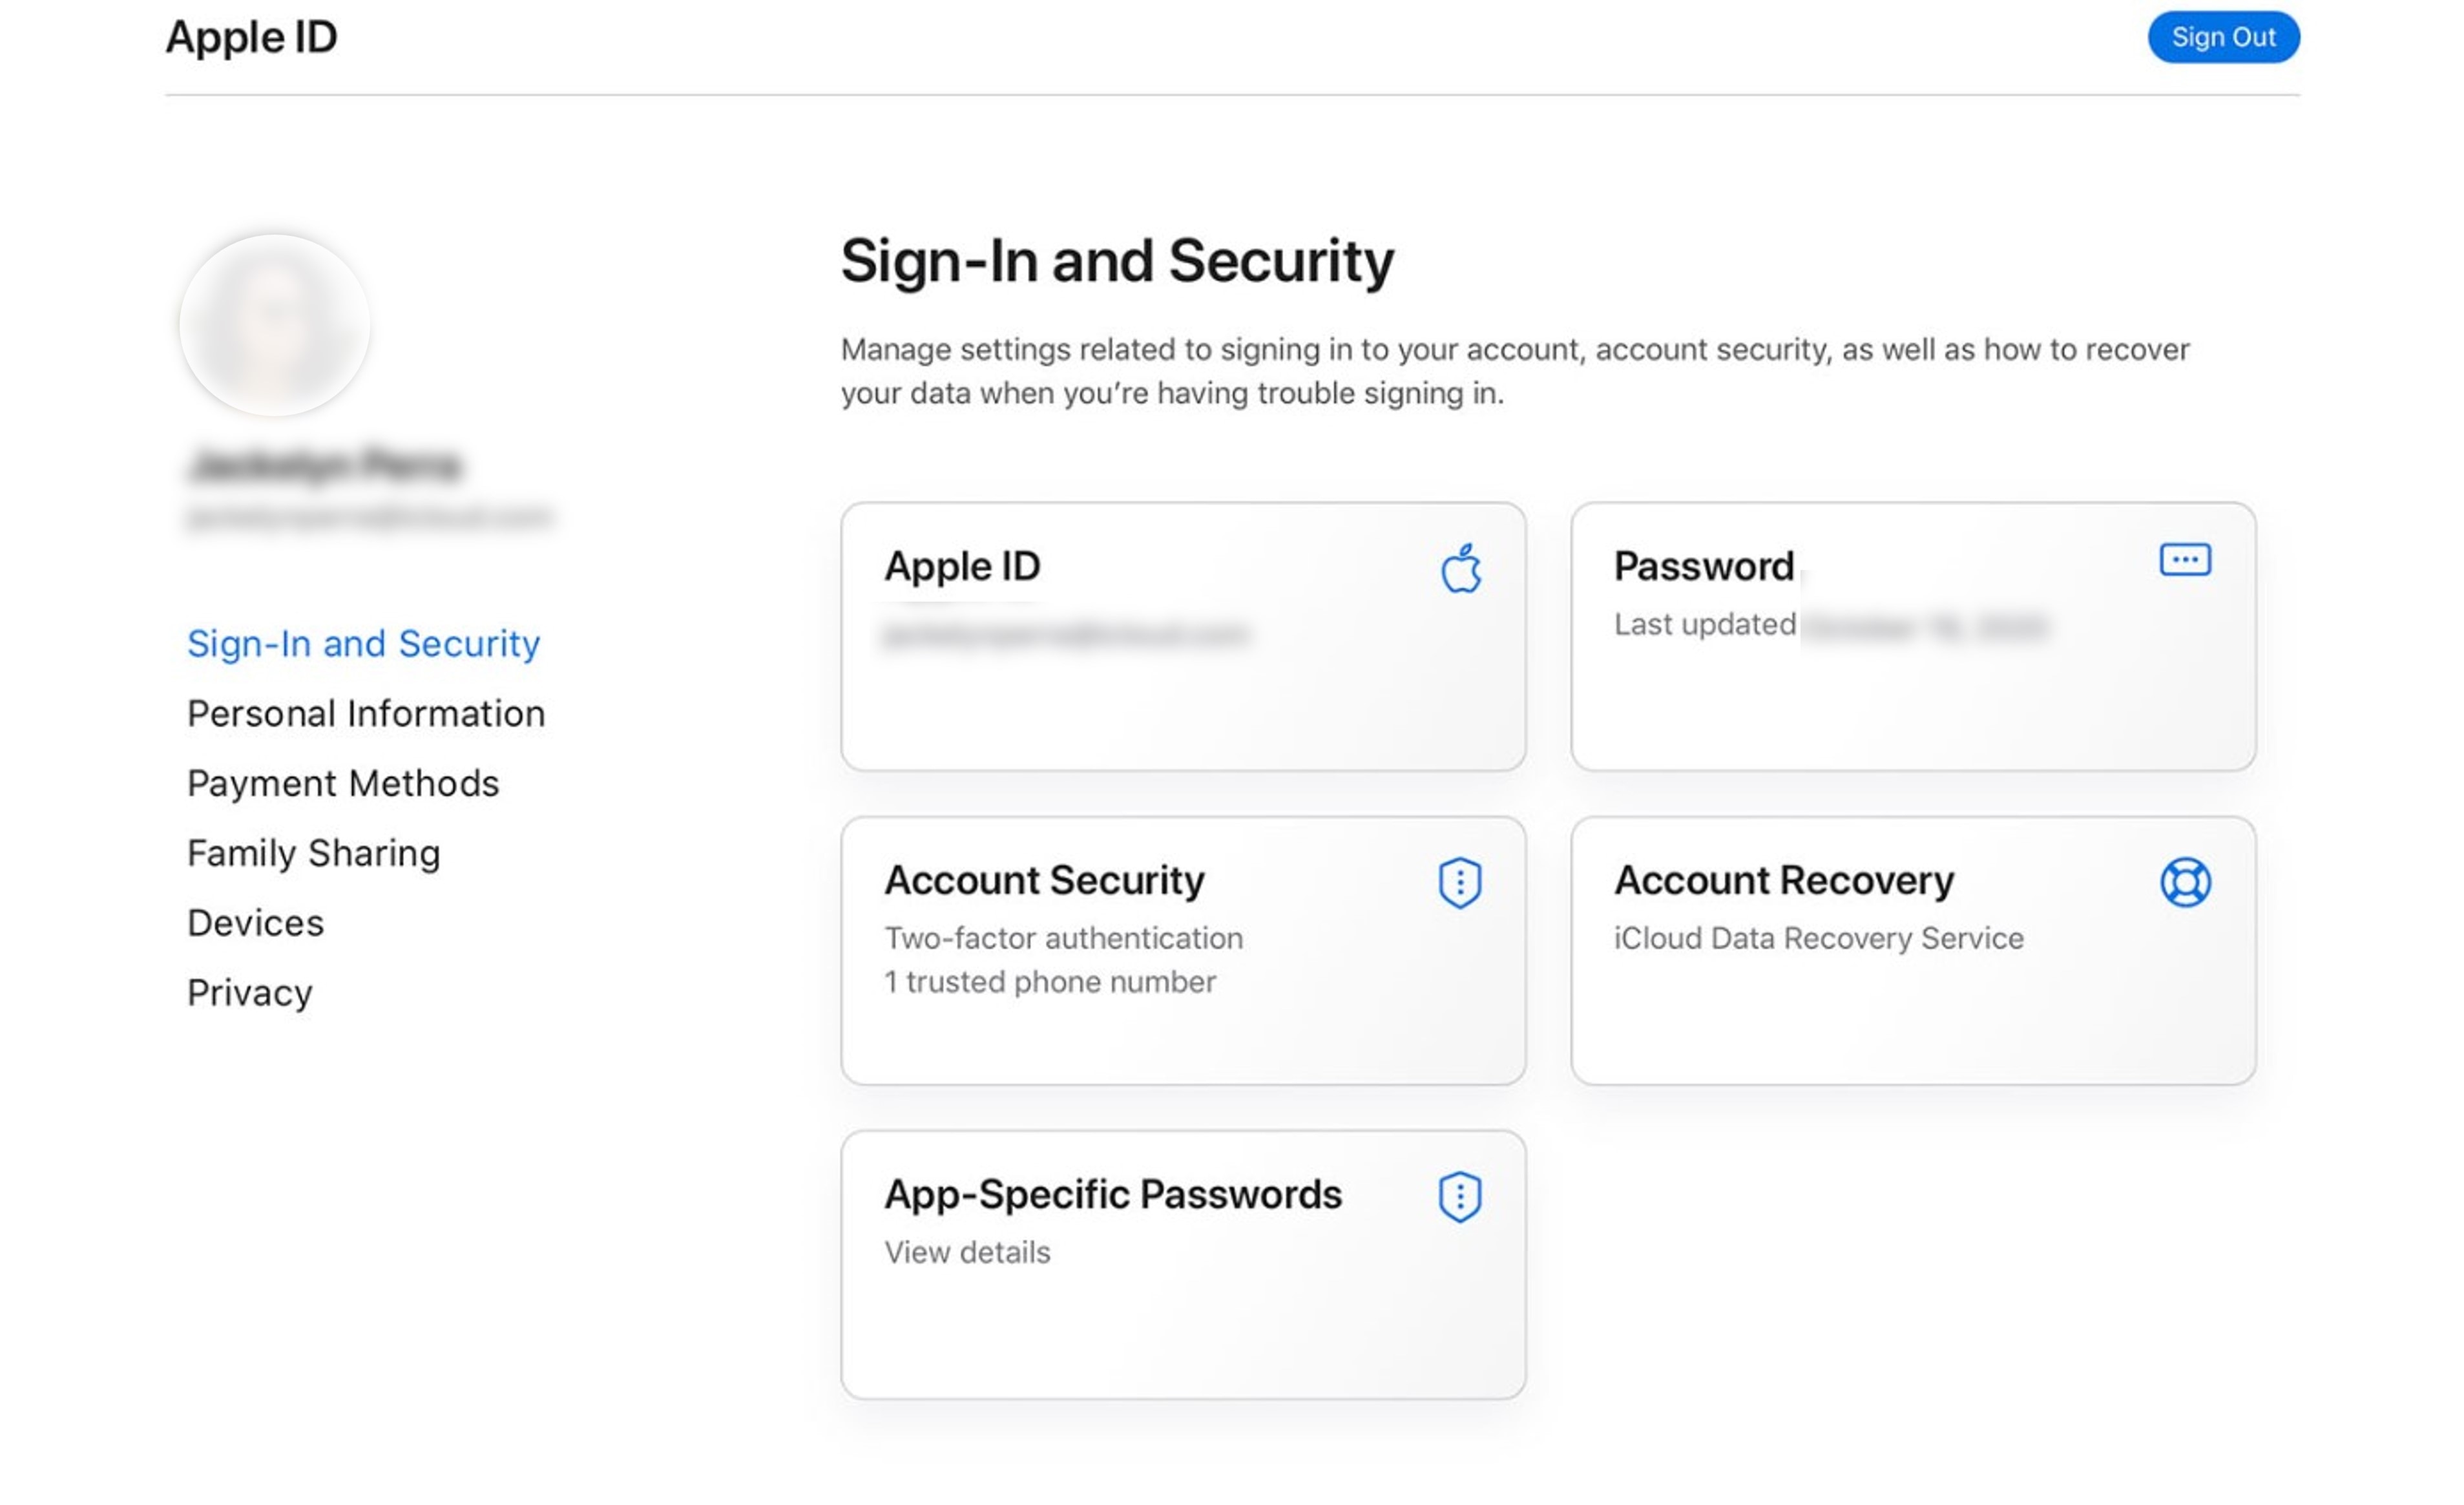
- Step 2: Once logged in, select Apple ID in the Sign-In and Security section.
- Step 3: From the Apple ID pop-up window, enter your new Apple ID in the Change your Apple ID text field.
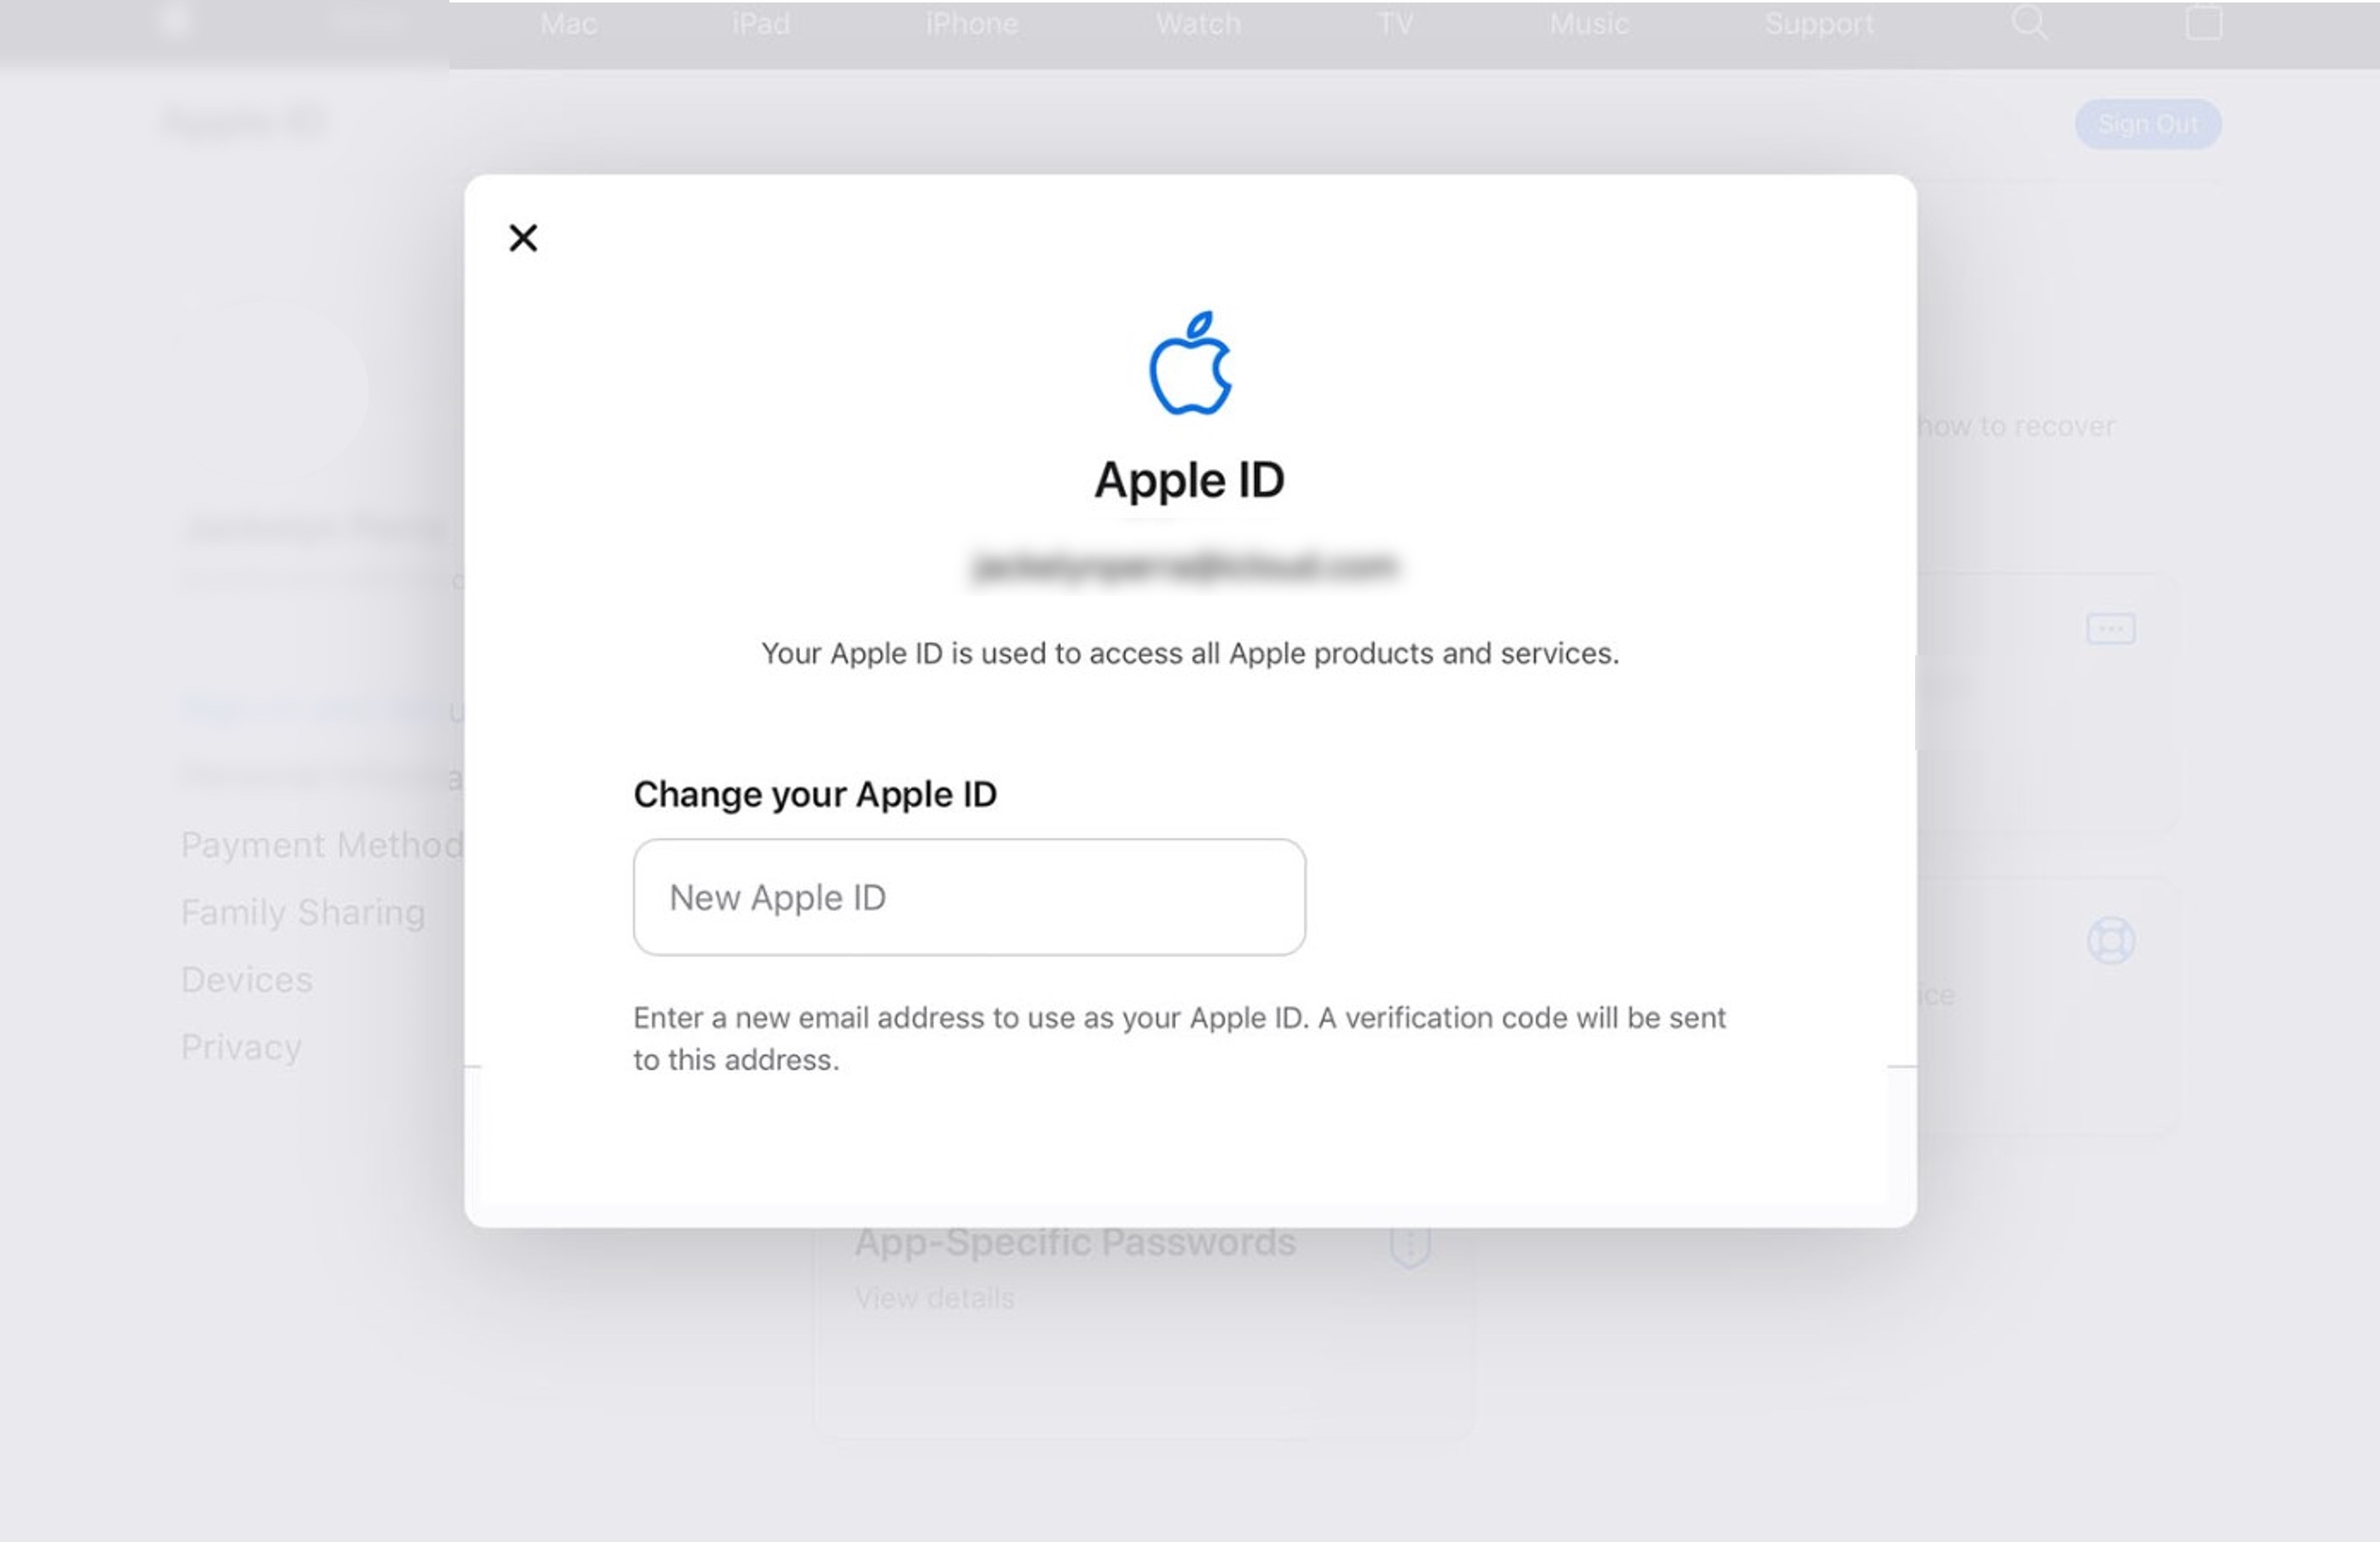
- Step 4: Select Change Apple ID to proceed.
- Step 5: Check your email to get a verification code sent by Apple to ensure that only you can change it to a third-party email address. Enter the code to complete the update.
Step 6: Sign in to Apple services such as iCloud and Messages, using your new Apple ID to continue sharing with others.
Steps To Change Your Apple ID to a Different Mobile Number
Do you want to use Your Apple iPhone 15 Plus number as your Apple ID username? It’s possible, but it depends on your location, how you created your account, and what version of iOS you’re using.
If you’re in China mainland or India, and you’re using iOS 11 or later, you can create a new Apple ID with Your Apple iPhone 15 Plus number as the username. However, Your Apple iPhone 15 Plus number must be (+86) or (+91). So, if you’re thinking of, “How can I change my Apple ID on my iPad if it’s a mobile phone number?” then this guide is for you:
- Step 1: Log out of all Apple services and devices currently signed in with your Apple ID, except the one you’re using to change your Apple ID.
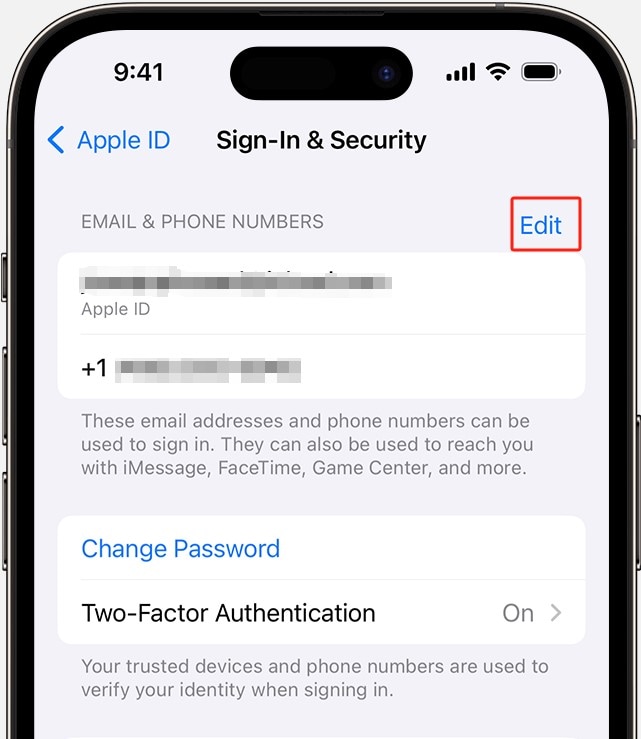
- Step 2: On your iPad, go to Settings > [your account name] > Sign-in & Security.
- Step 3: Tap Edit next to Email & Phone Numbers.
- Step 4: Go to the Delete icon next to your mobile number and follow the directions given.
- Step 5: Enter the code sent to the mobile number you added as your new Apple ID to verify it.
- Step 6: Log into all Apple services using your new Apple ID.
Even if you can’t change your Apple ID on your iPad to a mobile phone number, you can still associate it with a phone number on your account page. It means you can use a different email address or mobile phone number to log in to your Apple ID. See the next sections for more information on the workarounds you can try.
Part 3: What To Do if You Cannot Change Your Apple ID on iPad?
Changing your Apple ID on an iPad is usually easy. However, there can be setbacks during the process. Now, here’s what to do if you find yourself unable to do it and why it might be happening:
Try Again Later
If you encounter errors during the process, give it a little time and try again. Mayne it is because you changed your Apple ID on your iPad to an iCloud email address within 30 days.
Check if Apple ID Is Already in Use
Apple IDs are unique, and you can’t have two identical ones. If you’re trying to change your Apple ID to one that’s already in use, you’ll hit a roadblock. Ensure that the new Apple ID you want isn’t already taken. Remove it from the family member’s account if they are using it.
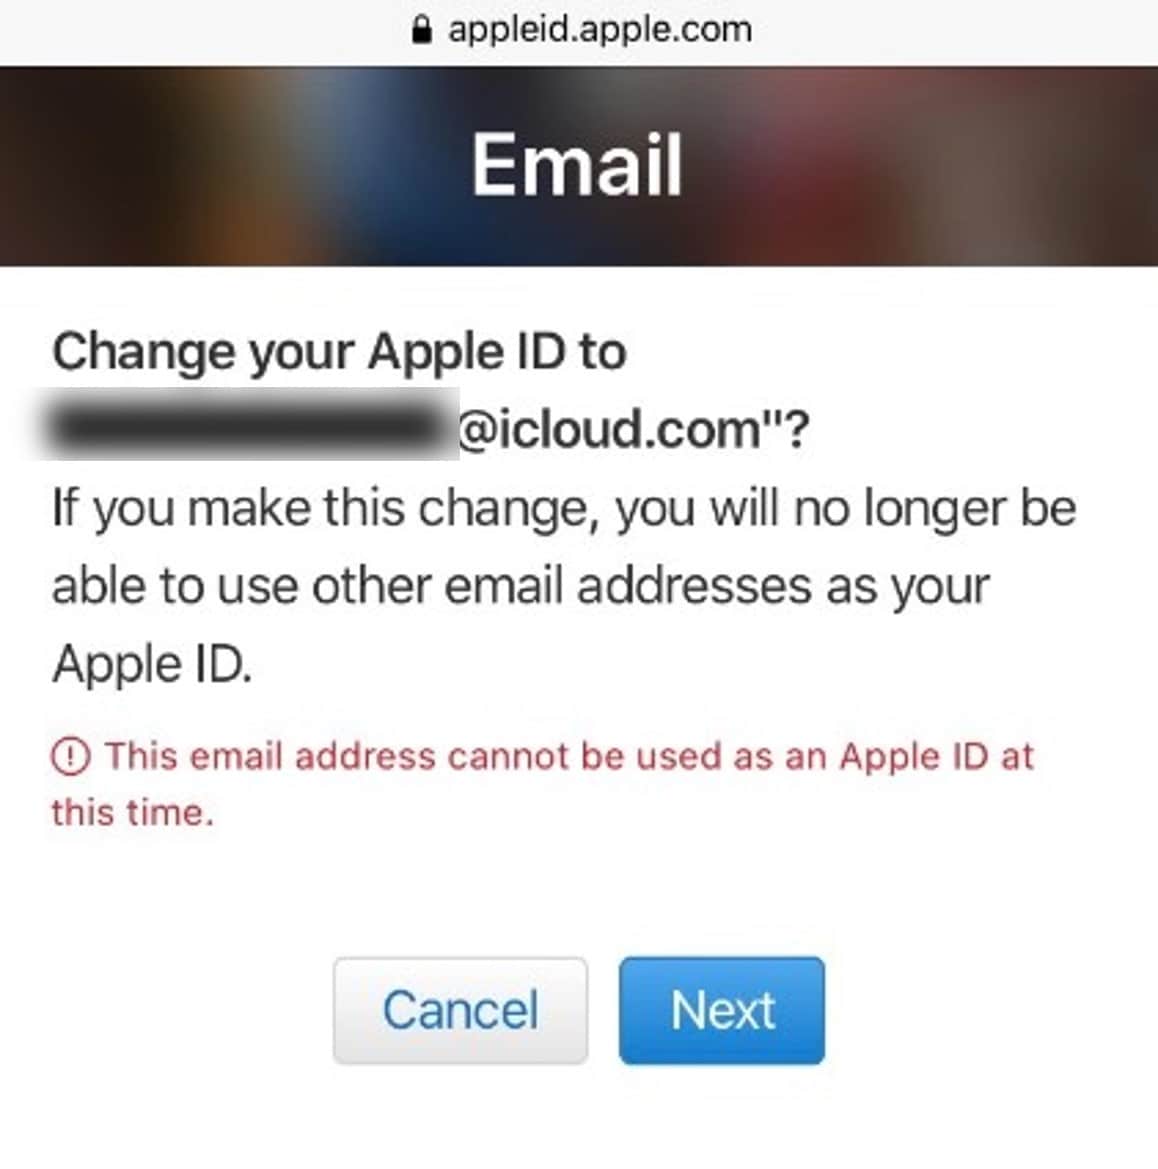
Your Apple ID Is an Email Address
If your current Apple ID is an email address, you won’t be able to change it to a mobile phone number directly. Instead, you can add an email or phone number to your account for contact purposes.
If you’ve addressed these issues and still can’t change your Apple ID, don’t worry. Apple customer support is available to assist you with account-related challenges. Contact them for guidance and solutions tailored to your situation.
However, if you can’t change your Apple ID on your iPad because you forgot or don’t have access to the password, you can use a third-party tool such as Dr.Fone. This tool is easy to use and can help you unlock your iPad and remove the Apple ID in a few clicks.
Part 4: Using Wondershare Dr.Fone
Dr.Fone Screen Unlock (iOS) tool is your go-to solution for unlocking iOS devices without a passcode. The best part? It is easy to use for users of all technical backgrounds. With Dr.Fone, you can unlock iOS screens protected by 4 to 6-digit passcodes, Face ID, Touch ID, and more.
But it doesn’t stop there; Dr.Fone can also help remove the iCloud activation lock, unlock Apple ID without a password, and much more. This powerful tool is a lifesaver for iOS users, supporting the latest iPadOS 17, iOS 17, and iPhone 14.
Step-by-Step Guide to Removing Apple ID on iPad Using Dr.Fone
Dr.Fone can bypass the Find My/Find My iPhone feature to remove your Apple ID from your iPad, iPhone, or iPod Touch. Follow the steps below to learn how to use this feature on your iOS device.
Step 1: Get Wondershare Dr.Fone from their website and install it on your computer.
Step 2: From the app’s Toolbox homepage, click Screen Unlock, and select iOS.
- Step 3: Select Remove AppleID from the available Screen Unlock tools.

- Step 4: Connect your iPad or other iOS device to your computer, then click Unlock Now to continue.

- Step 5: Click Yes to confirm your device has a screen lock. Otherwise, it won’t work.

- Step 6: Enable the Two-Factor Authentication on your iPad so you can unlock your Apple ID. Then, click Yes to proceed.

- Step 7: Follow the on-screen instructions to put your iPad in Recovery Mode.

- Step 8: The next screen will demonstrate the Device Model information. Select an option from the System Version dropdown list and click Start.
- Step 9: The iOS firmware will start downloading, and you can see the progress on the next screen. If you’re experiencing slow download speeds, click Copy to get the link and download it.

- Step 10: Review the Device Model and System Version, then click Unlock Now to proceed.
- Step 11: From the Warning dialogue box, enter the code shown in the text field, then click Unlock.

- Step 12: Wait and refrain from using your device while it’s connected to avoid a bricked device.

- Step 13: Once finished, click Done, then check your iPad. If your Apple ID is not unlocked, you may need to click Try again to restart.

Best Practices To Secure Your iOS Data
Changing your Apple ID on your iPad can be a great way to protect your privacy and security. However, it’s important to take steps to ensure that your iOS data remains safe during the process. Here are some tips to help you do just that:
- Backup Your Files
Before you change your Apple ID on your iPad, create a backup of your data so you don’t lose important files. You can create a backup using iCloud or Dr.Fone.
Dr.Fone also allows you to view the contents of your backup before you restore it, so you can ensure that you’re getting back exactly what you want. This way, you can restore your data to your new Apple ID if needed.
- Password Check
Review your current passwords. Change any weak or compromised ones, including your Apple ID password, and never share it with anyone.
- Avoid Sharing an Apple ID
It’s best practice for each family member to have their own Apple ID. Sharing one can lead to problems with app purchases, data syncing, and privacy.
- Enable Two-Factor Authentication (2FA)
If not already enabled, turn on 2FA for an extra layer of security. It’s simple and highly effective.
Conclusion
Changing your Apple ID on your iPad or other iOS devices is a simple process that can help you protect your privacy and information. With the tips above, you can ensure your iOS data is safe and secure during the switch.
And if you need to remove your Apple ID without a password, Dr.Fone is a good option. Dr.Fone is a powerful iOS toolkit that can help you with various phone solutions. It’s easy to use and can help you solve mobile problems in just a few minutes.
Also read:
- [New] 2024 Approved AgriBuddy Games Celebrating Camaraderie on the Farm
- [New] Streamline Your Life Quick Tips to Beginning on Discord Broadcasts for 2024
- [Updated] Is AV1 The Clear Winner Against VP9, In 2024
- 2024 Approved The Complete Process of Video Recording & Editing on Adobe Connect
- 3 Ways to Unlock Apple iPhone 15 Plus without Passcode or Face ID
- Apple iPhone 13 mini Asking for Passcode after iOS 17/14 Update, What to Do?
- Comment Résoudre Le Problème D'un Fichier Bloquant Sur Votre Système Windows 10: 4 Solutions Efficaces
- Experience Language Learning Like Never Before: Googled Editors' Choice Mondly
- In 2024, How Do You Unlock your Apple iPhone XS Max? Learn All 4 Methods
- In 2024, How To Change Country on App Store for iPhone 11 With 7 Methods
- In 2024, How to Unlock Apple iPhone 12?
- In 2024, How to Unlock iPhone 12 Pro With an Apple Watch & What to Do if It Doesnt Work
- In 2024, Learn How To Lock Stolen Your iPhone 12 Pro Properly
- Ingenious AI Photo Masterclass for 2024
- PassFab Apple iPhone X Backup Unlocker Top 4 Alternatives
- Reimagine Video Narratives with Windows 10'S Story Remix Tool
- The Ultimate Selection of Mac Clipping Tools for 2024
- Title: In 2024, How To Unlock A Found iPhone 15 Plus?
- Author: Sophia
- Created at : 2024-10-10 07:16:11
- Updated at : 2024-10-15 01:22:11
- Link: https://ios-unlock.techidaily.com/in-2024-how-to-unlock-a-found-iphone-15-plus-by-drfone-ios/
- License: This work is licensed under CC BY-NC-SA 4.0.